Saturday, February 28, 2009

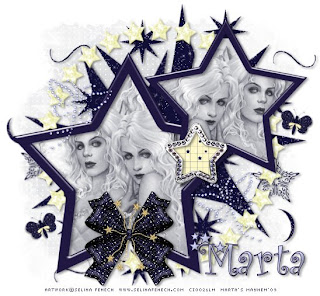
♥ Star Quality ♥


Click the tag to preview at full size. This tutorial was written by Marta on February 28, 2009. Any resemblance to any other tutorial is coincidental. Do not copy and paste this tutorial elsewhere on the net. Absolutely NO Scripting and/or translating of this tutorial.

For this tutorial you will need:

PSP
Tube(s) or Image(s) of choice
Font of choice (I used MC Twinkle Star)
Mask - Becky_Mask022
Xenofex2 - Constellation
ScrapKit *Magic of the Stars* by Tina of Tina's Magical World.
You can purchase it HERE.

I am using the artwork of Selina Fenech, you can find her licensed art at CILM.

Let's get started:

Open a new image 550x550 and background set to white. Copy & paste paper2 as a new layer. Open Becky_Mask022, Layers/New Mask Layer/From Image and find the mask in the drop down list. Delete mask layer, and merge group. Effects/Texture Effects/Weave/Set to Gap Size/2, Width/7, Opacity/3, Weave & Gap Color/#FFFFFF, Fill gaps checked.

Copy & paste doodlestars1 as a new layer. Effects/Xenofex 2/Constellation/Settings/Star Field/Keep original image. Add drop shadow. Duplicate. Image/Mirror/Image/Flip. Copy & paste circle_starframe3 as a new layer.

Copy & paste stars_doubleframe1 as a new layer and resize as needed. Copy & paste paper5 as a new layer. Copy & paste your tubes or images as new layers, and place in both starframes. Using you Magic Wand, click inside both frames, Selection/Modify/Expand by 5/Selections/Invert and hit Delete on your paper and tube layers. Copy & paste starbow4 as a new layer and place at the center bottom of the largest starframe. Add drop shadow to the frames, tubes/images, and bow.

Add any additional ribbons, flowers, butterflies, or elements of your choice.

Crop or resize to your liking. Add your text, copyright info, and watermark, and save as a jpg, png, or gif file.

That's it.. all done!
Tuesday, February 24, 2009

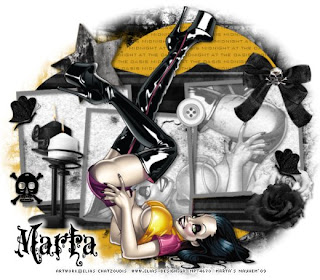
♥ Midnight At The Oasis ♥


Click the tag to preview at full size. This tutorial was written by Marta on February 24, 2009. Any resemblance to any other tutorial is coincidental. Do not copy and paste this tutorial elsewhere on the net. Absolutely NO Scripting and/or translating of this tutorial.

For this tutorial you will need:

PSP
Tube of choice
Font of choice (I used VTKS Dear Love)
Teresa's TagTemplate7 - You can download HERE
Mask - WSL_Mask291 - You can download from Chelle's blog HERE
ScrapKit *Madame Midnight* by Brandi of Grunge & Glitter Scraps.
You can purchase it HERE.

I am using the artwork of Elias Chatzoudis, you can find his licensed art at MPT.

Let's get started:

Open Teresa's TagTemplate7, Image/Resize/by 75%/All layers checked. Shift + D to duplicate and close out the original. Delete the watermark layer. Click on the circle layer, Selections/Float/Defloat/Modify/Smooth by 10. Open new raster layer, and floodfill with a color of your choice, I used #DBA521. Copy & paste paper 15 as a new layer, and move above the journalblock layer. Click on the journalblock, Selections/Float/Defloat/Modify/Smooth by 10. Select the paper15 layer, and hit Delete. X out all layers except for the three mat layers. Merge. Selections/Float/Defloat/Modify/Smooth to 10. Keep selected. Copy & paste paper11 as a new layer. Copy & paste your tube as a new layer. Image/Resize/by 130%. Move to desired position, and hit Delete on the paper11 and tube layers. Add drop shadow to your circle, journalblock, mat, frames, and tube layers. I didn't use the template flowers or change the color of the frames, but if you do, just follow the steps above. X-out the white background and merge visible.

Copy & paste paper1 as a new layer. Open WSL_Mask291, Layers/New Mask Layer/From Image and find the mask in the drop down list. Delete mask layer, and merge group. Move to the right side of your image and move under the framed layer. Open new raster layer, and floodfill with color of your choice, I used #DBA521. Open WSL_Mask291, Layers/New Mask Layer/From Image and find the mask in the drop down list. Delete mask layer, and merge group. Move to the left side of your image.

Add any additional candles, bows, ribbons, buttons, flowers, butterflies, or elements of your choice.

Crop or resize to your liking. Add your text, copyright info, and watermark, and save as a jpg, png, or gif file.

That's it.. all done!
Sunday, February 22, 2009

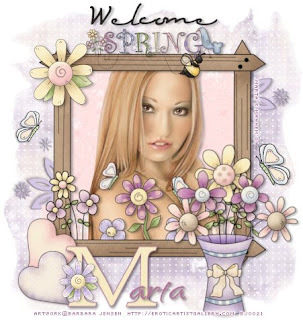
♥ Springtime ♥


Click the tag to preview at full size. This tutorial was written by Marta on February 22, 2009. Any resemblance to any other tutorial is coincidental. Do not copy and paste this tutorial elsewhere on the net. Absolutely NO Scripting and/or translating of this tutorial.

For this tutorial you will need:

PSP
Tube of choice
Font of choice (I used QwitcherBychen)
Mask - WSL_Mask287 - You can download from Chelle's blog HERE
ScrapKit *Welcome Spring* by Missy of Scraps With Attitude.
You can purchase it HERE.

I am using the artwork of Barbara Jensen, you can find her licensed art HERE.

Let's get started:

Open a new image 500x500 and background set to white. Copy & paste paper3 as a new layer. Open WSL_Mask287, Layers/New Mask Layer/From Image and find the mask in the drop down list. Delete mask layer, and merge group. Effects/Texture Effects/Weave/Set to Gap Size/2, Width/7, Opacity/3, Weave & Gap Color/#FFFFFF, Fill gaps checked.

Copy & paste the CuteFrame as a new layer. Copy & paste paper14 as a new layer, and move under the frame layer. Copy & paste your tube as a new layer, and move under the frame layer. Copy & paste flowers1 as a new layer. Resize as needed. Using your Magic Wand, click inside the frame, Selections/Modify/Expand by 5/Selections/Invert and hit Delete on the flowers, tube and paper layers. Add drop shadow to the frame, flowers, and tube layers and merge.

Copy & paste doodle 1 as a new layer. Resize. Add drop shadow. Duplicate. Image/Mirror/Image/Flip and move under the frame layers. Copy & paste the flowerpot as a new layer, add drop shadow, and move to the right side of the frame. Copy & paste wordart1 as a new layer, resize, add drop shadow, and move to the top of the frame. Copy & paste the heart and heart1 as new layers, resize, add drop shadow, and move to the left bottom of the frame.

Add any additional ribbons, buttons, flowers, butterflies, or elements of your choice.

Crop or resize to your liking. Add your text, copyright info, and watermark, and save as a jpg, png, or gif file.

That's it.. all done!
♥ Triple Award ♥


Rules for this award:

1: Must pass it on to up to 10 other bloggers.
2: Link back to the blogger who gave you the award.
3: Link to the bloggers you award it to.

♥ Friendship Award ♥


This was given to me by Lori of Crazy Lady Scraps. Thank you so much hun.

Now I get to pick 5 friends to give this award to, I'm terrible at choosing only 5 lol...

1. Dark Yarrow - Fall3n Angel Scrapz
2. Chantal - ChaDesignz
3. Jill - Created by Jill
4. Kelly - Angel's Designz
5. Deep - Deep's DesignZ

Tuesday, February 17, 2009

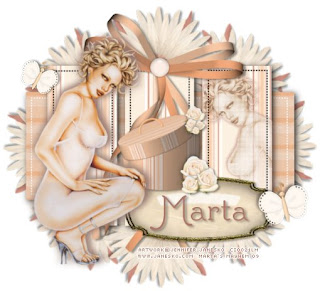
♥ Just Peachy ♥


Click the tag to preview at full size. This tutorial was written by Marta on February 17, 2009. Any resemblance to any other tutorial is coincidental. Do not copy and paste this tutorial elsewhere on the net. Absolutely NO Scripting and/or translating of this tutorial.

For this tutorial you will need:

PSP
Tubes of choice
Font of choice (I used Plus de Vagues NF)
EC5 Impact - Perspective Shadow
Mura's Meister - Copies
mysticincdesigntemplate2 by Debbie of Mystic Inc Design, download HERE
ScrapKit *Peach n'Cream* by Tina of Saphira's World.
You can purchase it HERE.

I am using the artwork of Jennifer Janesko, you can find her licensed art at CILM.

Let's get started:

Open up the template, Shift + D to duplicate. Close the original. Image/Canvas Size/Change size to 550x550, placement Center. New raster layer and fill with #FFFFFF, move this layer to the bottom, and delete the copyright layer.

Copy & paste flower5 as a new layer. Add drop shadow. Effects/Mura's Meister/Copies/Set to Encircle/Set Number to 8, ShiftX to 60, and ShiftY to 50. Leave all other settings.

Copy & paste paper1 as a new layer. Image/Rotate/Left 90 degrees. Click on the large rectangle, Selections/Float/De Float/Modify/Smooth/Set both to 10/Invert and hit Delete on the paper1 layer. Delete the original large rectangle. Copy & paste paper7 as a new layer. Copy & paste your tube as a new layer, Image/Mirror and position on the last rectangle. Click on the triple rectangles, Selections/Float/De Float/Modify/Smooth/Set both to 10/Invert and hit Delete on your paper and tube layers. Delete the original triple rectangles. Effects/EC5-Impact/Perspective Shadow/Settings/Drop Shadow Lowest on both layers. Working on your tube layer, Adjust/Hue and Saturation/Colorize/Set to H/18, S/98 and lower the opacity to 69%.

Copy & paste bow1 as a new layer and move to the center of the triple rectangles. Copy & paste label2 as a new layer and move to the bottom of the triple rectangles. Copy & paste the hatbox as a new layer and move to the bottom middle of the triple rectanges. Copy & paste your tube as a new layer and move to the left side of the triple rectangles. Add drop shadow to all layers.

Add any additional ribbons, buttons, flowers, butterflies, stars, staples, or elements of your choice.

Crop or resize to your liking. Add your text, copyright info, and watermark, and save as a jpg, png, or gif file.

That's it.. all done!

♥ On Film ♥


Click the tag to preview at full size. This tutorial was written by Marta on February 16, 2009. Any resemblance to any other tutorial is coincidental. Do not copy and paste this tutorial elsewhere on the net. Absolutely NO Scripting and/or translating of this tutorial.

For this tutorial you will need:

PSP
Tubes of choice
Font of choice (I used 101! Star Lit Nght)
Film Strips - I have no idea where I got these, so unfortunately I can't supply.
ScrapKit *My Way* by Vassia of Vassia's Designs.
You can purchase it HERE.

I am using the artwork of PinUpToons, you can find his licensed art at CILM.

Let's get started:

Open a new image 550x400 and background set to white. Copy & paste stampframe3 as a new layer. Copy & paste paper19 as a new layer and move behind the frame layer. Copy & paste your tubes as new layers. On the tubes that are on frame 1 and 3, Adjust/Hue and Saturation/Colorize/Set to H/136, S/85. Change the blend mode to Screen and lower opacity to where you like. Add drop shadow to frame and all tube layers. Using your Magic Wand, click inside each frame, Selections/Modify/Expand by 4/Selections/Invert and hit Delete on the paper and tube layers. Merge.

Copy & paste doodle2 and doodle3 as a new layer. Position to each side of the frame. Merge these 2 layers. Add drop shadow. Duplicate. Image/Mirror/Image/Flip. Merge the doodle layers.

Copy & paste staplenote1 as a new layer. Add drop shadow. Duplicate. Working on the original layer, Image/Rotate/Right 13 degrees. Move these layers under the frame layer and position to your liking.

Copy & paste laceribbon1 as a new layer. Resize as needed and place at the bottom of the frame. Copy & paste bow1 as a new layer and place at the middle of the laceribbon. Add drop shadow to both layers.

Add any additional ribbons, buttons, flowers, butterflies, stars, staples, or elements of your choice.

Crop or resize to your liking. Add your text, copyright info, and watermark, and save as a jpg, png, or gif file.

That's it.. all done!

Monday, February 16, 2009

♥ You'll Never Walk Alone ♥


Click the tag to preview at full size. This tutorial was written by Marta on February 16, 2009. Any resemblance to any other tutorial is coincidental. Do not copy and paste this tutorial elsewhere on the net. Absolutely NO Scripting and/or translating of this tutorial.

♥♥♥ Just a note about how this tag was inspired. I was listening to the song You'll Never Walk Alone by Elvis, and it brought back the memory of how Larry, my late husband, used to sing this to me all the time. It was one of his all time favorites. Sorry, don't mean to get mushy, but I had a strong feeling for him today, so I would like to dedicate this tag to him. ♥♥♥

For this tutorial you will need:

PSP
Tube or Image of choice
Font of choice (I used DianaCTT and Impact)
EC4 - Gradient Glow
Xenofex2 - Constellation
ScrapKit *Adore Me* by Crystal of Crystal's Designs.
You can purchase it HERE.

I am using the artwork of Anthony Guerra, you can find his licensed art at CILM.

Let's get started:

Open a new image 600x500 and background set to white. Copy & paste doodle1 as a new layer. Duplicate. Image/Mirror/Image/Flip. Merge these 2 layers. Adjust/Add Noise/Set to 59. Copy & paste the beaded-heart as a new layer, and place above the doodles. Add drop shadow to the doodle and heart layers.

Copy & paste the triple-frame as a new layer. Copy & paste paper3 as a new layer. Resize 50%, and move under the frame and place in the center frame. Copy & paste your tube or image of choice, Duplicate, and place in the 1st and 3rd frames. When happy with placement, using your Magic Wand, click inside each frame, make sure you select all areas. Selections/Modify/Expand by 4/Selections/Invert and hit Delete on the tube/image layers and the paper layer. On the paper layer only, Effects/Xenofex2/Constellation/Star Field and keep original image marked. Copy & paste the heart-love as a new layer and place to the upper left of the frame. Copy & paste the lace-up as a new layer, resize as needed. Duplicate. Image/Mirror and place to each side of the middle frame. Add drop shadow to the frame, tube, heart-love and lace-up layers. Merge all these layers.

Add your text and any wordart you would like to add.. Effects/EC4/Gradient Glow/Change color to #FFFFFF and Glow Width to 14. On your text layer, Image/Rotate/Left 5%. I placed the wordart in the middle at the bottom of the tag.

Add any additional butterflies, bows, hearts, or elements of your choice.

Crop or resize to your liking. Add your copyright info, and watermark, and save as a jpg, png, or gif file.

That's it.. all done!

Saturday, February 14, 2009

♥ For Sale: Potions & Powders ♥


Click the tag to preview at full size. This tutorial was written by Marta on February 14, 2009. Any resemblance to any other tutorial is coincidental. Do not copy and paste this tutorial elsewhere on the net. Absolutely NO Scripting and/or translating of this tutorial.

For this tutorial you will need:

PSP
Tube of choice
Font of choice (I used Luna Bar)
Mura's Meister - Copies
ScrapKit *Bourbon Street* by Jill of Created by Jill.
You can purchase it HERE.

I am using the artwork of Elias Chatzoudis, you can find his licensed art at MPT.

Let's get started:

Open a new image 550x550 and background set to white. Copy & paste flower3 as a new layer. Add drop shadow. Effects/Mura's Meister/Copies/Set to Encirle/Default.

Copy & paste the glitterdrops as a new layer and place at the top of the shelves. Copy & paste the raffiawrap1 as a new layer and place to your liking. Copy & paste the streetlamp as a new layer and place to the left of the shelves. Copy & paste sign2 as a new layer. Copy & paste sign3 as a new layer. Add drop shadow to all layers.

Working on the sign3 layer, using your Deform Tool, hold down the control key on your keyboard, move the left sides smaller. Play with this until you get the sign to look like it's at an angle. Adjust/Sharpness/Sharpen.

Copy & paste tag2 as a new layer and move it to desired position. Copy & paste your tube as a new layer and place it to the right of the shelves. I couldn't use the wordart because I wanted the saying to run horizontal across the bottom, using a scripty font, type out "I'll show'em if you throw'em". Copy & paste the beads as new layers. I added 4 different colors, and place at the bottom of your tag. Add drop shadow to all layers.

Add any additional ribbons, flowers, butterflies, or elements of your choice.

Crop or resize to your liking. Add your text, copyright info, and watermark, and save as a jpg, png, or gif file.

That's it.. all done!
Friday, February 13, 2009

♥ Your Gothic Love ♥


Click the tag to preview at full size. This tutorial was written by Marta on February 13, 2009. Any resemblance to any other tutorial is coincidental. Do not copy and paste this tutorial elsewhere on the net. Absolutely NO Scripting and/or translating of this tutorial.

For this tutorial you will need:

PSP
Tube or Image of choice
Font of choice (I used Gothic_Love_Letters)
Mask - WSL_Mask59 - You can download from Chelle's blog HERE
Xenofex2 - Constellation
ScrapKit *Gothic Lover* by Chantal of ChaDesignz.
You can purchase it HERE.

I am using the artwork of Zindy S. D. Nielsen, you can find her licensed art HERE.

Let's get started:

Open a new image 500x500 and background set to white. Copy & paste paper10 as a new layer. Open WSL_Mask59, Layers/New Mask Layer/From Image and find the mask in the drop down list. Delete mask layer, and merge group. Effects/Xenofex2/Constellation/Settings/Star Field/Keep original image. Change Twinkle Amount to 92, leave other settings.

Copy & paste the doodle as a new layer. Add drop shadow. Duplicate. Image/Mirror/Image/Flip and place to your liking.

Copy & paste frame1 as a new layer. Copy & paste your image or tube of choice as a new layer and move under the frame layer. Using your Magic Wand, click inside the frame, Selections/Modify/Expand by 5/Selections/Invert and hit Delete on your image layer. Add drop shadow to your frame. If you're using a tube, you will need to add a paper behind the tube, and add a dtop shadow to the tube. Merge these layers.

Copy & paste the NamePlate as a new layer, and move to the center bottom of the frame. Copy & paste button as a new layer. Duplicate. Position both buttons to the sides of the NamePlate. Copy & paste flower3 as a new layer and place at the bottom left of the frame. Copy & paste Deco1 as a new layer and place at the bottom right of the frame. Copy & paste the doubleheart as a new layer. Image/Mirror and place at the right side of the frame. Add drop shadow to all of these layers.

Add any additional ribbons, flowers, butterflies, or elements of your choice.

Crop or resize to your liking. Add your text, copyright info, and watermark, and save as a jpg, png, or gif file.

That's it.. all done!
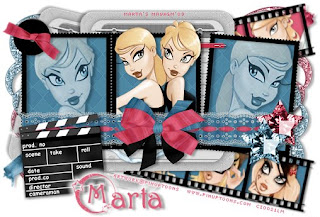
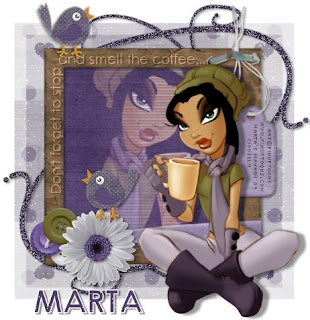
♥ Coffee Break ♥


Click the tag to preview at full size. This tutorial was written by Marta on February 13, 2009. Any resemblance to any other tutorial is coincidental. Do not copy and paste this tutorial elsewhere on the net. Absolutely NO Scripting and/or translating of this tutorial.

For this tutorial you will need:

PSP
Tube of choice
Font of choice (I used Century Gothic)
Mask - Vix_Valentine_Mask16 - You can download HERE
Xenofex2 - Constellation
ScrapKit *Spring Breeze* by Shannon of Shanmomto4 Designs.
You can purchase it HERE.

I am using the artwork of PinUpToons, you can find his licensed art at CILM.

Let's get started:

Open a new image 500x500 and background set to white. Copy & paste paper12 as a new layer. Open Vix_Valentine_Mask16, Layers/New Mask Layer/From Image and find the mask in the drop down list. Delete mask layer, and merge group. Effects/Xenofex2/Constellation/Settings/Star Field/Keep original image.

Copy & paste doodle4 as a new layer. Adjust/Add Noise/Set to 59. Add drop shadow. Duplicate. Image/Mirror/Image Flip, and place to your liking.

Copy & paste frame2 as a new layer. Copy & paste paper1 as a new layer, and move under the frame layer. Copy & paste your tube as a new layer, and move under the frame layer. Using your Magic Wand, click inside the frame. Selections/Modify/Expand by 5/Selections/Invert and hit Delete on the paper and tube layers. Add drop shadow to the frame and tube layers. Merge these layers.

Copy & paste button1, button2, and button3 as new layers. Resize 40%. Working on the button2 layer, Adjust/Hue and Saturation/Colorize/Set to H/38, S/102. Adjust/Brightness and Contrast/Brightness/Contrast/Set to H/-78, S/-29. Place to your liking and add drop shadows to all. Merge these layers.

Copy & paste tag1 as a new layer. Image/Mirror and move to the right side of the frame. Copy & paste the staple as a new layer and place on the string of the tag. Add drop shadow to both layers.

Add any additional wordart, ribbons, flowers, or elements of your choice.

Crop or resize to your liking. Add your text (Effects/Xenofex2/Constellation/Set to Star Field/Keep original image), copyright info, and watermark, and save as a jpg, png, or gif file.

That's it.. all done!

Thursday, February 12, 2009

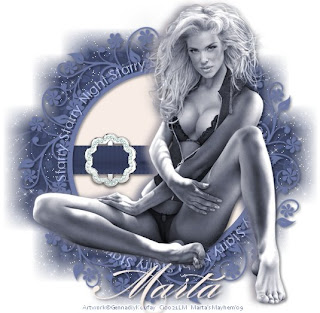
♥ Starry Starry Night ♥


Click the tag to preview at full size. This tutorial was written by Marta on February 12, 2009. Any resemblance to any other tutorial is coincidental. Do not copy and paste this tutorial elsewhere on the net. Absolutely NO Scripting and/or translating of this tutorial.

For this tutorial you will need:

PSP
Tube of choice
Font of choice (I used Burgues Script and Century Gothic)
Mask - Vix_Mask10 - You can download HERE
Xenofex2 - Constellation
ScrapKit *Moment In Time* by Annie of Annie's Design.
You can purchase it HERE.

I am using the artwork of Gennadiy Koufay, you can find his licensed art at CILM.

Let's get started:

Open a new image 550x550 and background set to white. Copy & paste paper7 as a new layer. Open Vix_Mask10, Layers/New Mask Layer/From Image and find the mask in the drop down list. Delete mask layer, and merge group. Effects/Xenofex2/Constellation/Settings/Star Field/Keep original image.

Copy & paste frame1 as a new layer. Copy & paste bow14 as a new layer and move under the frame layer, you may have to mirror depending on the tube you use. Using your Magic Wand, click inside the frame. Selections/Modify/Expand by 3. Open a new raster layer and floodfill with #F8EDE6, keep selected. Selections/Invert and hit Delete on your bow layer. Selections/Select none. Add drop shadow to your frame and bow.

Copy & paste your tube, position to desired position. If you're using a black & white tube, Adjust/Hue and Saturation/Colorize/Set to H/161/S/40. Duplicate. Working on your original tube layer. Change your foreground to #F8EDE6 and your background to #6C78A4. Effects/Filters Unlimited2/Render/Cloud(fore-/background color)/Change Gamma to 161. Adjust/Blue/Gaussian Blur/Set to 5. Add drop shadow to the copied tube layer.

Add any additional bows, wordart, ribbons, flowers, candles, or elements of your choice.

Crop or resize to your liking. Add your text (Effects/Xenofex2/Constellation/Set to Star Field/Keep original image), copyright info, and watermark, and save as a jpg, png, or gif file.

That's it.. all done!

Wednesday, February 11, 2009

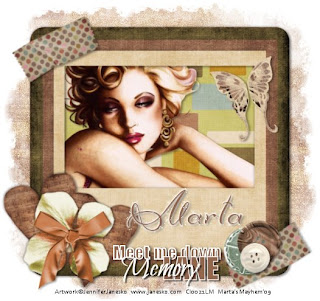
♥ Meet Me Down Memory Lane ♥


Click the tag to preview at full size. This tutorial was written by Marta on February 11, 2009. Any resemblance to any other tutorial is coincidental. Do not copy and paste this tutorial elsewhere on the net. Absolutely NO Scripting and/or translating of this tutorial.

For this tutorial you will need:

PSP
Tube of choice
Font of choice (I used DianaCTT)
Mask - Becky_Mask022
Xenofex2 - Constellation
ScrapKit *Memory Lane* by Kaylek of Kaylek's Designs.
You can purchase it HERE.

I am using the artwork of Jennifer Janesko, you can find her licensed art at CILM.

Let's get started:

Open a new image 550x550 and background set to white. Copy & paste paper12 as a new layer. Open Becky_Mask022, Layers/New Mask Layer/From Image and find the mask in the drop down list. Delete mask layer, and merge group. Effects/Xenofex2/Constellation/Set to Star Field/Keep original image. Change opacity to 81%.

Copy & paste the frame as a new layer. Copy & paste your tube as a new layer, and move under the frame layer. Copy & paste paper5 as a new layer, and move under the tube layer. Using your Magic Wand, click inside the frame, Selections/Modify/Expand by 5/Selections/Invert and hit Delete on the tube and paper layers. Add drop shadow to frame and tube layers.

Copy & paste tape2 as a new layer. Place at top left of the frame. Duplicate. Image/Mirror/Image/Flip and place at bottom right of the frame. Add drop shadow.

Copy & paste the heart as a new layer. Duplicate. Image/Mirror. Copy & paste flower6 as a new layer and place on top of the hearts. Copy & paste bow1 as a new layer, and place in the center of the flower. Add drop shadow to all layers.

Add any additional bows, buttons, ribbons, flowers, butterflies, or elements of your choice.

Crop or resize to your liking. Add your text (Effects/Xenofex2/Constellation/Set to Star Field/Keep original image), copyright info, and watermark, and save as a jpg, png, or gif file.

That's it.. all done!

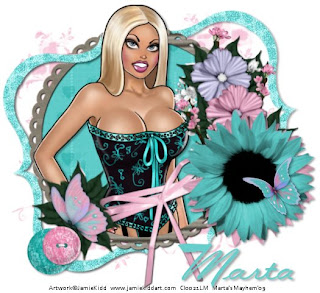
♥ Cute As A Button ♥


Click the tag to preview at full size. This tutorial was written by Marta on February 11, 2009. Any resemblance to any other tutorial is coincidental. Do not copy and paste this tutorial elsewhere on the net. Absolutely NO Scripting and/or translating of this tutorial.

For this tutorial you will need:

PSP
Tube of choice
Font of choice (I used FleurFordSH)
Mask - gabeemask50 - You can download HERE.
DSB Flux - Bright Noise
ScrapKit *Cute As A Button* by Tammy of Scraps With Attitude.
You can purchase it HERE.

I am using the artwork of Jamie Kidd, you can find his licensed art at CILM.

Let's get started:

Open a new image 550x550 and background set to white. Copy & paste paper6 as a new layer. Open gabeemask50, Layers/New Mask Layer/From Image and find the mask in the drop down list. Delete mask layer, and merge group.

Copy & paste paper7 as a new layer. Copy & paste your tube as a new layer. Copy & paste frame3 as a new layer. Using your Magic Wand, click inside the frame, Selections/Modify/Expand by 5/Selections/Invert, and hit Delete on your tube and paper layers. Add drop shadow to the frame and tube layers.

Open bracket3 and using your Selection Tool, set on rectangle, draw a rectangle to include 1/2 of the bracket, and hit Delete on your keyboard. Now you should have 1/2 of the bracket only. Copy & paste the bracket as a new layer. Resize as needed. Image/Rotate/Left 13 degrees. Duplicate. Image/Mirror/Image/Flip. Add drop shadow to both brackets. Effects/DSB Flux/Bright Noise/Set Intensity to 42 & Direction/Mix.

Add any additional bows, buttons, ribbons, flowers, butterflies, or elements of your choice.

Crop or resize to your liking. Add your text, copyright info, and watermark, and save as a jpg, png, or gif file.

That's it.. all done!
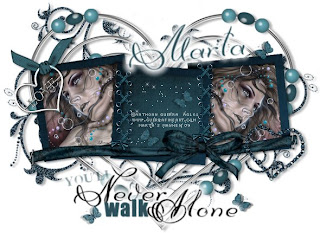
♥ Spring Is In The Air ♥


Click the tag to preview at full size. This tutorial was written by Marta on February 11, 2009. Any resemblance to any other tutorial is coincidental. Do not copy and paste this tutorial elsewhere on the net. Absolutely NO Scripting and/or translating of this tutorial.

For this tutorial you will need:

PSP
Tube of choice
Font of choice (I used Burgues Script)
Mask - Vix_Mask176 - You can download HERE
Penta - Color Dot
ScrapKit *A Touch of Spring* by Tina of Saphira's World.
You can purchase it HERE.

I am using the artwork of Elias Chatzoudis, you can find his licensed art at MPT.

Let's get started:

Open a new image 550x550 and background set to white. Open a new raster layer, foreground set to #B7DF6E, background null, using your Flood Fill Tool, fill this layer. Effects/Texture Effects/Weave/Set to Gap Size/2, Width/30, Opacity/100, Weave & Gap Color/#FFFFFF, Fill Gaps checked.

Copy & paste paper6 as a new layer. Open Vix_Mask176, Layers/New Mask Layer/From Image and find the mask in the drop down list. Delete mask layer, and merge group. Effects/Penta/Color Dot/Set to default settings.

Copy & paste paper2 as a new layer. Copy & paste your tube as a new layer. Image/Resize/120%. Effects/Penta/Color Dot/Set to default settings. Copy & paste frame2 as a new layer. Using your Magic Wand, click inside the frame, Selections/Modify/Expand by 4/Selections/Invert and hit Delete on your tube and paper layers. Add drop shadow to your frame and tube layers and merge.

Copy & paste flowerstring1 as a new layer and place it across the frame. Copy & paste bow1 as a new layer and place at the center bottom of the frame. Copy & paste flower3 as a new layer and place above the bow. Copy & paste your tube and place to desired position. Add drop shadow to these layers.

Add any additional bows, buttons, ribbons, flowers, butterflies, or elements of your choice.

Crop or resize to your liking. Add your text, copyright info, and watermark, and save as a jpg, png, or gif file.

That's it.. all done!
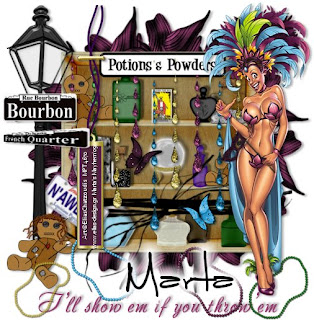
Tuesday, February 10, 2009

♥ Untainted Love ♥


Click the tag to preview at full size. This tutorial was written by Marta on February 10, 2009. Any resemblance to any other tutorial is coincidental. Do not copy and paste this tutorial elsewhere on the net. Absolutely NO Scripting and/or translating of this tutorial.

For this tutorial you will need:

PSP
Tube or Image of choice
Font of choice (I used Carmilla/Be Safe)
Mask - cbj_mask12 or mask of choice
ScrapKit *Cherry Chocolate* by Gina of KiKeKa Kits
You can purchase it HERE.

I am using the artwork of Jasmine Beckett-Griffith, you can find her licensed art at CILM.

A special thank you to Katrina who came up with the name for this tut!!

Let's get started:

Open a new image 500x500 and background set to white. Copy & paste ss_paradiseexclisivepaper8_09 as a new layer. Open cbj_mask12 or a mask of your choice, Layers/New Mask Layer/From Image and find the mask in the drop down list. Delete mask layer, and merge group. Adjust/Add Noise/Set to 30.

Copy & paste frame3 as a new layer. Copy & paste your image as a new layer and move it under the frame layer. Using your Magic Wand, click inside the frame, Selections/Modify/Expand by 5/Selections/Invert, and hit Delete on your image layer. Add drop shadow to frame, and merge these layers. Duplicate. Image/Rotate/Left 13 degrees.

Copy & paste flower2 as a new layer. Copy & paste brooch1 as a new layer and position it in the middle of the flower layer. Add drop shadow to both and merge.

Add any additional bows, doodles, ribbons, flowers, butterflies, or elements of your choice.

Crop or resize to your liking. Add your text, copyright info, and watermark, and save as a jpg, png, or gif file.

That's it.. all done!
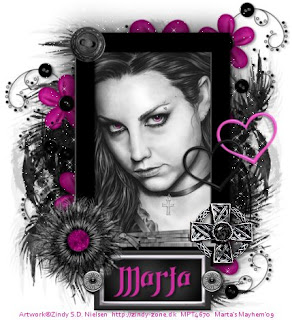
♥ I GOT A NEW BLINKIE ♥


This was made by Kelly of Angel's Designz, she did an awesome job. She used the kit "Silly Flowers" by Chantal of ChaDesignz.

Be sure to check out these blogs, you will not be disappointed.

Monday, February 9, 2009

♥ Paradise ♥


Click the tag to preview at full size. This tutorial was written by Marta on February 9, 2009. Any resemblance to any other tutorial is coincidental. Do not copy and paste this tutorial elsewhere on the net. Absolutely NO Scripting and/or translating of this tutorial.

For this tutorial you will need:

PSP
Tube of choice
Font of choice (I used Whisper)
Mask - AF019 or mask of choice
Mura's Meister - Copies
Xenofex2 - Crumple
ScrapKit *Paradise Love* by Cindy of Southern Scraps
You can purchase it HERE.

I am using the artwork of Keith Garvey you can find his licensed art at MPT.

Let's get started:

Open a new image 500x500 and background set to white. Copy & paste ss_paradiseexclisivepaper8_09 as a new layer. Open AF019, Layers/New Mask Layer/From Image and find the mask in the drop down list. Delete mask layer, and merge group.

Copy & paste ss_paradiseexclisivee31_09 as a new layer. Resize by 50%. Add drop shadow. Effects/Mura's Meister/Copies/Set to Number/9, Shift X & Y/60, leave all other settings.

Copy & paste ss_paradiseexclisivee2_09 as a new layer and add drop shadow. Using your Rectangle Tool, set your background to #F2899F and foreground to null. Draw out a little rectangle to use as labels on the side of the journal. Effects/Xenofex2/Crumple/use default settings. Duplicate 2 times. Add any text you want. Add drop shadow to text and labels.

Copy & paste ss_paradiseexclisivee3_09 as a new layer and move to the bottom right of the journal, add drop shadow.

Copy & paste your tube of choice and add drop shadow. You can go crazy here with all the fun elements, so many to choose from, and all are awesome. I used the butterfly, bird, caterpiller, fly, and the cute pink sun.

Add any additional bows, flowers, butterflies, or elements of your choice.

Crop or resize to your liking. Add your text, copyright info, and watermark, and save as a jpg, png, or gif file.

That's it.. all done!
Sunday, February 8, 2009

♥ Pretty Woman ♥


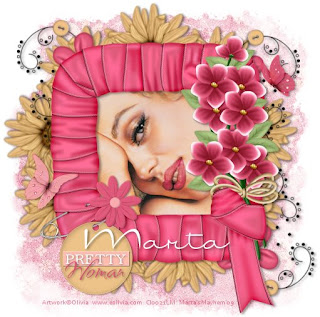
Click the tag to preview at full size. This tutorial was written by Marta on February 8, 2009. Any resemblance to any other tutorial is coincidental. Do not copy and paste this tutorial elsewhere on the net. Absolutely NO Scripting and/or translating of this tutorial.

For this tutorial you will need:

PSP
Tube or Image of choice
Font of choice (I used International Palms)
Mask - Becky_Mask022 or mask of choice
Mura's Meister - Copies
ScrapKit *Silly Flowers* by Chantal of ChaDesignz.
You can purchase it HERE.

I am using the artwork of Olivia, you can find her licensed art at CILM.

Let's get started:

Open a new image 550x550 and background set to white. Copy & paste paper11 as a new layer. Open Becky_Mask022, Layers/New Mask Layer/From Image and find the mask in the drop down list. Delete mask layer, and merge group. Adjust/Add Noise/Set to 30.

Copy & paste flower22 as a new layer. Add drop shadow. Effects/Mura's Meister/Select Encircle/Set to Number/9, Shift X & Y/60, leave the rest of the settings the same.

Copy & paste flowerdoodle as a new layer. Add drop shadow. Image/Mirror/Image/Flip and move both doodles to desired position.

Copy & paste frame4 as a new layer. Copy & paste your image or tube of choice as a new layer and move under the frame layer. Using your Magic Wand, click inside the frame, Selections/Modify/Expand by 5/Selections/Invert and hit Delete on your image layer. Add drop shadow to your frame. If you're using a tube, you will need to add a paper behind the tube, and add a drop shadow to the tube. Merge these layers.

Copy & paste tag1 as a new layer, move to the bottom left of the frame. Using your Selection Tool remove a section of the safety pin. Add new raster layer. Using your AirBrush Tool, change size to 6 and opacity to 50, and put a little dot at the parts where you took the section out, to make it look like it has a hole where the pin goes in and comes out of the frame. When happy with placement, merge these layers and add drop shadow.

Add any additional bows, flowers, butterflies, or elements of your choice.

Crop or resize to your liking. Add your text, copyright info, and watermark, and save as a jpg, png, or gif file.

That's it.. all done!
Saturday, February 7, 2009

♥ With or Without You ♥


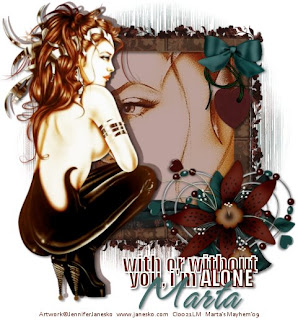
Click the tag to preview at full size. This tutorial was written by Marta on February 7, 2009. Any resemblance to any other tutorial is coincidental. Do not copy and paste this tutorial elsewhere on the net. Absolutely NO Scripting and/or translating of this tutorial.

For this tutorial you will need:

PSP
Tube and Image of choice
Font of choice (I used Hurricane and Impact)
Mask - WSL_Mask16 & WSL_Mask169 - You can download from Chelle's blog HERE
ScrapKit *Vintage Love* by Chantal of ChaDesignz.
You can purchase it HERE.

I am using the artwork of Jennifer Janesko, you can find her licensed art at CILM.

Let's get started:

Open a new image 550x550 and background set to white. Copy & paste paper3 as a new layer. Open WSL_Mask16, Layers/New Mask Layer/From Image and find the mask in the drop down list. Delete mask layer, and merge group. Adjust/Add Noise/Set to 30.

Copy & paste paper4 as a new layer. Open WSL_Mask16, Layers/New Mask Layer/From Image and find the mask in the drop down list. Delete mask layer, and merge group.

Copy & paste frame3 as a new layer. Copy & paste your image of choice as a new layer and move under the frame layer. Using your Magic Wand, click inside the frame, Selections/Modify/Expand by 5/Selections/Invert and hit Delete on your image layer. Add drop shadow to your frame.

Copy & paste paper1 as a new layer. Open WSL_Mask169, Layers/New Mask Layer/From Image and find the mask in the drop down list. Delete mask layer, and merge group. Using your Deform Tool move the sides and top and bottom in so it is just outside the frame layer. Using your Selection Tool, set to rectangle, draw a rectangle on the inside of the frame, and hit Delete on the mask layer.

Copy & paste heart6 as a new layer. Copy & paste bow2 as a new layer and place at the upper right of the frame and on top of heart6. Copy & paste the beadedheart as a new layer and place at the lower right of the frame. Copy & paste the decoration_flower and place on top of the beadedheart. Add drop shadow to all.

Copy & paste your tube as a new layer and move to the left of the frame, or wherever looks best with the tube you're using. Add a thick drop shadow.

Add any additional bows, hearts, or elements of your choice.

Crop or resize to your liking. Add your text, copyright info, and watermark, and save as a jpg, png, or gif file.

That's it.. all done!
♥ I Got An Award ♥ YAY!

Woohoooo I got an award! Thank you Vassia from Vassia's Designs


The "rules" of this award are that I must: )1. Put the logo on your blog or post. (Right click on the logo above and save to your own computer. )2. Nominate at least 10 blogs which show great attitude and/or gratitude! )3. Link to your nominees within your post. )4. Let them know that they have received this award by commenting on their blog. )5. Share the love and link to this post with the person from whom you received your award.

So I nominate:

Katrina - Charmed Illusions
Natalie -
Nat's Nonsense
Tamara -
Just a Girl's Designs

Friday, February 6, 2009

♥ Radiant in Red ♥


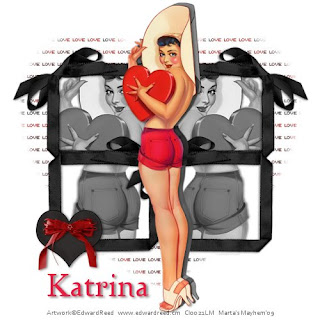
Click the tag to preview at full size. This tutorial was written by Marta on February 6, 2009. Any resemblance to any other tutorial is coincidental. Do not copy and paste this tutorial elsewhere on the net. Absolutely NO Scripting and/or translating of this tutorial.

For this tutorial you will need:

PSP
Tube of choice
Font of choice (I used Zephyr)
Mask - Vix_Mask_Valentine2 - You can download HERE
Mega Colab Kit *I Heart You* by Rachel of Captivated Visions and Deanna's Dreams.
You can purchase it HERE.

I am using the artwork of Edward Reed, you can find his licensed art at CILM.

Let's get started:

Open a new image 500x500 and background set to white. Copy & paste paper10 as a new layer. Open Vix_Mask_Valentine2, Layers/New Mask Layer/From Image and find the mask in the drop down list. Delete mask layer, and merge group.

Copy & paste frame5, resize by 50%, Image/Mirror. Adjust/Hue and Saturation/Colorize/Set to H - 0, S - 0. Adjust/Brightness and Contrast/Brightness/Contrast/Set to B/-92, C/-29. Duplicate three more times until you get a total of 4 frames. For placement, see my tag for reference. Using your Magic Wand, while holding down the shift key, click inside each frame. Selections/Modify/Expand by 5. Open a new raster layer and move under the frame layers, Floodfill with white or a color of your choice. Copy & paste your tubes and move under the frame layers and above the floodfill layer, when happy, hit Delete on your tube layers. Select none. On your tube layers, Adjust/Hue and Saturation/Colorize/Set to H - 0, S - 0. Add drop shadow to your tubes and frames. Merge all your frames, tubes, and floodfill layers.

Copy & paste your main tube and add a thick drop shadow.

Add any additional bows, butterflies, hearts,, or elements of your choice.

Crop or resize to your liking. Add your text, copyright info, and watermark, and save as a jpg, png, or gif file.

That's it.. all done!
Thursday, February 5, 2009

♥ Silent Tears ♥


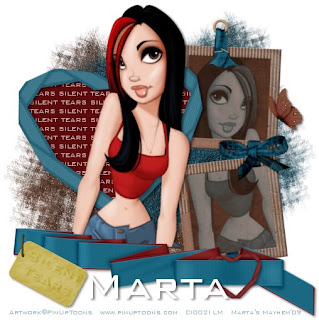
Click the tag to preview at full size. This tutorial was written by Marta on February 5, 2009. Any resemblance to any other tutorial is coincidental. Do not copy and paste this tutorial elsewhere on the net. Absolutely NO Scripting and/or translating of this tutorial.

For this tutorial you will need:

PSP
Tube of choice
Font of choice (I used Bank Gothic)
Mask - WSL_Mask167 - You can download from Chelle's blog HERE
ScrapKit *Silent Tears* by Missy of Scraps With Attitude.
You can purchase it HERE.

I am using the artwork of PinUpToons, you can find his licensed art HERE.

Let's get started:

Open a new image 550x550 and background set to white. Copy & paste paper3 as a new layer. Open WSL_Mask167, Layers/New Mask Layer/From Image and find the mask in the drop down list. Delete mask layer, and merge group. Move this layer to the left. Adjust/Add Noise/Set to 11.

Copy & paste paper9 as a new layer. Open WSL_Mask167, Layers/New Mask Layer/From Image and find the mask in the drop down list. Delete mask layer, and merge group. Image/Mirror and move to the right. Adjust/Add Noise/Set to 30.

Copy & paste DblFrame as a new layer. Copy & paste paper3 as a new layer and move under the frame layer. Copy & paste your tube of choice, Image/Mirror and move under the frame layer. Using your Magic Wand, click inside both frames of the frame, Selections/Modify/Expand by 5/Selections/Invert and hit Delete on the tube and paper layers. On your tube layer, Adjust/Hue and Saturation/Colorize/Set to H/137, S/71 and lower opacity to 60% or whatever you prefer. Add drop shadow to frame and tube layers. Merge these three layers.

Copy & paste RibbonHeart2 as a new layer. Copy & paste paper2 as a new layer and move under the ribbonheart layer. Using your Text Tool, set to Bank Gothic size 14 and type out Silent Tears until it fills the ribbonheart and move under the frame layer. Using your Magic Wand, click inside the ribbonheart layer, Selections/Modify/Expand by 5/Selections/Invert and hit Delete on the paper and text layers. Add drop shadow to the ribbonheart layer. Merge these three layers.

Copy & paste your tube of choice. Copy & paste ribbon2 as a new layer and resize as needed. Add drop shadow to your tube and ribbon2 layers. Using your Text Tool, set to Bank Gothic, size 48 and type out Silent Tears so it fits on the tag on the ribbon2 layer. Add drop shadow and change blend mode to Burn.

Add any additional bows, flowers, or elements of your choice.

Crop or resize to your liking. Add your text, copyright info, and watermark, and save as a jpg, png, or gif file.

That's it.. all done!
Tuesday, February 3, 2009

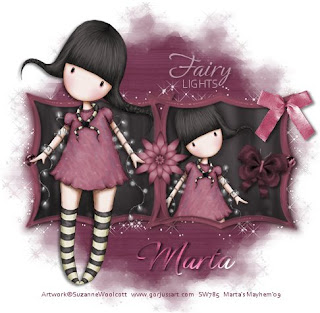
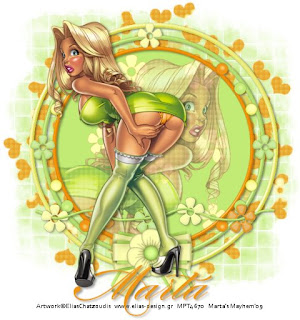
♥ Fairy Lights ♥


Click the tag to preview at full size. This tutorial was written by Marta on February 3, 2009. Any resemblance to any other tutorial is coincidental. Do not copy and paste this tutorial elsewhere on the net. Absolutely NO Scripting and/or translating of this tutorial.

For this tutorial you will need:

PSP
Tube and Image of choice
Font of choice (I used Ephesis)
Mask - WSL_Mask161 - You can download from Chelle's blog HERE
ScrapKit *My Passion* by Vassia of Vassia's Designs.
You can purchase it HERE.

I am using the artwork of Suzanne Woolcott, you can find her licensed art HERE.

Let's get started:

Open a new image 500x500 and background set to white. Copy & paste paper12 as a new layer. Open WSL_Mask161, Layers/New Mask Layer/From Image and find the mask in the drop down list. Delete mask layer, and merge group. Duplicate. Working on the original mask layer, Adjust/Blur/Gaussian Blur/Set to 5, Effects/Xenofex2/Constellation/Set to Star Size/4.55, Size Variation/100, Edge Star Density/1, Overall Star Density/12, Overdrive/82, Twinkle Amount/75, Twinkle Rotation/45, Background Fill/Keep original image.

Copy & paste frame3 as a new layer. Adjust/Hue and Saturation/Colorize/Set to H/244, S/76, or something that matches the tube you use. Copy & paste your image as a new layer and move under the frame layer. Using your Magic Wand, click inside the frame, Selections/Modify/Expand by 3/Selections/Invert and hit Delete on the image layer. Add drop shadow to your frame and merge these layers. Duplicate. Working on the original mask layer, Adjust/Blur/Gaussian Blur/Set to 5, Effects/Xenofex2/Constellation/Set to Star Size/4.55, Size Variation/100, Edge Star Density/1, Overall Star Density/12, Overdrive/82, Twinkle Amount/75, Twinkle Rotation/45, Background Fill/Keep original image. Image/Resize by 102%.

Copy & paste your tube of choice and add drop shadow. Add any additional bows, flowers, or elements of your choice.

Crop or resize to your liking. Add your text, copyright info, and watermark, and save as a jpg, png, or gif file.

That's it.. all done!
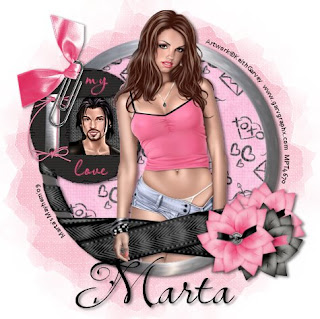
♥ My Love ♥


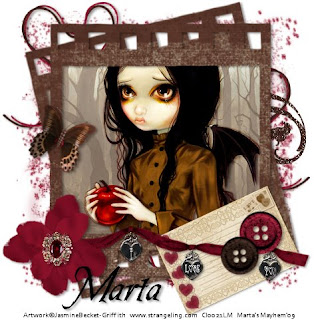
Click the tag to preview at full size. This tutorial was written by Marta on February 3, 2009. Any resemblance to any other tutorial is coincidental. Do not copy and paste this tutorial elsewhere on the net. Absolutely NO Scripting and/or translating of this tutorial.

For this tutorial you will need:

PSP
Tube and Image of choice
Font of choice (I used Lavishly Yours)
Mask - Vix_Mask109 - You can download HERE
ScrapKit *My Love* by Nora of Coquetta's Designz.
You can purchase it HERE.

I am using the artwork of Keith Garvey, you can find his licensed art at MPT.

Let's get started:

Open a new image 475x475 and background set to white. Copy & paste paper1 as a new layer. Open Vix_Mask109, Layers/New Mask Layer/From Image and find the mask in the drop down list. Delete mask layer, and merge group. Effects/Texture Effects/Weave/Set to Gap Size - 1, Width - 7, Opacity - 3, Weave & Gap color to #FFFFFF, Fill Gaps checked.

Copy & paste frame Chrome_Black as a new layer. Copy & paste paper9 as a new layer and move under the frame layer. Copy & paste your tube of choice and move between the frame and paper layers. Using your Magic Wand, click inside your frame, Selections/Modify/Expand by 5/Selections/Invert and hit Delete on the paper and tube layers. Add drop shadow to your frame and tube layers.

Copy & paste the CardboardFrame as a new layer. Resize. Copy & paste paper3 as a new layer and move under the frame layer. Copy & paste your tube of choice and move between the frame and paper layers. Using your Magic Wand, click inside the frame, Selections/Modify/Expand by 5/Selections/Invert and hit Delete on your paper and tube layers. Add drop shadow to your frame and tube layers.

Copy & paste Clip_Pink as a new layer and place it on top of the Cardboard Frame, add drop shadow. Copy & paste Flower_Pink and Flower_Black as new layers, position to the right of the frame, and add drop shadow.

Add any additional bows, hearts, flowers, or elements of your choice.

Crop or resize to your liking. Add your text, copyright info, and watermark, and save as a jpg, png, or gif file.

That's it.. all done!

Monday, February 2, 2009

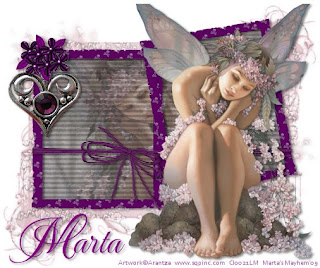
♥ Purple Dream ♥


Click the tag to preview at full size. This tutorial was written by Marta on February 2, 2009. Any resemblance to any other tutorial is coincidental. Do not copy and paste this tutorial elsewhere on the net. Absolutely NO Scripting and/or translating of this tutorial.

For this tutorial you will need:

PSP
Tube and Image of choice
Font of choice (I used Mea Culpa)
Jeux de lignes - You can download HERE
Mask - gabeemask8 - You can download HERE
ScrapKit *Rebel* by Annie of Annie's Design.
You can purchase it HERE.

I am using the artwork of Arantza, you must have a license to use.

Let's get started:

Open a new image 525x425 and background set to white. Copy & paste paper4 as a new layer. Adjust/Hue and Saturation/Colorize/Set to H/247, S/56. Adjust Brightness and Contrast/Set to B/134, C/-29. Open gabeemask8, Layers/New Mask Layer/From Image and find the mask in the drop down list. Delete mask layer, and merge group.

Copy & paste frame5 as a new layer. Copy & paste your image as a new layer and move under the frame layer. Resize as needed. Using your Magic Wand, click inside both sides of the frame, Selections/Modify/Expand by 3/Selections/Invert and hit Delete on the image layer. Effects/Jeau de lignes/Set to default, and lower opacity to 79%.

Copy & paste ribbon7 as a new layer, resize and erase any parts that overlap the frame. Copy & paste flower4 as a new layer and move to the top left of the frame. Copy & paste the heart as a new layer, resize and move just under the flower layer. Add drop shadow to all.

Copy & paste your tube as a new layer, resize if needed, and add drop shadow.

Add any additional bows, hearts, flowers, or elements of your choice.

Crop or resize to your liking. Add your text, copyright info, and watermark, and save as a jpg, png, or gif file.

That's it.. all done!
Sunday, February 1, 2009

♥ Pretty In Pink ♥


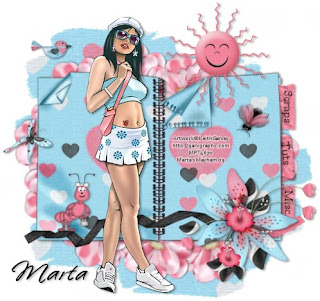
Click the tag to preview at full size. This tutorial was written by Marta on February 1, 2009. Any resemblance to any other tutorial is coincidental. Do not copy and paste this tutorial elsewhere on the net. Absolutely NO Scripting and/or translating of this tutorial.

For this tutorial you will need:

PSP
Tube of choice
Font of choice (I used Candy Script Swash)
Mask - GabeeValentine4 - You can download HERE
ScrapKit *A Beautiful Heart* by Cindy of Southern Scrapz.
You can purchase it HERE.

I am using the artwork of Ismael Rac, you can find his licensed art at MPT.

Let's get started:

Open a new image 500x550 and background set to white. Copy & paste paper1 as a new layer. Open GabeeValentine4, Layers/New Mask Layer/From Image and find the mask in the drop down list. Delete mask layer, and merge group.

Copy & paste frame13 as a new layer. Copy & paste paper9 as a new layer and move under the frame layer. Copy & paste bow5 as a new layer and resize to fit the frame. Add drop shadow to your frame layer and merge these layers.

Copy & paste your tube of choice and add a wide drop shadow.

Add any additional bows, hearts, flowers, or elements of your choice.

Crop or resize to your liking. Add your text, copyright info, and watermark, and save as a jpg, png, or gif file.

That's it.. all done!