Sunday, August 30, 2009

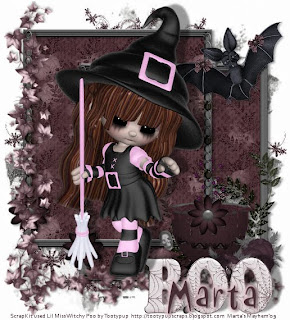
♥ Lil Miss Witchy Poo ♥


Click the tag to preview at full size. This tutorial was written by Marta on August 30, 2009. Any resemblance to any other tutorial is coincidental. Do not copy and paste this tutorial elsewhere on the net. Absolutely NO Scripting and/or translating of this tutorial.

For this tutorial you will need:

PSP
Tube of choice
Font of choice (I used JUICED)
Mask of choice
ScrapKit *Lil Miss Witchy Poo* by Tootypup of Tootypup Scraps.
You can purchase it HERE.

Let's get started:

Open a new image 525x575 and background set to white. Copy & paste Paper6c as a new layer. Open your mask of choice, Layers/New Mask Layer/From Image and find the mask in the drop down list. Delete mask layer, and merge group.

Copy & paste Frame3 as a new layer. Using your Magic Wand, click inside the frame, making sure you select each open piece of the frame. Copy Paper5c. Add new raster layer and paste into selection. Move this layer under the frame. Add drop shadow to frame.
Copy & paste barivy1 as a new layer. Place at bottom of frame. Add drop shadow. Duplicate. Image/Rotate/Left/90 degrees and place at the left of the frame.

Copy & paste your tube of choice, I used littlewitch1 and add drop shadow. Copy & paste bat2 as a new layer and move to the top right of the frame.

Add any additional flowers, bows, butterflies, or elements of your choice.

Crop or resize to your liking. Add your text, copyright info, and watermark, and save as a jpg, png, or gif file.

That's it.. all done!
Wednesday, August 26, 2009

♥ Mediterranean Love ♥


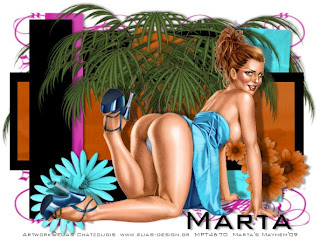
Click the tag to preview at full size. This tutorial was written by Marta on August 26, 2009. Any resemblance to any other tutorial is coincidental. Do not copy and paste this tutorial elsewhere on the net. Absolutely NO Scripting and/or translating of this tutorial.

For this tutorial you will need:

PSP
Tube of choice
Font of choice (I used Bank Gothic)
Mask - UFMask48 - You can download HERE.
Template - Ali's Template 161 - You can download HERE.
ScrapKit *Mediterranean Dawn* by Ishona of Athena Designs.
You can purchase it HERE.

I am using the artwork of Elias Chatzoudis, you can find his licensed art at MPT.

Let's get started:

Open Ali's Template161, Shift + D, and close out the original. Open new raster layer and floodfill with white and move to the bottom. Copy & paste Paper16TS as a new layer. Open UFMask48, Layers/New Mask Layer/From Image and find the mask in the drop down list. Delete mask layer, and merge group. Move above the white background.

Click on the raster2 layer, Selections/Float/Defloat/Modify/Smooth by 10, copy paper17TS and paste into selection.

Click on the raster1 layer, Selections/Float/Defloat/Modify/Smooth by 10, and floodfill with #000000.

Click on the raster7 layer, Selections/Float/Defloat/Modify/Smooth by 10, and paste into selection.

Click on the raster3 layer, Selections/Float/Defloat/Modify/Smooth by 10, copy paper16TS and paste into selection.

Click on the raster5 layer, Selections/Float/Defloat/Modify/Smooth by 10, copy paper17TS and paste into selection.

Copy & paste palm1TS as a new layer, and place in the center of your canvas.

Add any additional flowers, bows, leaves, birds, clips, or elements of your choice.

Crop or resize to your liking. Add your text, copyright info, and watermark, and save as a jpg, png, or gif file.

That's it.. all done!
Tuesday, August 25, 2009

I've received an award!! woohooooooooo

I received this awesome award from Marie "Sky" of Sky Scraps Designs. Thank you sweetie, it's much appreciated.


Here are the guidelines for accepting the award:

1 - Display the prize.
2 - Link to the Blog from whom you received it.
3 - Nominate another 10 blogs.
4 - Leave a message for them on their blog.

Bev
Ali
Stayyseee
Katrina

Monday, August 24, 2009

♥ Emo Hearts ♥


Click the tag to preview at full size. This tutorial was written by Marta on August 24, 2009. Any resemblance to any other tutorial is coincidental. Do not copy and paste this tutorial elsewhere on the net. Absolutely NO Scripting and/or translating of this tutorial.

For this tutorial you will need:

PSP
Tube of choice
Font of choice (I used Cursivessca Estilo)
Mask - UFMask56 - You can download HERE.
ScrapKit *My Loving Heart* by Star of Stargazer Musings.
You can purchase it HERE.

I am using the artwork of PinUpToons, you can find his licensed art at CILM.

Let's get started:

Open a new image 700x600 and background set to white. Copy & paste Paper14 as a new layer. Open your mask of choice, Layers/New Mask Layer/From Image and find the mask in the drop down list. Delete mask layer, and merge group.

Copy & paste HeartDecoFrame_1 as a new layer. Copy & paste PearlFrame_1 as a new layer. Copy & paste paper3 as a new layer and move under the PearlFrame. Using your Magic Wand, click inside the PearlFrame, Selections/Modify/Expand by 10, Selections/Invert and hit delete on the paper layer. Copy & paste HeartFrame_1 as a new layer and place over the PearlFrame. Add drop shadow to all frame layers.

Copy & paste GlitterHeartCharm_2 as a new layer. Don't worry about any overhang. Duplicate and place to your liking. See my tag above for placement. Add drop shadow.

Using your text tool, using a font of your choice, I used Bank Gothic, type out Emo Hearts until it covers the paper layer under the frame.

Using your Magic Wand, click on the paper layer under the frame, selections/invert, and hit Delete on the charm and text layer.

Add any additional flowers, bows, ribbons, or elements of your choice.

Crop or resize to your liking. Add your copyright info, and watermark, and save as a jpg, png, or gif file.

That's it.. all done!

Tuesday, August 18, 2009

♥ Lettered Bliss ♥


Click the tag to preview at full size. This tutorial was written by Marta on August 19, 2009. Any resemblance to any other tutorial is coincidental. Do not copy and paste this tutorial elsewhere on the net. Absolutely NO Scripting and/or translating of this tutorial.

For this tutorial you will need:

PSP
3 Images of choice
Font of choice (I used Mekanik LET Plain)
Mask - Mask 20-20
Xero - Fritillary
ScrapKit *Bliss* by Marie of Sky Scraps Designs.
You can purchase it HERE.

I am using the artwork of Jennifer Janesko, you can find her licensed art at CILM.

Let's get started:

Open a new image 500 x 325. Selections/Select All. Copy paper5, right click on image, and paste into selection. Selections/Select None. Effects/Xero/Fritillary with default settings.

Open one image of choice. Open your mask of choice, Layers/New Mask Layer/From Image and find the mask in the drop down list. Delete mask layer, and merge group. Repeat this for the next two images. Copy & paste each image onto your original image. Arrange and resize as needed. When happy with size and placement, merge these 3 images. Adjust/Hue and Colorization/Colorize/H/0, S/0. Change the Blend Mode to Hard Light.

Using a font of your choice, I'm using Mekanik LET Plain, size 150, create as vector, foreground set to #FFFFFF, background set to #37A59F, type out the first letter of your name. Using the nodes, stretch across and down until you get the size you want. Change the Blend Mode to Hard Light. Add drop shadow H/2, V/2, Opacity/50, Blur/5, Color/#000000. Add inner bevel with the following settings: Bevel/2, Width/31, Smoothness/35, Depth/2, Ambiance/-8, Shininess/10, Color/#FFFFFF, Angle/315, Intensity/75, Elevation/20.

Choose font again, and type out the remaining letters of your name. Using the nodes, stretch across and down, until you get the size you want. Change the Blend Mode to Overlay. Add same drop shadow and inner bevel as above.

Copy & paste Element6 as a new layer and move to the right side of the canvas. Copy & paste Butterfly1 as a new layer and move to the left side of the canvas. Copy & paste Element13 as a new layer and move to the right side of the canvas. Add same drop shadow as above to all three layers.

Add any additional flowers, bows, ribbons, or elements of your choice.

Crop or resize to your liking. Add your copyright info, and watermark, and save as a jpg, png, or gif file.

That's it.. all done!

Monday, August 17, 2009

TAG OFFER ♥ Cinnamon and Pink ♥


Click the tag to preview at full size.

If you would like this tag, please email me HERE. Please put "A Touch of Cinnamon" in the subject line when requesting. Thank you!

ScrapKit used *A Touch of Cinnamon* by Adrienne of Crazy Girl Scraps. You can purchase it HERE.

I am using the artwork of Olivia, you can find her licensed art at CILM.

Sunday, August 16, 2009

♥ Punk'd ♥


Click the tag to preview at full size. This tutorial was written by Marta on August 16, 2009. Any resemblance to any other tutorial is coincidental. Do not copy and paste this tutorial elsewhere on the net. Absolutely NO Scripting and/or translating of this tutorial.

For this tutorial you will need:

PSP
Tube of choice
Font of choice (I used DianaCTT)
Mask of choice
ScrapKit *DangerZoneRed* by Nicole of Simply Irresistible.
You can purchase it HERE.

I am using the artwork of PinUpToons, you can find his licensed art at CILM.

Let's get started:

Open a new image 700x600 and background set to white. Copy & paste Paper1 as a new layer. Open your mask of choice, Layers/New Mask Layer/From Image and find the mask in the drop down list. Delete mask layer, and merge group.

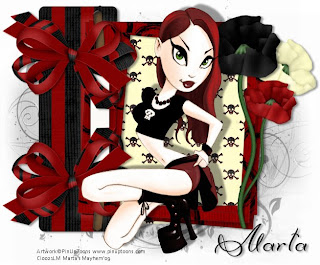
Copy & paste ClipFrameRed as a new layer. Copy & paste paper9 as a new layer and move under the frame layer. Using your Magic Wand, click inside the frame, Selections, Modify, Expand by 5, Selections, Invert and hit delete on the paper layer. Add drop shadow to the frame layer.

Copy & paste bow2 as a new layer. Move to the top left of the frame. Duplicate. Image/Flip. Add drop shadow.

Copy & paste poppy1, poppy2, and poppy4 as new layers. Resize to the size of your choice. Add drop shadow.

Add any additional flowers, bows, ribbons, or elements of your choice.

Crop or resize to your liking. Add your copyright info, and watermark, and save as a jpg, png, or gif file.

That's it.. all done!
Saturday, August 15, 2009

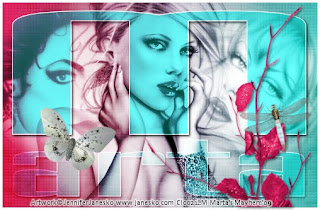
TAG OFFER ♥ Désolé dans le bleu ♥


Click the tag to preview at full size.

If you would like this tag, please email me HERE. Please put "Sorry" in the subject line when requesting. Thank you!

ScrapKit used *Sorry* by Ali of Designs by Ali. You can purchase it HERE.

I am using the artwork of Jennifer Janesko, you can find her licensed art at CILM.

Friday, August 14, 2009

TAG OFFER ♥ A Splash of Rose ♥


Click the tag to preview at full size.

If you would like this tag, please email me HERE. Please put "Angels on the Moon" in the subject line when requesting. Thank you!

ScrapKit used *Angels on the Moon* by Missy of Scraps with Attitude. You can purchase it HERE.

I am using the artwork of Ted Hammond, you can find his licensed art at CILM.

Thursday, August 6, 2009