Saturday, March 21, 2009
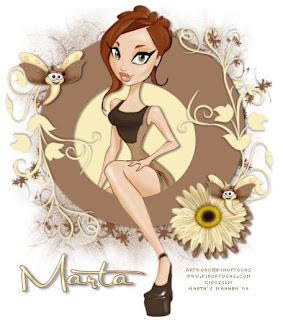
♥ Oh How Sweet ♥
Click the tag to preview at full size. This tutorial was written by Marta on March 21, 2009. Any resemblance to any other tutorial is coincidental. Do not copy and paste this tutorial elsewhere on the net. Absolutely NO Scripting and/or translating of this tutorial.
For this tutorial you will need:
PSP
Tube of choice
Font of choice (I used Satisfaction)
Mask of choice
Ali's Template135 - You can download it HERE
ScrapKit *Sweet Spring* by Danielle of Dazzling Scraps.
You can purchase it HERE.
Let's get started:
Open Ali's Template135, Shift + D, and close out the original. Open new raster layer and floodfill with white and move to the bottom. Copy & paste paper17 as a new layer. Open mask of choice, Layers/New Mask Layer/From Image and find the mask in the drop down list. Delete mask layer, and merge group. Adjust/Add Noise/Set to Random 30%. Move above the white background.
Click on the layer1 layer, Selections/Float/Defloat/Modify/Smooth by 10 and floodfill with #9E795E. Add drop shadow. Using your Magic Wand, click inside the layer, Selections/Modify/Expand by 7, open new raster layer, and floodfill with #F8EEBD, Select none and move under the original layer1.
Click on the shape2 layer. Selections/Float/Defloat/Modify/Expand by 1 and floodfill with #F8EEBD. Repeat above on shape2 copy layer. Add drop shadow to both layers. Move to each side of the layer1 layer. I didn't use the shape1 layer, but feel free to use, and repeat the above.
Copy & paste flower5 as a new layer, and move to the bottom right. Copy & paste flower3 as a new layer, and move above the flower5 layer and move it a little to the left and up of the flower5 layer. Add drop shadow to both layers.
Copy & paste dragonfly3 as a new layer. Resize as needed. Add drop shadow. Duplicate. Image/Mirror.
Copy & paste your tube of choice and add drop shadow.
Add any additional bows, butterflies, buttons, or elements of your choice.
Crop or resize to your liking. Add your text, copyright info, and watermark, and save as a jpg, png, or gif file.
That's it.. all done!
Saturday, March 14, 2009
♥ Autumn Gold ♥
Click the tag to preview at full size. This tutorial was written by Marta on March 14, 2009. Any resemblance to any other tutorial is coincidental. Do not copy and paste this tutorial elsewhere on the net. Absolutely NO Scripting and/or translating of this tutorial.
For this tutorial you will need:
PSP
Tube of choice
Font of choice (I used Miss Lankfort)
Mask - WSL_Mask221 - You can download from Chelle's blog HERE.
ScrapKit *Autumn* by Lisa of Frosted Illusions.
You can purchase it HERE.
Let's get started:
Open a new image 550x550 and background set to white. Copy & paste paper11 as a new layer. Open WSL_Mask221, Layers/New Mask Layer/From Image and find the mask in the drop down list. Delete mask layer, and merge group.
Open new raster layer, Selections/Select All, copy paper1, and Paste Into Selection. Copy & paste frame5 as a new layer, and move to the left. Using your Magic Wand, click inside the frame, Selections/Modify/Expand by 7/Selections/Invert and hit Delete on the paper layer. Add drop shadow to frame.
Copy & paste frame1 as a new layer, and move to the right of frame5. Copy & paste your tubes or images of choice and move under the frame layer, and position to where you want them. Using your Magic Wand, click inside both frames, Selections/Modify/Expand by 4/Selections/Invert and hit Delete on the tube or image layers. Add drop shadow to frame.
Copy & paste bow4 as a new layer, resize, and move to the upper left of frame5. Copy & paste leaves4 as a new layer. Duplicate. Move one to the right and one to the left side of frame5. Copy & paste leaves1 as a new layer. Image/Flip. Move to the bottom right of the double frame. Copy & paste flower1 as a new layer and move above the leaves1 layer. Duplicate for as many flowers as you want. Add drop shadow to all layers.
Copy & paste your tube as a new layer and position above the frame5 layer. Add drop shadow.
Add any additional ribbons, bows, butterflies, or elements of your choice.
Crop or resize to your liking. Add your text, copyright info, and watermark, and save as a jpg, png, or gif file.
That's it.. all done!
Friday, March 13, 2009
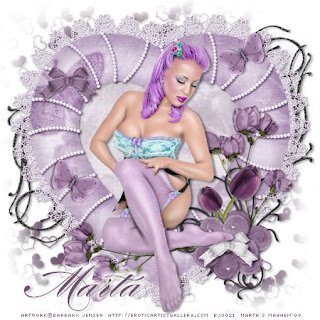
♥ Lavender Lust ♥
Click the tag to preview at full size. This tutorial was written by Marta on March 12, 2009. Any resemblance to any other tutorial is coincidental. Do not copy and paste this tutorial elsewhere on the net. Absolutely NO Scripting and/or translating of this tutorial.
For this tutorial you will need:
PSP
Tube of choice
Font of choice (I used Burgues Script)
Mask - Vix_Mask177 - You can download HERE.
ScrapKit *Soft Lavender* by Crystal of Designs by Crystal.
You can purchase it HERE.
Let's get started:
Open a new image 550x550 and background set to white. Copy & paste paper16 as a new layer. Open Vix_Mask177, Layers/New Mask Layer/From Image and find the mask in the drop down list. Delete mask layer, and merge group.
Copy & paste frame-heart2 as a new layer. Adjust/Hue and Saturation/Colorize/Set to H/202, S/116. Add drop shadow. Copy & paste frame-heart as a new layer, lower opacity of this layer to 65%. Copy & paste paper01 as a new layer and move under the frame-heart layer. Using your Magic Wand, click inside the frame-heart, Selections/Modify/Expand by 5/Selections/Invert and hit Delete on the paper layer.
Copy & paste doodle1 as a new layer and move to the lower right of the heart frame. Copy & paste doodle1 as a new layer, and move to the lower left and under the frame layers. Duplicate. Image/Mirror/Image/Flip. Add drop shadow to all.
Copy & paste flower1 as a new layer and move to the lower right of the heart frame. Copy & paste bouganvilla1 as a new layer. Image/Mirror and move under the flower1 layer. Duplicate. Image/Rotate/Left 90 degrees. Copy & paste tulip1 as a new layer and move under the flower1 layer. Duplicate/Image/Mirror. See tag above for placement. Add drop shadow to all.
Add any additional ribbons, bows, butterflies, or elements of your choice.
Crop or resize to your liking. Add your text, copyright info, and watermark, and save as a jpg, png, or gif file.
That's it.. all done!
Wednesday, March 11, 2009
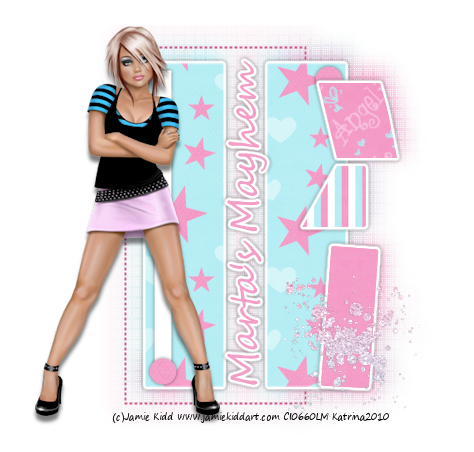
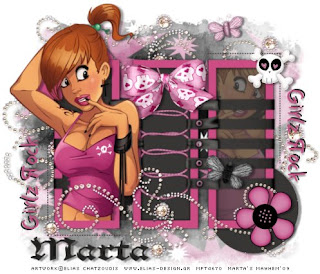
♥ Girlz Яock ♥
Click the tag to preview at full size. This tutorial was written by Marta on March 11, 2009. Any resemblance to any other tutorial is coincidental. Do not copy and paste this tutorial elsewhere on the net. Absolutely NO Scripting and/or translating of this tutorial.
For this tutorial you will need:
PSP
Tube of choice
Font of choice (I used ROCK and Children Play)
Yvette_EOC_Template3 - You can download HERE.
Mask - Becky_Mask022
ScrapKit *Glam Rock* by Michelle of Candy Kisses Designz.
You can purchase it HERE.
Let's get started:
Open Yvette_EOC_Template 3, Shift + D, and close the original. Delete the copyright layer. Click on the frames layer, Selections/Float/Defloat/Modify/Smooth by 10. Using your Floodfill Tool, fill all frames with #CB4D84. Select none. Add drop shadow.
Click on the photo layer, Selections/Float/Defloat/Modify/Smooth by 10. Using your Floodfill Tool, fill all frames with #373634. Select none.
Click on the circle layer, Selections/Float/Defloat/Modify/Smooth by 10. Using your Floodfill Tool, fill the right circle with #373634, and fill the left circle with #CB4D84. Select none. Add drop shadow.
Keep dotted lines the same. I deleted the rectangles layer, but follow the above with a color or paper of your choice.
Copy & paste paper10 as a new layer and move above the white background. Open Becky_Mask022, Layers/New Mask Layer/From Image and find the mask in the drop down list. Delete mask layer, and merge group.
Copy & paste the tied ribbon with skull as a new layer, and move it above the frame layer. Resize as needed so it fits the frames. Copy & paste the SKULL as a new layer and move to the upper right of the frames. Copy & paste the BOW as a new layer, and place it in the center of the frame over the tied ribbon. Add drop shadow to all.
Copy & paste bling2 as a new layer, and move to the bottom of the frames. Duplicate and move the copied bling2 under the circle layer. Image/Flip/Image/Mirror. Copy & paste bling1 as a new layer and move under the circle layer. Image/Rotate/Left 90 degrees, and place towards the middle of the frames.
Copy & paste your tube of choice as a new layer. Add drop shadow. Duplicate. Image/Mirror and place under the third frame, resize as needed. Using your Magic Wand, click inside the third frame, Selections/Modify/Expand by 10/Selections/Invert and hit Delete on your copied tube layer.
Add any additional ribbons, bows, butterflies, or elements of your choice.
Crop or resize to your liking. Add your text, copyright info, and watermark, and save as a jpg, png, or gif file.
That's it.. all done!
Monday, March 9, 2009
♥ Want a Ride? ♥
Click the tag to preview at full size. This tag was made by Marta on March 9, 2009.
ScrapKit *Pink Struck* by Foxy of Foxy's Designz, which is a FTU kit. Just swing on by her site and pick this beauty up.
Sunday, March 8, 2009
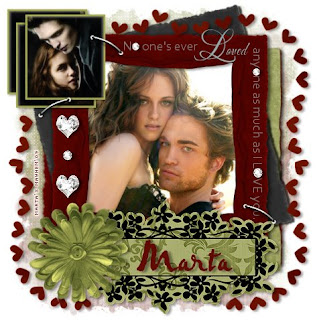
♥ Forever, Forever, and Forever ♥
Click the tag to preview at full size. This tutorial was written by Marta on March 8, 2009. Any resemblance to any other tutorial is coincidental. Do not copy and paste this tutorial elsewhere on the net. Absolutely NO Scripting and/or translating of this tutorial.
For this tutorial you will need:
PSP
Tube or Image of choice
Font of choice (I used Pablo)
Mask - Becky_Mask022
ScrapKit *Twitterpated* by Cora of Pimp'd Dezigns.
You can purchase it HERE.
Let's get started:
Open a new image 500x500 and background set to white. Copy & paste paper09 as a new layer. Open Becky_Mask022, Layers/New Mask Layer/From Image and find the mask in the drop down list. Delete mask layer, and merge group. Effects/Texture Effects/Blinds/Set to Width/2, Opacity/34, Color/#FFFFFF, and Light from left/top checked.
Copy & paste paper03 as a new layer. Open Becky_Mask022, Layers/New Mask Layer/From Image and find the mask in the drop down list. Delete mask layer, and merge group. Move this layer to the left side of your image. Effects/Texture Effects/Weave/Set to Gap Size/1, Width/4, Opacity/2, Weave & Gap Color/#FFFFFF, and Fill gaps checked.
Copy & paste frame02 as a new layer. Resize by 65%. Duplicate. Working on the original frame layer, Selections/Float/Defloat/Modify/Smooth by 10/Invert. Copy & paste paper03 as a new layer and hit Delete. On the copy layer of the frame, Image/Rotate/Left/14%. Copy & paste frame01 as a new layer. Resize by 65%. Copy & paste your image/tube of choice. Using your Magic Wand, click inside the frame, Selections/Modify/Expand by 7/Invert and hit Delete on the image layer. Add drop shadows to all frames.
Copy & paste heart-bracket-frame as a new layer. Copy & paste the journaling as a new layer and place in the lower middle of frame01. Copy & paste the heart-diamonds as a new layer and move to the left side of frame01. Erase any parts that you don't want. Copy & paste flower02 as a new layer and move to the left of the journaling. Add drop shadow to all layers.
Open another image, resize until it's approximately 125x125, give or take. Image/Add borders/Color from your tag, I used #A6AB52/Size 4 on all. Copy & paste this layer to your original image. Add drop shadow. Duplicate 2 times and arrange your frames to your liking. Copy & paste the staple as a new layer. I duplicated 2 times.
Add any additional wordart (I used a quote from the book "Breaking Dawn"), ribbons, flowers, bows, or elements of your choice.
Crop or resize to your liking. Add your text, copyright info, and watermark, and save as a jpg, png, or gif file.
That's it.. all done!
Saturday, March 7, 2009
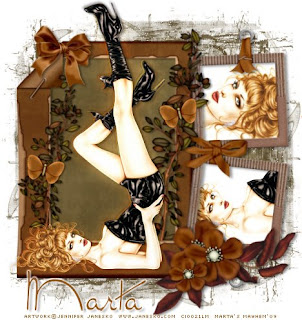
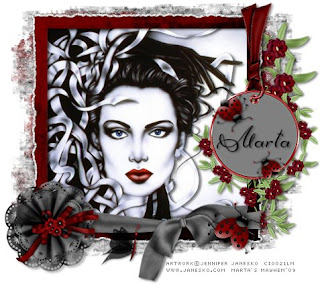
♥ Grunged Beauty ♥
Click the tag to preview at full size. This tutorial was written by Marta on March 7, 2009. Any resemblance to any other tutorial is coincidental. Do not copy and paste this tutorial elsewhere on the net. Absolutely NO Scripting and/or translating of this tutorial.
For this tutorial you will need:
PSP
Tube or Image of choice
Font of choice (I used DianaCTT)
Mask - WSL_Mask83 - You can download from Chelle's blog HERE
ScrapKit *Grunge It* by Adrienne of Crazy Girl Scraps.
You can purchase it HERE.
I am using the artwork of Jennifer Janesko, you can find her licensed art at CILM.
Let's get started:
Open a new image 500x500 and background set to white. Copy & paste Paper10 as a new layer. Open WSL_Mask83, Layers/New Mask Layer/From Image and find the mask in the drop down list. Delete mask layer, and merge group. Duplicate. Image/Mirror/Image/Flip. Move to desire position. Copy & paste Paper14 as a new layer. Open WSL_Mask83, Layers/New Mask Layer/From Image and find the mask in the drop down list. Delete mask layer, and merge group. Move this layer to the left side of your image.
Copy & paste frame02 as a new layer. Copy & paste your image or tube of choice as a new layer and move under the frame layer. Using your Magic Wand, click inside the frame, Selections/Modify/Expand by 7/Selections/Invert and hit Delete on the image/tube layer. If using a tube, you will need to add a paper of choice. Add drop shadow to your frame.
Copy & paste SatinRibbon02 as a new layer and place at the bottom of the frame. Erase any parts that extend past the frame. Copy & paste Sachet04 as a new layer, and move to the bottom left of the frame. Copy & paste Flower02 as a new layer and move to the right side of the frame. Duplicate until you get the effect that you want. Copy & paste Tag01 as a new layer, and move to the upper right of the frame.
Add any additional lady bugs, ribbons, flowers, butterflies, or elements of your choice.
Crop or resize to your liking. Add your text, copyright info, and watermark, and save as a jpg, png, or gif file.
That's it.. all done!
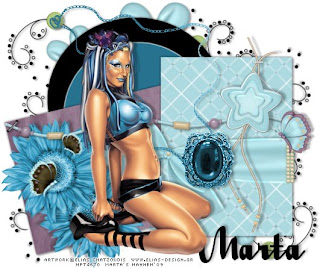
Tuesday, March 3, 2009
♥ Blue Zirconia ♥
Click the tag to preview at full size. This tutorial was written by Marta on March 3, 2009. Any resemblance to any other tutorial is coincidental. Do not copy and paste this tutorial elsewhere on the net. Absolutely NO Scripting and/or translating of this tutorial.
For this tutorial you will need:
PSP
Tube of choice
Font of choice (I used QuigleyWiggly)
Ali's Template10 - You can download HERE.
EC4 - Gradient Glow
ScrapKit *Crossed Emotion* by Nikki of Creative Intentionz.
You can purchase it HERE.
I am using the artwork of Elias Chatzoudis, you can find his licensed art at MPT.
Let's get started:
Open Ali's Template10, Shift + D to duplicate and close out the original. Delete the watermark layer. Click on the circle1 layer, Selections/Float/Defloat/Modify/Smooth by 10. Open new raster layer, and floodfill with a color of your choice, I used #000000. Add drop shadow.
Click on the circle2 layer, Selections/Float/Defloat/Modify/Smooth by 10. Open new raster layer, and floodfill with a color of your choice, I used #27728F. Effects/EC4/Gradient Glow/Glow Width/3, Soft Corners/25, Overall Opacity/100/Change color to #FFFFFF. Add drop shadow.
Copy & paste paper 5 as a new layer, and move above the rectangle1. Click on rectangle1, Selections/Float/Defloat/Modify/Smooth by 10 and hit Delete on the paper5 layer. Copy & paste paper12 as a new layer, and move above rectangle2. Click on rectangle2, Selections/Float/Defloat/Modify/Smooth by 10 and hit Delete on the paper12 layer.
Copy & paste your tube and position. Add drop shadow.
Copy & paste flowerdoodle3 as a new layer and move above the white background layer. Add drop shadow. Duplicate. Image/Mirror/Image/Flip and move to desired positions.
Add any additional ribbons, flowers, butterflies, beads, or elements of your choice.
Crop or resize to your liking. Add your text, copyright info, and watermark, and save as a jpg, png, or gif file.
That's it.. all done!
♥ And Another Award ♥
I received this award from Michal of Michal's Designz.
Thank you sweetie :)
Feel free to pass this along to any friends who haven't received this yet!
Thank you sweetie :)
Feel free to pass this along to any friends who haven't received this yet!
Labels:
Awards
♥ Another Award ♥
I received this award from Vassia at Vassia's Designs.
Thank you hun!!
I sent passed this on to ten people, so I pass this on to anyone that hasn't received it yet :)
Thank you hun!!
I sent passed this on to ten people, so I pass this on to anyone that hasn't received it yet :)
Labels:
Awards
♥ Totally Awesome Blog Award ♥
I received this from HorsePlay's Pasture. Thank you so much Bev!!
Rules for this award:
1: Must pass it on to up to 10 (yikes!) other bloggers.
2: Link back to the blogger who gave you the award.
3: Link to the bloggers you award it to.
And here are my 10:
And here are my 10:
6. ChaDesignz
10. Clarey's Designz
Labels:
Awards
Monday, March 2, 2009
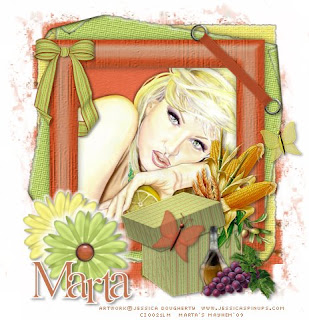
♥ Box Full of Love ♥
Click the tag to preview at full size. This tutorial was written by Marta on March 2, 2009. Any resemblance to any other tutorial is coincidental. Do not copy and paste this tutorial elsewhere on the net. Absolutely NO Scripting and/or translating of this tutorial.
For this tutorial you will need:
PSP
Tube of choice
Font of choice (I used New Romantics)
Mask - Becky_Mask034
ScrapKit *Dolce Vita* by Tina of Saphira's World.
You can purchase it HERE.
I am using the artwork of Jessica Dougherty, you can find her licensed art at CILM.
Let's get started:
Open a new image 500x500 and background set to white. Copy & paste paper2 as a new layer. Open Becky_Mask034, Layers/New Mask Layer/From Image and find the mask in the drop down list. Delete mask layer, and merge group.
Copy & paste frame2 as a new layer. Copy & paste paper8 as a new layer and move under the frame layer. Copy & paste your tube as a new layer and move under the frame layer and above the paper layer. Using you Magic Wand, click inside the frame, Selection/Modify/Expand by 25/Selections/Invert and hit Delete on your paper and tube layers. Add drop shadow to the frame and tube layers.
Copy & paste the box as a new layer and move it to the bottom right of the frame. Copy & paste flower 1 and 3 as new layers, and move to the bottom left of the frame. Add drop shadow to the box and flowers.
Add any additional ribbons, flowers, butterflies, buttons or elements of your choice.
Crop or resize to your liking. Add your text, copyright info, and watermark, and save as a jpg, png, or gif file.
That's it.. all done!
Subscribe to:
Posts (Atom)