Tuesday, April 28, 2009
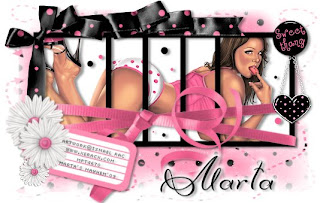
♥ Sweet Thang ♥
Click the tag to preview at full size. This tutorial was written by Marta on April 28, 2009. Any resemblance to any other tutorial is coincidental. Do not copy and paste this tutorial elsewhere on the net. Absolutely NO Scripting and/or translating of this tutorial.
For this tutorial you will need:
PSP
Tube of choice
Font of choice (DianaCTT)
Mask - Becky_Mask23 - You can download it HERE.
Frame - Made by me - You can download it HERE.
ScrapKit *Polka Dots* by Tanya of Scraps by jOeswife.
You can purchase it HERE.
I am using the artwork of Ismael Rac, you can find his licensed art at MPT.
Let's get started:
Open a new image 550x350 and background set to white. Copy & paste paper13 as a new layer. Open Becky_Mask023, Layers/New Mask Layer/From Image and find the mask in the drop down list. Delete mask layer, and merge group.
Copy & paste your frame as a new layer. Copy & paste your tube as a new layer and move under the frame layer. Using your Magic Wand, click inside each frame, Selections/Modify/Expand by 7/Selections/Invert and hit Delete on the tube or image layer. DO NOT add drop shadow to frame as it already has one.
Copy & paste bow5 as a new layer, resize, and move it to the top left of the frame. Add drop shadow. Copy & paste ribbon5 as a new layer, resize, and move it to the bottom of the frame. Add drop shadow.
Add any additional flowers, ribbons, charms, tags, or elements of your choice.
Crop or resize to your liking. Add your text, copyright info, and watermark, and save as a jpg, png, or gif file.
That's it.. all done!
Sunday, April 26, 2009
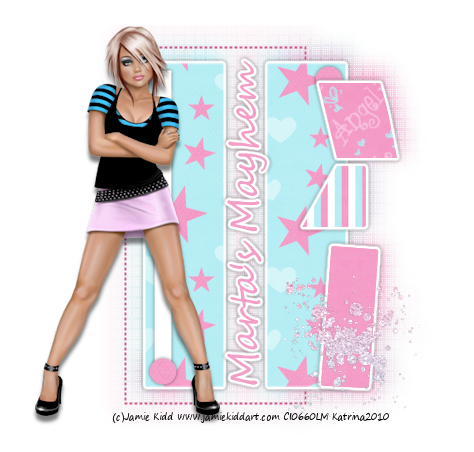
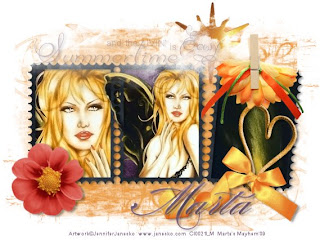
♥ Summertime ♥
Click the tag to preview at full size. This tutorial was written by Marta on April 26, 2009. Any resemblance to any other tutorial is coincidental. Do not copy and paste this tutorial elsewhere on the net. Absolutely NO Scripting and/or translating of this tutorial.
For this tutorial you will need:
PSP
Tubes/Images of choice
Font of choice (I used Burgues Script and DianaCTT)
Mask - WSL_Mask221 - You can download from Chelle's blog HERE
ScrapKit *Summer Lovin'* by Cora of Pimp Your Scrap Book.
You can purchase it HERE.
I am using the artwork of Jennifer Janesko, you can find her licensed art at CILM.
Let's get started:
Open a new image 575x450 and background set to white. Copy & paste paper8 as a new layer. Open WSL_Mask221, Layers/New Mask Layer/From Image and find the mask in the drop down list. Delete mask layer, and merge group.
Copy & paste frame5 as a new layer. Copy & paste three images or tubes of choice, as new layers, and move under the frame layer. Using your Magic Wand, click inside each frame, Selections/Modify/Expand by 4/Selections/Invert and hit Delete on each image/tube layer. Add drop shadow to frame layer.
Copy & paste cloud1 and cloud2 as new layers, and move to the top of the frame. Copy & paste the sun as a new layer, move to the top right of the second frame, and move under the frame and image layers. Add drop shadow. Copy & paste the flower-clipped as a new layer, and move to the top of the third frame. Add drop shadow. Copy & paste bow1 as a new layer, and move to the center of the third frame. Add drop shadow.
Add any additional flowers, ribbons, wordart or elements of your choice.
Crop or resize to your liking. Add your text, copyright info, and watermark, and save as a jpg, png, or gif file.
That's it.. all done!
Saturday, April 25, 2009
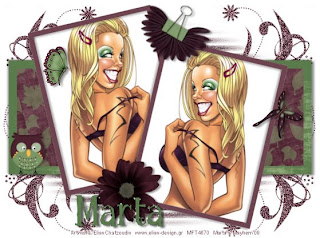
♥ Falling 4 You ♥
Click the tag to preview at full size. This tutorial was written by Marta on April 25, 2009. Any resemblance to any other tutorial is coincidental. Do not copy and paste this tutorial elsewhere on the net. Absolutely NO Scripting and/or translating of this tutorial.
For this tutorial you will need:
PSP
Tube of choice
Font of choice (I used Little Trouble Girl BV)
Mask - Monti Blinds_mask 1 - You can download Monti's mask HERE.
ScrapKit *Falling For You* by Michelle of Candy Kisses Designz.
You can purchase it HERE.
I am using the artwork of Elias Chatzoudis, you can find his licensed art at MPT.
Let's get started:
Open a new image 600x450 and background set to white. Copy & paste paper12 as a new layer. Open the blinds_mask1, Layers/New Mask Layer/From Image and find the mask in the drop down list. Delete mask layer, and merge group. Adjust/Add Noise/Set to 70.
Open paper10 and paper6 and resize both by 50%. Set your foreground to patterns, and find paper10. Set your background to patterns, and find paper6. Using your Rectangle Tool, width set to 15, draw out a rectangle, see my tag for reference. When happy with size, convert to raster layer. Add drop shadow.
Using your Rectangle Tool, set your foreground to #000000, background to nul, width=8, and draw out a rectangle for your frame. When happy with size, convert to raster layer. Copy & paste your image/tube as a new layer, and move under the frame layer and position. Using your Magic Wand, click inside your frame, Selections/Modify/Expand by 5/Selections/Invert and hit Delete on your image/tube layer. Add drop shadow to your frame and tube layer. Merge these 2 layers. Image/Free Rotate/Left/15 degrees. Duplicate. Image/Mirror.
Add any additional flowers, ribbons, doodles, or elements of your choice.
Crop or resize to your liking. Add your text, copyright info, and watermark, and save as a jpg, png, or gif file.
That's it.. all done!
Friday, April 24, 2009
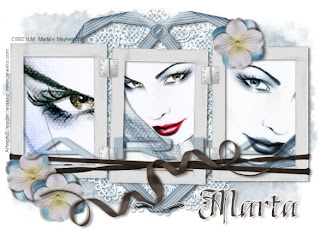
♥ Aria in Blue ♥
Click the tag to preview at full size. This tutorial was written by Marta on April 24, 2009. Any resemblance to any other tutorial is coincidental. Do not copy and paste this tutorial elsewhere on the net. Absolutely NO Scripting and/or translating of this tutorial.
For this tutorial you will need:
PSP
Tubes and/or Images of choice
Font of choice (I used Chivalry Decorative ITCTT and Bank Gothic)
Mask - Becky_Mask021 - Download it HERE.
ScrapKit *Bella* by Cora of Pimp Your Scrap Book.
You can purchase it HERE.
I am using the artwork of Jennifer Janesko, you can find her licensed art at CILM.
Let's get started:
Open a new image 600x450 and background set to white. Copy & paste paper13 as a new layer. Open Becky_Mask021, Layers/New Mask Layer/From Image and find the mask in the drop down list. Delete mask layer, and merge group.
Copy & paste the lace-heart as a new layer. Copy & paste the ribbon-heart1 as a new layer. Add drop shadow.
Copy & paste frame3 as a new layer. Copy & paste your tubes and/or images as new layers and move under the frame layer. Move to desired position. While holding down the Shift key, select your Magic Wand, click inside each frame, and don't forget to select the small pieces under the ribbon. Selections/Modify/Expand by 3/Selections/Invert and hit delete on the tube/image layers. Add drop shadow to frame and any tube layers.
Using your text tool, set to Bank Gothic, background set to #CBD4DB, size 92. Type out the word you want, I used ARIA. Select none. Using your deform tool, stretch out your text so it spreads horizontally across all the frames. Change blend move to Multiple.
Add any additional flowers, ribbons, or elements of your choice.
Crop or resize to your liking. Add your text, copyright info, and watermark, and save as a jpg, png, or gif file.
That's it.. all done!
Below is another example.
Tuesday, April 21, 2009
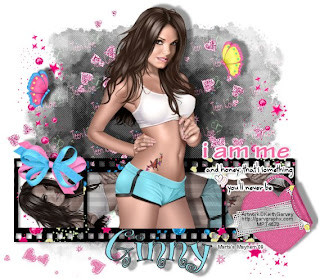
♥ I Am Me ♥
Click the tag to preview at full size. This tutorial was written by Marta on April 21, 2009. Any resemblance to any other tutorial is coincidental. Do not copy and paste this tutorial elsewhere on the net. Absolutely NO Scripting and/or translating of this tutorial.
For this tutorial you will need:
PSP
Tube of choice
Font of choice (I used Boingo)
Mask - Becky_Mask022 - Download it HERE.
Exclusive ScrapKit *Teen Love* by Missy & Tammy of Scraps with Attitude.
You can purchase it HERE.
I am using the artwork of Keith Garvey, you can find his licensed art at MPT.
Let's get started:
Open a new image 600x500 and background set to white. Copy & paste paper16 as a new layer. Open your mask of choice, Layers/New Mask Layer/From Image and find the mask in the drop down list. Delete mask layer, and merge group.
Monday, April 20, 2009
♥ Rosalicious ♥
Click the tag to preview at full size. This tutorial was written by Marta on April 19, 2009. Any resemblance to any other tutorial is coincidental. Do not copy and paste this tutorial elsewhere on the net. Absolutely NO Scripting and/or translating of this tutorial.
For this tutorial you will need:
PSP
Tube of choice
Font of choice (I used BeauRivageOne)
Mask - Becky_Mask022 - Download it HERE.
ScrapKit *Regal Rose* by Denise of Digital Designs by Scrappy Redhead.
You can purchase it HERE.
I am using the artwork of Elias Chatzoudis, you can find his licensed art at MPT.
Let's get started:
Open a new image 525x525 and background set to white. Copy & paste paper2 as a new layer. Open your mask of choice, Layers/New Mask Layer/From Image and find the mask in the drop down list. Delete mask layer, and merge group.
Thursday, April 9, 2009
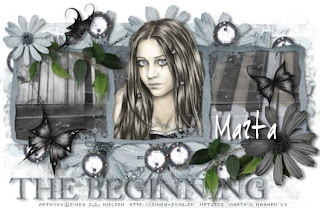
♥ The Beginning ♥
Click the tag to preview at full size. This tutorial was written by Marta on April 9, 2009. Any resemblance to any other tutorial is coincidental. Do not copy and paste this tutorial elsewhere on the net. Absolutely NO Scripting and/or translating of this tutorial.
For this tutorial you will need:
PSP
Tube of choice
Font of choice (I used Joe Hand)
Mask - Becky_Mask022 - Download it HERE.
Mura's Meister - Copies
Xenofex2 - Constellation
ScrapKit *The Saga: The Beginning* by Cora of Pimp Your Scrap Book.
You can purchase it HERE.
I am using the artwork of Zindy S. D. Nielsen, you can find her licensed art at Zindy Zone Shop.
Let's get started:
Open a new image 475x550 and background set to white. Copy & paste paper1 as a new layer. Open your mask of choice, Layers/New Mask Layer/From Image and find the mask in the drop down list. Delete mask layer, and merge group.
Copy & paste flower2 as a new layer. Image/Resize 50%. Image/Hue and Saturation/Colorize/Set to H/141, S/29. Effects/Mura's Meister/Copies/Set to Number/9, Shift X/60, Shift Y/45, leave all other settings as is. Add drop shadow. Effects/Xenofex 2/Constellation/Settings/Star Field/Keep original image.
Copy & paste paperframe as a new layer. Copy & paste paper12 as a new layer, resize by 50%. Move under the frame layer and move to the left frame. Copy & paste paper11 as a new layer, resize by 50%. Move under the frame layer and move to the right frame. Copy & paste paper 5 as a new layer, resize by 50%. Move under the frame layer and move to the center frame. Erase any of the papers that go beyond the frame. Add drop shadow to frame.
Copy & paste your tube of choice and place it in the center of the frame. Add drop shadow.
Add any additional flowers, ribbons, butterflies, or elements of your choice.
Crop or resize to your liking. Add your text, copyright info, and watermark, and save as a jpg, png, or gif file.
That's it.. all done!
Wednesday, April 8, 2009
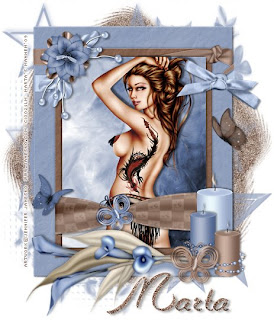
♥ Something Beautiful In Bloo ♥
Click the tag to preview at full size. This tutorial was written by Marta on April 8, 2009. Any resemblance to any other tutorial is coincidental. Do not copy and paste this tutorial elsewhere on the net. Absolutely NO Scripting and/or translating of this tutorial.
For this tutorial you will need:
PSP
Tube & Image of choice
Font of choice (I used CapriceBQ)
Masks of choice
ScrapKit *Something Beautiful* by Tina of Tina's Magical Scrap World.
You can purchase it HERE.
Let's get started:
Open a new image 550x550 and background set to white. Copy & paste paper2 as a new layer. Open your mask of choice, Layers/New Mask Layer/From Image and find the mask in the drop down list. Delete mask layer, and merge group. Adjust/Add Noise/Set to 70, monochrome checked. New raster layer, Floodfill with #8F9EBC, open your mask of choice (a different one), Layers/New Mask Layer/From Image and find the mask in the drop down list. Delete mask layer, and merge group.
Copy & paste the bowframe1 as a new layer, Image/Resize/Set to 75%. Copy & paste image of your choice, resize so that it is framed by the brown color of the bowframe. See my tag for reference. When happy with size & placement, Drop Shadow/Set to V/2, H/2, Opacity/40, Blur/5. Add drop shadow again but change to V/-2, H/-2, the rest remains the same. I colorized my image to match the frame. Adjust/Hue and Saturation/Colorize/Set to H/156, S/64. I then copied & pasted the matching tube as a new layer, and resized so it is the same size as the image. Add drop shadow.
Add any additional bows, ribbons, butterflies, candles, or elements of your choice.
Crop or resize to your liking. Add your text (apply same noise settings as above), copyright info, and watermark, and save as a jpg, png, or gif file.
That's it.. all done!
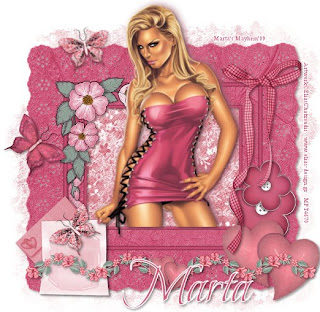
Sunday, April 5, 2009
♥ Mystery Tag Offer ♥ Blowing Bubbles ♥
Click the color pallette to preview at full size. This tag was made by Marta on April 3, 2009.
The color pallette above is the colors of the tag. I will leave it a mystery for 2 weeks, and then I'll post the tag for anyone who wants to wait until the tag is revealed.
Email me @ blooinboise@gmail.com with Blowing Bubbles in the Subject line. Make sure you give me the name you want on it, and I will make more than 1 tag per request. Manners please :)
Subscribe to:
Posts (Atom)