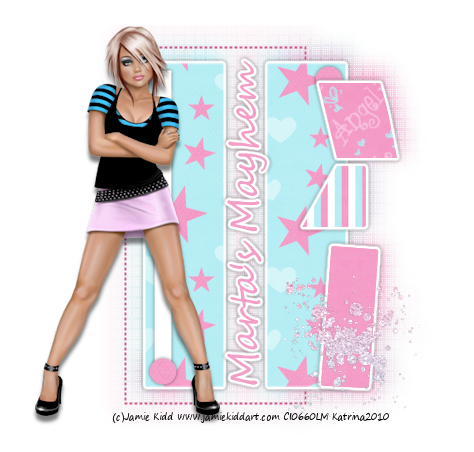
Friday, July 10, 2009

♥ Gothic Beauty ♥


Click the tag to preview at full size. This tutorial was written by Marta on July 10, 2009. Any resemblance to any other tutorial is coincidental. Do not copy and paste this tutorial elsewhere on the net. Absolutely NO Scripting and/or translating of this tutorial.

For this tutorial you will need:

PSP
Tube or Image of choice
Font of choice (I used KolkerBrush)
Mask of choice
Eye Candy 3.1 - Glass
ScrapKit *Gothic Butterfly* by Kat of KatNKDA Digital Art & Scraps.
You can purchase it HERE.

I am using the artwork of Vinegar, you can find her licensed art at MPT.

Let's get started:

Open a new image 500x500 and background set to white. Copy & paste Paper06 as a new layer. Open mask of choice, Layers/New Mask Layer/From Image and find the mask in the drop down list. Delete mask layer, and merge group.

Copy & paste Element27 as a new layer. Copy & paste your tube or image of choice and move under the frame layer. Copy & paste paper02 as a new layer and move under the tube/image layer. Using your Magic Wand, click inside the frame, Selections/Modify/Expand by 8 and hit Delete on your tube/image layer and your paper layer. Add drop shadow to frame and tube.

Copy & paste Element37 as a new layer and move to the upper right side of the frame and move under the paper layer.

Add your text and add a drop shadow. My settings are: V/2, H/4, Opacity/40, Blur/5. Effects/EC 3.1/Change settings to: Bevel Width/10, Bevel Shape/Mesa, Raw Spacing/20, Raw Thickness/10, Opacity/50, Refraction/2, Color/#FFFFFF, Highlight Brightness & Sharpness/100, Direction/127, Inclination/39.

Add any additional flowers, bows, ribbons, butterflies, or elements of your choice.

Crop or resize to your liking. Add your copyright info, and watermark, and save as a jpg, png, or gif file.

That's it.. all done!

Thursday, July 9, 2009

♥ Beautiful Dreamer ♥


Click the tag to preview at full size. This tutorial was written by Marta on July 9, 2009. Any resemblance to any other tutorial is coincidental. Do not copy and paste this tutorial elsewhere on the net. Absolutely NO Scripting and/or translating of this tutorial.

For this tutorial you will need:

PSP
Tube of choice
Font of choice (I used Mon Amour Script Pro)
Mask - Becky_Mask022
Brushes of choice
ScrapKit *Beautiful Dreamer* by Crystal of Scrappy Inspirations.
You can purchase it HERE.

I am using the artwork of PinUpToons, you can find his licensed art at CILM.

Let's get started:

Open a new image 600x500 and background set to white. Open a new raster layer and floodfill with #B2B2E9. Open Becky_Mask022, Layers/New Mask Layer/From Image and find the mask in the drop down list. Delete mask layer, and merge group. Effects/Texture Effects/Weave/Set to Gap size/2, Width/2, Opacity/1, Weave & Gap color/#FFFFFF, Fill gaps checked.

Copy & paste the wreath as a new layer, resize as needed. Add drop shadow.

Copy & paste Frame02 as a new layer. Copy & paste Paper06 as a new layer and move under the frame layer. Using your Magic Wand, click inside the frame, Selections/Modify/Expand by 5 and hit Delete on your paper layer. Add drop shadow to frame.

Copy & paste Daisy03 as a new layer and move to the lower right side of the frame. Copy & paste the Butterfly as a new layer and move above the daisy. Add drop shadow to both layers.

Click on the white background, add new raster layer, and add any brushes you like.

Add any additional flowers, bows, ribbons, buttons, brads, or elements of your choice.

Crop or resize to your liking. Add your text, copyright info, and watermark, and save as a jpg, png, or gif file.

That's it.. all done!

Tuesday, July 7, 2009

♥ Endless Love ♥


Click the tag to preview at full size. This tutorial was written by Marta on July 7, 2009. Any resemblance to any other tutorial is coincidental. Do not copy and paste this tutorial elsewhere on the net. Absolutely NO Scripting and/or translating of this tutorial.

For this tutorial you will need:
PSP
Tube or Image of choice
Font of choice (I used Burgues Script)
Mask of choice
ScrapKit *Grizabella's Dreamland* by Kat of KatNKDA Digital Art & Scraps.
You can purchase it HERE.

I am using the artwork of Irene Shpak, you can find her licensed art at MPT.

Let's get started:

Open a new image 600x500 and background set to white. Copy & paste paper19 as a new layer. Open mask of choice, Layers/New Mask Layer/From Image and find the mask in the drop down list. Delete mask layer, and merge group.

Copy & paste Element15 as a new layer. Copy & paste your tube or image of choice and move under the frame layer. Copy & paste paper15 as a new layer and move under the tube/image layer. Using your Magic Wand, click inside the frame, Selections/Modify/Expand by 8 and hit Delete on your tube/image layer and your paper layer. Add drop shadow to frame and tube.

Copy & paste Element 12 as a new layer and move to the lower right side of the frame. Copy & paste Element31 as a new layer and move to the left side of the frame. Add drop shadow to both layers.

Add any additional flowers, bows, ribbons, butterfly, or elements of your choice.

Crop or resize to your liking. Add your text, copyright info, and watermark, and save as a jpg, png, or gif file.

That's it.. all done!

Sunday, July 5, 2009

♥ Glitter N Grape ♥


Click the tag to preview at full size. This tutorial was written by Marta on July 4, 2009. Any resemblance to any other tutorial is coincidental. Do not copy and paste this tutorial elsewhere on the net. Absolutely NO Scripting and/or translating of this tutorial.

For this tutorial you will need:

PSP
Tube of choice
Font of choice (I used Mon Amour Script Pro)
ScrapKit *Grape Smoothie* by Ivory of Ivory's Designz.
You can purchase it HERE.

I am using the artwork of Daniel Esparza, you can find his licensed art at CILM.

Let's get started:

Open a new image 500x500 and background set to white.

Copy & paste Glitter2 as a new layer and resize. Image/Mirror. Image/Flip.

Copy & paste Frame3 as a new layer, and resize by 50%. Copy & paste paper2 as a new layer and move under the frame layer. Copy & paste your tube of choice and move under the frame layer. Using your Magic Wand, click inside the frame, Selections/Modify/Expand by 10 and hit Delete on your tube layer and paper layer. Add drop shadow to frame and tube.

Add any additional flowers, bows, ribbons, or elements of your choice.

Crop or resize to your liking. Add your text, copyright info, and watermark, and save as a jpg, png, or gif file.

That's it.. all done!

Saturday, July 4, 2009

♥ Right Round Baby ♥


Click the tag to preview at full size. This tutorial was written by Marta on July 3, 2009. Any resemblance to any other tutorial is coincidental. Do not copy and paste this tutorial elsewhere on the net. Absolutely NO Scripting and/or translating of this tutorial.

For this tutorial you will need:

PSP
Image of choice
Font of choice (I used Savoy)
Mask of choice
ScrapKit *Hotel Chocolat Suite - Peanut Butter Cup* by Ivory of Ivory's Designz.
You can purchase it HERE.

I am using the artwork of Jennifer Janesko, you can find her licensed art at CILM.

Let's get started:

Open a new image 550x550 and background set to white. Copy & paste paper10 as a new layer. Open mask of choice, Layers/New Mask Layer/From Image and find the mask in the drop down list. Delete mask layer, and merge group. Adjust/Add Noise/Set to Random 83%.

Copy & paste GlitterCircle1 as a new layer. Copy & paste GlitterCircle2 as a new layer and resize so it's a little smaller than the GlitterCircle1 layer. Adjust/Add Noise/Set to 30% on the GlitterCircle2 layer only.

Copy & paste Frame2 as a new layer, and resize by 50%. Copy & paste your image of choice and move under the frame layer. Using your Magic Wand, click inside the frame, Selections/Modify/Expand by 3 and hit Delete on your image layer. Add drop shadow to frame.

Add any additional flowers, bows, ribbons, butterflies, or elements of your choice.

Crop or resize to your liking. Add your text, copyright info, and watermark, and save as a jpg, png, or gif file.

That's it.. all done!

Friday, July 3, 2009

♥ Born 'N Bred American ♥


Click the tag to preview at full size. This tutorial was written by Marta on July 1, 2009. Any resemblance to any other tutorial is coincidental. Do not copy and paste this tutorial elsewhere on the net. Absolutely NO Scripting and/or translating of this tutorial.

For this tutorial you will need:

PSP
Tube of choice
Font of choice (I used TarquiniusPlus Book)
ScrapKit *American Proud* by Marie of Sky Scraps Designs.
You can purchase it HERE.

I am using the artwork of Elias Chatzoudis, you can find his licensed art at MPT.

Let's get started:

Open a new image 500x500 and background set to white.

Copy & paste Deco9 as a new layer, resize, and move to the left side of canvas. Image/Mirror Image/Flip and position as desired.

Copy & paste Firework1 as a new layer and leave in center of canvas.

Copy & paste Frame2 as a new layer and resize. Copy & paste paper2 as a new layer, resize by 50%, and move under the frame layer. Copy & paste your tube of choice and position. Add drop shadow to frame and tube layers. Using your Magic Wand, click inside the frame layer, and hit delete on the paper layer.

Add any additional flowers, bows, ribbons, or elements of your choice.

Crop or resize to your liking. Add your text, copyright info, and watermark, and save as a jpg, png, or gif file.

That's it.. all done!

♥ Three Awards ♥

I received the following awards from:
Bev of HorsePlay's Pasture.

Thank you sweetie!!


Feel free to take these awards from me if you don't have them.