Saturday, February 28, 2009

♥ Star Quality ♥


Click the tag to preview at full size. This tutorial was written by Marta on February 28, 2009. Any resemblance to any other tutorial is coincidental. Do not copy and paste this tutorial elsewhere on the net. Absolutely NO Scripting and/or translating of this tutorial.

For this tutorial you will need:

PSP
Tube(s) or Image(s) of choice
Font of choice (I used MC Twinkle Star)
Mask - Becky_Mask022
Xenofex2 - Constellation
ScrapKit *Magic of the Stars* by Tina of Tina's Magical World.
You can purchase it HERE.

I am using the artwork of Selina Fenech, you can find her licensed art at CILM.

Let's get started:

Open a new image 550x550 and background set to white. Copy & paste paper2 as a new layer. Open Becky_Mask022, Layers/New Mask Layer/From Image and find the mask in the drop down list. Delete mask layer, and merge group. Effects/Texture Effects/Weave/Set to Gap Size/2, Width/7, Opacity/3, Weave & Gap Color/#FFFFFF, Fill gaps checked.

Copy & paste doodlestars1 as a new layer. Effects/Xenofex 2/Constellation/Settings/Star Field/Keep original image. Add drop shadow. Duplicate. Image/Mirror/Image/Flip. Copy & paste circle_starframe3 as a new layer.

Copy & paste stars_doubleframe1 as a new layer and resize as needed. Copy & paste paper5 as a new layer. Copy & paste your tubes or images as new layers, and place in both starframes. Using you Magic Wand, click inside both frames, Selection/Modify/Expand by 5/Selections/Invert and hit Delete on your paper and tube layers. Copy & paste starbow4 as a new layer and place at the center bottom of the largest starframe. Add drop shadow to the frames, tubes/images, and bow.

Add any additional ribbons, flowers, butterflies, or elements of your choice.

Crop or resize to your liking. Add your text, copyright info, and watermark, and save as a jpg, png, or gif file.

That's it.. all done!

Tuesday, February 24, 2009

♥ Midnight At The Oasis ♥


Click the tag to preview at full size. This tutorial was written by Marta on February 24, 2009. Any resemblance to any other tutorial is coincidental. Do not copy and paste this tutorial elsewhere on the net. Absolutely NO Scripting and/or translating of this tutorial.

For this tutorial you will need:

PSP
Tube of choice
Font of choice (I used VTKS Dear Love)
Teresa's TagTemplate7 - You can download HERE
Mask - WSL_Mask291 - You can download from Chelle's blog HERE
ScrapKit *Madame Midnight* by Brandi of Grunge & Glitter Scraps.
You can purchase it HERE.

I am using the artwork of Elias Chatzoudis, you can find his licensed art at MPT.

Let's get started:

Open Teresa's TagTemplate7, Image/Resize/by 75%/All layers checked. Shift + D to duplicate and close out the original. Delete the watermark layer. Click on the circle layer, Selections/Float/Defloat/Modify/Smooth by 10. Open new raster layer, and floodfill with a color of your choice, I used #DBA521. Copy & paste paper 15 as a new layer, and move above the journalblock layer. Click on the journalblock, Selections/Float/Defloat/Modify/Smooth by 10. Select the paper15 layer, and hit Delete. X out all layers except for the three mat layers. Merge. Selections/Float/Defloat/Modify/Smooth to 10. Keep selected. Copy & paste paper11 as a new layer. Copy & paste your tube as a new layer. Image/Resize/by 130%. Move to desired position, and hit Delete on the paper11 and tube layers. Add drop shadow to your circle, journalblock, mat, frames, and tube layers. I didn't use the template flowers or change the color of the frames, but if you do, just follow the steps above. X-out the white background and merge visible.

Copy & paste paper1 as a new layer. Open WSL_Mask291, Layers/New Mask Layer/From Image and find the mask in the drop down list. Delete mask layer, and merge group. Move to the right side of your image and move under the framed layer. Open new raster layer, and floodfill with color of your choice, I used #DBA521. Open WSL_Mask291, Layers/New Mask Layer/From Image and find the mask in the drop down list. Delete mask layer, and merge group. Move to the left side of your image.

Add any additional candles, bows, ribbons, buttons, flowers, butterflies, or elements of your choice.

Crop or resize to your liking. Add your text, copyright info, and watermark, and save as a jpg, png, or gif file.

That's it.. all done!

Sunday, February 22, 2009

♥ Springtime ♥


Click the tag to preview at full size. This tutorial was written by Marta on February 22, 2009. Any resemblance to any other tutorial is coincidental. Do not copy and paste this tutorial elsewhere on the net. Absolutely NO Scripting and/or translating of this tutorial.

For this tutorial you will need:

PSP
Tube of choice
Font of choice (I used QwitcherBychen)
Mask - WSL_Mask287 - You can download from Chelle's blog HERE
ScrapKit *Welcome Spring* by Missy of Scraps With Attitude.
You can purchase it HERE.

I am using the artwork of Barbara Jensen, you can find her licensed art HERE.

Let's get started:

Open a new image 500x500 and background set to white. Copy & paste paper3 as a new layer. Open WSL_Mask287, Layers/New Mask Layer/From Image and find the mask in the drop down list. Delete mask layer, and merge group. Effects/Texture Effects/Weave/Set to Gap Size/2, Width/7, Opacity/3, Weave & Gap Color/#FFFFFF, Fill gaps checked.

Copy & paste the CuteFrame as a new layer. Copy & paste paper14 as a new layer, and move under the frame layer. Copy & paste your tube as a new layer, and move under the frame layer. Copy & paste flowers1 as a new layer. Resize as needed. Using your Magic Wand, click inside the frame, Selections/Modify/Expand by 5/Selections/Invert and hit Delete on the flowers, tube and paper layers. Add drop shadow to the frame, flowers, and tube layers and merge.

Copy & paste doodle 1 as a new layer. Resize. Add drop shadow. Duplicate. Image/Mirror/Image/Flip and move under the frame layers. Copy & paste the flowerpot as a new layer, add drop shadow, and move to the right side of the frame. Copy & paste wordart1 as a new layer, resize, add drop shadow, and move to the top of the frame. Copy & paste the heart and heart1 as new layers, resize, add drop shadow, and move to the left bottom of the frame.

Add any additional ribbons, buttons, flowers, butterflies, or elements of your choice.

Crop or resize to your liking. Add your text, copyright info, and watermark, and save as a jpg, png, or gif file.

That's it.. all done!

♥ Triple Award ♥


Rules for this award:

1: Must pass it on to up to 10 other bloggers.
2: Link back to the blogger who gave you the award.
3: Link to the bloggers you award it to.

♥ Friendship Award ♥


This was given to me by Lori of Crazy Lady Scraps. Thank you so much hun.

Now I get to pick 5 friends to give this award to, I'm terrible at choosing only 5 lol...

1. Dark Yarrow - Fall3n Angel Scrapz
2. Chantal - ChaDesignz
3. Jill - Created by Jill
4. Kelly - Angel's Designz
5. Deep - Deep's DesignZ

Tuesday, February 17, 2009

♥ Just Peachy ♥


Click the tag to preview at full size. This tutorial was written by Marta on February 17, 2009. Any resemblance to any other tutorial is coincidental. Do not copy and paste this tutorial elsewhere on the net. Absolutely NO Scripting and/or translating of this tutorial.

For this tutorial you will need:

PSP
Tubes of choice
Font of choice (I used Plus de Vagues NF)
EC5 Impact - Perspective Shadow
Mura's Meister - Copies
mysticincdesigntemplate2 by Debbie of Mystic Inc Design, download HERE
ScrapKit *Peach n'Cream* by Tina of Saphira's World.
You can purchase it HERE.

I am using the artwork of Jennifer Janesko, you can find her licensed art at CILM.

Let's get started:

Open up the template, Shift + D to duplicate. Close the original. Image/Canvas Size/Change size to 550x550, placement Center. New raster layer and fill with #FFFFFF, move this layer to the bottom, and delete the copyright layer.

Copy & paste flower5 as a new layer. Add drop shadow. Effects/Mura's Meister/Copies/Set to Encircle/Set Number to 8, ShiftX to 60, and ShiftY to 50. Leave all other settings.

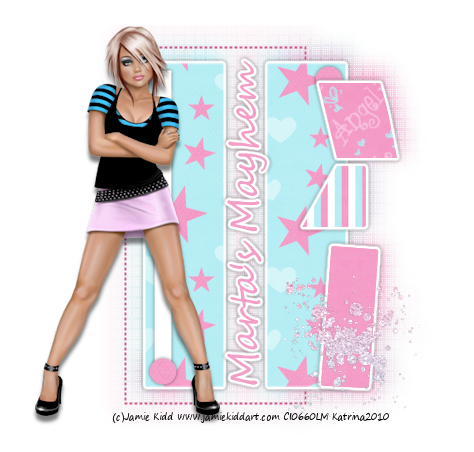
Copy & paste paper1 as a new layer. Image/Rotate/Left 90 degrees. Click on the large rectangle, Selections/Float/De Float/Modify/Smooth/Set both to 10/Invert and hit Delete on the paper1 layer. Delete the original large rectangle. Copy & paste paper7 as a new layer. Copy & paste your tube as a new layer, Image/Mirror and position on the last rectangle. Click on the triple rectangles, Selections/Float/De Float/Modify/Smooth/Set both to 10/Invert and hit Delete on your paper and tube layers. Delete the original triple rectangles. Effects/EC5-Impact/Perspective Shadow/Settings/Drop Shadow Lowest on both layers. Working on your tube layer, Adjust/Hue and Saturation/Colorize/Set to H/18, S/98 and lower the opacity to 69%.

Copy & paste bow1 as a new layer and move to the center of the triple rectangles. Copy & paste label2 as a new layer and move to the bottom of the triple rectangles. Copy & paste the hatbox as a new layer and move to the bottom middle of the triple rectanges. Copy & paste your tube as a new layer and move to the left side of the triple rectangles. Add drop shadow to all layers.

Add any additional ribbons, buttons, flowers, butterflies, stars, staples, or elements of your choice.

Crop or resize to your liking. Add your text, copyright info, and watermark, and save as a jpg, png, or gif file.

That's it.. all done!

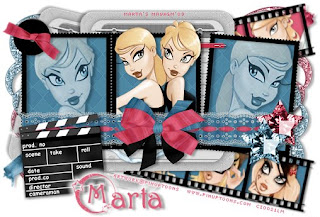
♥ On Film ♥


Click the tag to preview at full size. This tutorial was written by Marta on February 16, 2009. Any resemblance to any other tutorial is coincidental. Do not copy and paste this tutorial elsewhere on the net. Absolutely NO Scripting and/or translating of this tutorial.

For this tutorial you will need:

PSP
Tubes of choice
Font of choice (I used 101! Star Lit Nght)
Film Strips - I have no idea where I got these, so unfortunately I can't supply.
ScrapKit *My Way* by Vassia of Vassia's Designs.
You can purchase it HERE.

I am using the artwork of PinUpToons, you can find his licensed art at CILM.

Let's get started:

Open a new image 550x400 and background set to white. Copy & paste stampframe3 as a new layer. Copy & paste paper19 as a new layer and move behind the frame layer. Copy & paste your tubes as new layers. On the tubes that are on frame 1 and 3, Adjust/Hue and Saturation/Colorize/Set to H/136, S/85. Change the blend mode to Screen and lower opacity to where you like. Add drop shadow to frame and all tube layers. Using your Magic Wand, click inside each frame, Selections/Modify/Expand by 4/Selections/Invert and hit Delete on the paper and tube layers. Merge.

Copy & paste doodle2 and doodle3 as a new layer. Position to each side of the frame. Merge these 2 layers. Add drop shadow. Duplicate. Image/Mirror/Image/Flip. Merge the doodle layers.

Copy & paste staplenote1 as a new layer. Add drop shadow. Duplicate. Working on the original layer, Image/Rotate/Right 13 degrees. Move these layers under the frame layer and position to your liking.

Copy & paste laceribbon1 as a new layer. Resize as needed and place at the bottom of the frame. Copy & paste bow1 as a new layer and place at the middle of the laceribbon. Add drop shadow to both layers.

Add any additional ribbons, buttons, flowers, butterflies, stars, staples, or elements of your choice.

Crop or resize to your liking. Add your text, copyright info, and watermark, and save as a jpg, png, or gif file.

That's it.. all done!