I’ve been tagged by Bev so here goes lol
THREE NAMES I GO BY:
Marta, Mar, Hey YOU
*****
THREE PLACES I HAVE LIVED:
Missouri, California, Idaho
*****
THREE THINGS I LIKE TO WATCH:
American Idol, Survivor, Lost
*****
THREE PLACES I HAVE BEEN:
North Carolina, Florida, Kansas
*****
THREE OF MY FAVOURITE FOODS:
Lasagna, Tacos, Pizza
*****
THREE THINGS I AM LOOKING FORWARD TO:
Winning the lotto, Visiting my daughter and family, Winning the lotto hehe
*****
THREE OF YOUR FAVORITE PEOPLE:
Traci, Jason, Lary
*****
THREE FAVORITE COLOURS:
Orange, Brown, Yellow
*****
THREE FAVORITE BOOKS:
Twilight series, The Stand, Boo
*****
THREE THINGS YOUR GOING TO DO TODAY:
I hurt my back, so ... Lay down, Sleep, and try to PSP
*****
PASS THIS ON TO 5 BLOGS TO FIND OUT
THREE THINGS ABOUT YOUR FRIENDS
(if you've already been tagged, dont worry about it, cause Im not lol)
Monday, July 27, 2009
Saturday, July 18, 2009
♥ The Ballerina ♥
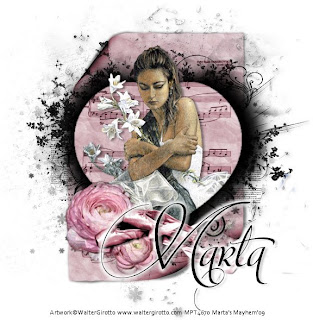
Click the tag to preview at full size. This tutorial was written by Marta on July 18, 2009. Any resemblance to any other tutorial is coincidental. Do not copy and paste this tutorial elsewhere on the net. Absolutely NO Scripting and/or translating of this tutorial.
For this tutorial you will need:
PSP
Tube or Image of choice
Font of choice (I used Mon Amour Script Pro)
ScrapKit *Black Swan* by Kat of KatNKDA Digital Art & Scraps.
You can purchase it HERE.
I am using the artwork of Walter Girotto, you can find his licensed art at MPT.
Let's get started:
Open Element11, Shift + D, and close out the original. Copy & paste Element21Shadowed as a new layer, and move under Element 11.
Copy & paste Element03 as a new layer and move to the bottom left of the heart frame.
Copy & paste Element08Shadowed as a new layer and place above the flower layer.
Add any additional flowers, bows, ribbons, or elements of your choice.
Crop or resize to your liking. Add your copyright info, and watermark, and save as a jpg, png, or gif file.
That's it.. all done!
Sunday, July 12, 2009
♥ Bronzed Blush ♥
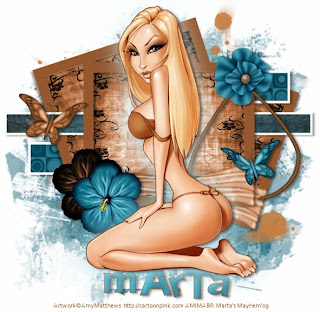
Click the tag to preview at full size. This tutorial was written by Marta on July 12, 2009. Any resemblance to any other tutorial is coincidental. Do not copy and paste this tutorial elsewhere on the net. Absolutely NO Scripting and/or translating of this tutorial.
For this tutorial you will need:
PSP
Tube of choice
Font of choice (I used Cerulean NF)
Mask -WynterMask1903082
Mask - Vix_Mask233 - You can download HERE.
ScrapKit *Cozy Choco Blues* by Foxy of Foxy's Designz.
You can purchase it HERE.
I am using the artwork of Amy Matthews, you can find her licensed art at AMI.
Let's get started:
Open a new image 600x600 and background set to white. Copy & paste Paper11 as a new layer. Open Vix_Mask233, Layers/New Mask Layer/From Image and find the mask in the drop down list. Delete mask layer, and merge group. New raster layer, floodfill with a color to match your tube, I used #C47D42. Open WynterMask1903082 or mask of choice (grungy mask works best), Layers/New Mask Layer/From Image and find the mask in the drop down list. Delete mask layer, and merge group.
Copy & paste frame2 as a new layer. Using your magic want, click inside the frame, Selections/Expand by 5. Open new raster layer and move under the frame layer, and copy & paste paper9, right click on canvas, and paste into selection. I colorized the frame and paper to match my tube. Add drop shadow to frame and merge these two layers. Duplicate 2 times. On the original frame layer, Image/Rotate/Right/10 degrees. On the first copy, Image/Rotate/Left/18 degrees. See tag above for placement.
Using your Rectangle Tool, width set to 5, foreground/#000000, background/set to pattern and find the paper/papers of choice. I used paper1 and paper10. See my tag above for placement and size.
Add any additional flowers, bows, ribbons, butterflies, or elements of your choice.
Crop or resize to your liking. Add your copyright info, and watermark, and save as a jpg, png, or gif file.
That's it.. all done!
Saturday, July 11, 2009
♥ Award ♥
This awesome award was given to me by Lori @
Thank you so much, Lori.
This award is dedicated to a world without borders in the world of Scrap, by people who always give you:
Help
Gratitude
Respect
Solidarity
Affection
Love
Trust
Friendship
Imagination
The rules for this award is to pass on to 5 friends blogs who you know that has these qualities so I'm passing this award to the following 5 blogs...
Katrina @ Charmed Illusions
Nicole @ Simply Irresistible Scraps
Jillann @ Jillann's Creations
Star @ Stargazer Musings
Stayyseee @ Stayyseee Productionzz
Labels:
Awards
Friday, July 10, 2009
♥ Gothic Beauty ♥
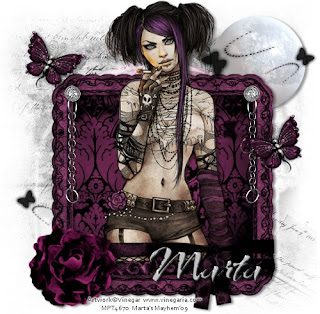
Click the tag to preview at full size. This tutorial was written by Marta on July 10, 2009. Any resemblance to any other tutorial is coincidental. Do not copy and paste this tutorial elsewhere on the net. Absolutely NO Scripting and/or translating of this tutorial.
For this tutorial you will need:
PSP
PSP
Tube or Image of choice
Font of choice (I used KolkerBrush)
Mask of choice
Eye Candy 3.1 - Glass
ScrapKit *Gothic Butterfly* by Kat of KatNKDA Digital Art & Scraps.
You can purchase it HERE.
I am using the artwork of Vinegar, you can find her licensed art at MPT.
Let's get started:
Open a new image 500x500 and background set to white. Copy & paste Paper06 as a new layer. Open mask of choice, Layers/New Mask Layer/From Image and find the mask in the drop down list. Delete mask layer, and merge group.
Copy & paste Element27 as a new layer. Copy & paste your tube or image of choice and move under the frame layer. Copy & paste paper02 as a new layer and move under the tube/image layer. Using your Magic Wand, click inside the frame, Selections/Modify/Expand by 8 and hit Delete on your tube/image layer and your paper layer. Add drop shadow to frame and tube.
Copy & paste Element37 as a new layer and move to the upper right side of the frame and move under the paper layer.
Copy & paste Element37 as a new layer and move to the upper right side of the frame and move under the paper layer.
Add your text and add a drop shadow. My settings are: V/2, H/4, Opacity/40, Blur/5. Effects/EC 3.1/Change settings to: Bevel Width/10, Bevel Shape/Mesa, Raw Spacing/20, Raw Thickness/10, Opacity/50, Refraction/2, Color/#FFFFFF, Highlight Brightness & Sharpness/100, Direction/127, Inclination/39.
Add any additional flowers, bows, ribbons, butterflies, or elements of your choice.
Crop or resize to your liking. Add your copyright info, and watermark, and save as a jpg, png, or gif file.
That's it.. all done!
Thursday, July 9, 2009
♥ Beautiful Dreamer ♥
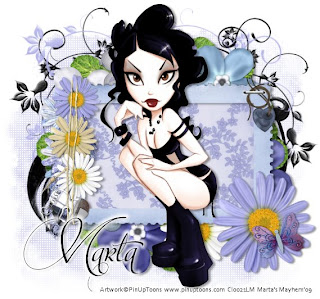
Click the tag to preview at full size. This tutorial was written by Marta on July 9, 2009. Any resemblance to any other tutorial is coincidental. Do not copy and paste this tutorial elsewhere on the net. Absolutely NO Scripting and/or translating of this tutorial.
For this tutorial you will need:
PSP
Tube of choice
Font of choice (I used Mon Amour Script Pro)
Mask - Becky_Mask022
For this tutorial you will need:
PSP
Tube of choice
Font of choice (I used Mon Amour Script Pro)
Mask - Becky_Mask022
Brushes of choice
ScrapKit *Beautiful Dreamer* by Crystal of Scrappy Inspirations.
You can purchase it HERE.
I am using the artwork of PinUpToons, you can find his licensed art at CILM.
Let's get started:
Open a new image 600x500 and background set to white. Open a new raster layer and floodfill with #B2B2E9. Open Becky_Mask022, Layers/New Mask Layer/From Image and find the mask in the drop down list. Delete mask layer, and merge group. Effects/Texture Effects/Weave/Set to Gap size/2, Width/2, Opacity/1, Weave & Gap color/#FFFFFF, Fill gaps checked.
Copy & paste the wreath as a new layer, resize as needed. Add drop shadow.
Copy & paste Frame02 as a new layer. Copy & paste Paper06 as a new layer and move under the frame layer. Using your Magic Wand, click inside the frame, Selections/Modify/Expand by 5 and hit Delete on your paper layer. Add drop shadow to frame.
Copy & paste Daisy03 as a new layer and move to the lower right side of the frame. Copy & paste the Butterfly as a new layer and move above the daisy. Add drop shadow to both layers.
Copy & paste Daisy03 as a new layer and move to the lower right side of the frame. Copy & paste the Butterfly as a new layer and move above the daisy. Add drop shadow to both layers.
Click on the white background, add new raster layer, and add any brushes you like.
Add any additional flowers, bows, ribbons, buttons, brads, or elements of your choice.
Crop or resize to your liking. Add your text, copyright info, and watermark, and save as a jpg, png, or gif file.
That's it.. all done!
Add any additional flowers, bows, ribbons, buttons, brads, or elements of your choice.
Crop or resize to your liking. Add your text, copyright info, and watermark, and save as a jpg, png, or gif file.
That's it.. all done!
Tuesday, July 7, 2009
♥ Endless Love ♥
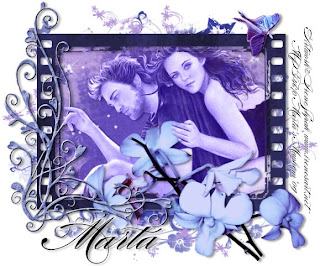
Click the tag to preview at full size. This tutorial was written by Marta on July 7, 2009. Any resemblance to any other tutorial is coincidental. Do not copy and paste this tutorial elsewhere on the net. Absolutely NO Scripting and/or translating of this tutorial.
For this tutorial you will need:
PSP
Tube or Image of choice
Font of choice (I used Burgues Script)
Mask of choice
ScrapKit *Grizabella's Dreamland* by Kat of KatNKDA Digital Art & Scraps.
You can purchase it HERE.
I am using the artwork of Irene Shpak, you can find her licensed art at MPT.
Let's get started:
Open a new image 600x500 and background set to white. Copy & paste paper19 as a new layer. Open mask of choice, Layers/New Mask Layer/From Image and find the mask in the drop down list. Delete mask layer, and merge group.
Copy & paste Element15 as a new layer. Copy & paste your tube or image of choice and move under the frame layer. Copy & paste paper15 as a new layer and move under the tube/image layer. Using your Magic Wand, click inside the frame, Selections/Modify/Expand by 8 and hit Delete on your tube/image layer and your paper layer. Add drop shadow to frame and tube.
Copy & paste Element 12 as a new layer and move to the lower right side of the frame. Copy & paste Element31 as a new layer and move to the left side of the frame. Add drop shadow to both layers.
Add any additional flowers, bows, ribbons, butterfly, or elements of your choice.
Crop or resize to your liking. Add your text, copyright info, and watermark, and save as a jpg, png, or gif file.
That's it.. all done!
Add any additional flowers, bows, ribbons, butterfly, or elements of your choice.
Crop or resize to your liking. Add your text, copyright info, and watermark, and save as a jpg, png, or gif file.
That's it.. all done!
Sunday, July 5, 2009
♥ Glitter N Grape ♥
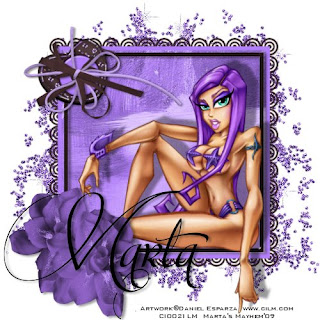
Click the tag to preview at full size. This tutorial was written by Marta on July 4, 2009. Any resemblance to any other tutorial is coincidental. Do not copy and paste this tutorial elsewhere on the net. Absolutely NO Scripting and/or translating of this tutorial.
For this tutorial you will need:
PSP
Tube of choice
Font of choice (I used Mon Amour Script Pro)
ScrapKit *Grape Smoothie* by Ivory of Ivory's Designz.
You can purchase it HERE.
I am using the artwork of Daniel Esparza, you can find his licensed art at CILM.
Let's get started:
Open a new image 500x500 and background set to white.
Copy & paste Glitter2 as a new layer and resize. Image/Mirror. Image/Flip.
Copy & paste Frame3 as a new layer, and resize by 50%. Copy & paste paper2 as a new layer and move under the frame layer. Copy & paste your tube of choice and move under the frame layer. Using your Magic Wand, click inside the frame, Selections/Modify/Expand by 10 and hit Delete on your tube layer and paper layer. Add drop shadow to frame and tube.
Add any additional flowers, bows, ribbons, or elements of your choice.
Crop or resize to your liking. Add your text, copyright info, and watermark, and save as a jpg, png, or gif file.
That's it.. all done!
Saturday, July 4, 2009
♥ Right Round Baby ♥
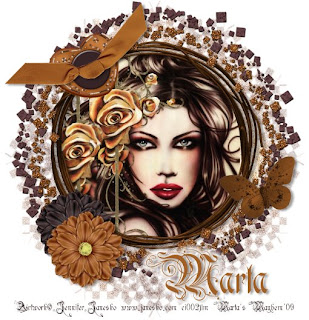
Click the tag to preview at full size. This tutorial was written by Marta on July 3, 2009. Any resemblance to any other tutorial is coincidental. Do not copy and paste this tutorial elsewhere on the net. Absolutely NO Scripting and/or translating of this tutorial.
For this tutorial you will need:
PSP
Image of choice
Font of choice (I used Savoy)
Mask of choice
ScrapKit *Hotel Chocolat Suite - Peanut Butter Cup* by Ivory of Ivory's Designz.
You can purchase it HERE.
I am using the artwork of Jennifer Janesko, you can find her licensed art at CILM.
Let's get started:
Open a new image 550x550 and background set to white. Copy & paste paper10 as a new layer. Open mask of choice, Layers/New Mask Layer/From Image and find the mask in the drop down list. Delete mask layer, and merge group. Adjust/Add Noise/Set to Random 83%.
Copy & paste GlitterCircle1 as a new layer. Copy & paste GlitterCircle2 as a new layer and resize so it's a little smaller than the GlitterCircle1 layer. Adjust/Add Noise/Set to 30% on the GlitterCircle2 layer only.
Copy & paste Frame2 as a new layer, and resize by 50%. Copy & paste your image of choice and move under the frame layer. Using your Magic Wand, click inside the frame, Selections/Modify/Expand by 3 and hit Delete on your image layer. Add drop shadow to frame.
Add any additional flowers, bows, ribbons, butterflies, or elements of your choice.
Crop or resize to your liking. Add your text, copyright info, and watermark, and save as a jpg, png, or gif file.
That's it.. all done!
Friday, July 3, 2009
♥ Born 'N Bred American ♥
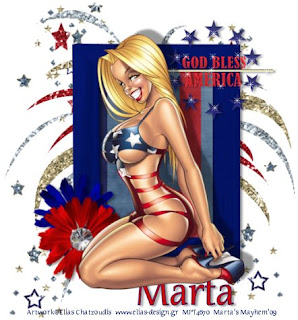
Click the tag to preview at full size. This tutorial was written by Marta on July 1, 2009. Any resemblance to any other tutorial is coincidental. Do not copy and paste this tutorial elsewhere on the net. Absolutely NO Scripting and/or translating of this tutorial.
For this tutorial you will need:
PSP
Tube of choice
Font of choice (I used TarquiniusPlus Book)
ScrapKit *American Proud* by Marie of Sky Scraps Designs.
You can purchase it HERE.
I am using the artwork of Elias Chatzoudis, you can find his licensed art at MPT.
Let's get started:
Open a new image 500x500 and background set to white.
Copy & paste Deco9 as a new layer, resize, and move to the left side of canvas. Image/Mirror Image/Flip and position as desired.
Copy & paste Firework1 as a new layer and leave in center of canvas.
Copy & paste Frame2 as a new layer and resize. Copy & paste paper2 as a new layer, resize by 50%, and move under the frame layer. Copy & paste your tube of choice and position. Add drop shadow to frame and tube layers. Using your Magic Wand, click inside the frame layer, and hit delete on the paper layer.
Add any additional flowers, bows, ribbons, or elements of your choice.
Crop or resize to your liking. Add your text, copyright info, and watermark, and save as a jpg, png, or gif file.
That's it.. all done!
♥ Three Awards ♥
I received the following awards from:
Bev of HorsePlay's Pasture.
Thank you sweetie!!

Feel free to take these awards from me if you don't have them.
Bev of HorsePlay's Pasture.
Thank you sweetie!!


Feel free to take these awards from me if you don't have them.
Labels:
Awards
Subscribe to:
Comments (Atom)
