Saturday, January 31, 2009

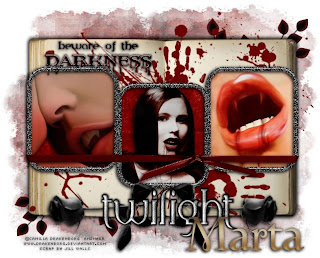
♥ Twilight ♥


Click the tag to preview at full size. This tutorial was written by Marta on January 31, 2009. Any resemblance to any other tutorial is coincidental. Do not copy and paste this tutorial elsewhere on the net. Absolutely NO Scripting and/or translating of this tutorial.

For this tutorial you will need:

PSP
Tube/s or Image/s of choice
Font of choice (I used Zephyr/Twilight)
Mask - Becky_Mask022
ScrapKit *Twilight* by Jill of created-by-jill.
You can purchase it HERE.

I am using the artwork of Camilla Drakenborg, you can find her licensed art AMI.

Let's get started:

Open a new image 550x400 and background set to white. Copy & paste paper6 as a new layer. Open Becky_Mask022, Layers/New Mask Layer/From Image and find the mask in the drop down list. Delete mask layer, and merge group.

Copy & paste book1 as a new layer, add drop shadow. Copy & paste frame6 as a new layer. Copy & paste paper10 as a new layer and move under the frame layer. Copy & paste your tubes or images as new layers, and move under the frame layer. Using your Magic Wand, click inside each frame, Selections/Modify/Expand by 3/Selections/Invert and hit Delete on the tube/images and paper layers. Add drop shadow to frame and tubes. Merge these layers.

Add any additional bows, butterflies, hearts, handprints, blood splatter, or elements of your choice.

Crop or resize to your liking. Add your text, copyright info, and watermark, and save as a jpg, png, or gif file.

That's it.. all done!
Friday, January 30, 2009

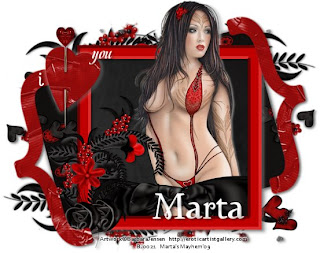
♥ I Heart You ♥


Click the tag to preview at full size. This tutorial was written by Marta on January 30, 2009. Any resemblance to any other tutorial is coincidental. Do not copy and paste this tutorial elsewhere on the net. Absolutely NO Scripting and/or translating of this tutorial.

For this tutorial you will need:

PSP
Tube of choice
Font of choice (I used Twilight)
Mask - Vix_Mask_Valentine13 - You can download HERE
Mega Colab Kit *I Heart You* by Rachel of Captivated Visions and Deanna's Dreams.
You can purchase it HERE

I am using the artwork of Barbara Jensen, you can find her licensed art at Erotic Artist Gallery.

Let's get started:

Open a new image 600x500 and background set to white. Copy & paste paper10 as a new layer. Open Vix_Mask_Valentine13, Layers/New Mask Layer/From Image and find the mask in the drop down list. Delete mask layer, and merge group. Adjust/Add Noise/Set to 30.

Copy & paste frame11 as a new layer. Copy & paste paper14 as a new layer and move under the frame layer. Copy & paste your tube as a new layer and move under the frame layer. If you want your tube outside the frame, like my tag, click on your tube layer, Selections/Select All/Float/Defloat. Using your Eraser Tool, click on your frame layer, and erase any parts that are on top of your tube. When you have all parts erased, add drop shadow to your frame and tube layers. Merge these three layers.

Copy & paste the brackets, resize, add drop shadow. Move to each side of the frame layer. Using your Selection Tool, draw out a rectangle that fits between the 2 brackets, keep selected, and add new raster layer, copy paper16 and paste into selection, select none. Add drop shadow. Image/Rotate/Left 15 degrees on both brackets and paper layer. Position to your liking.

Copy & paste the flowers, duplicate. Image/Flip/Image/Mirror and move to desired position.

Add any additional bows, butterflies, hearts, doodles, or elements of your choice.

Crop or resize to your liking. Add your text, copyright info, and watermark, and save as a jpg, png, or gif file.

That's it.. all done!
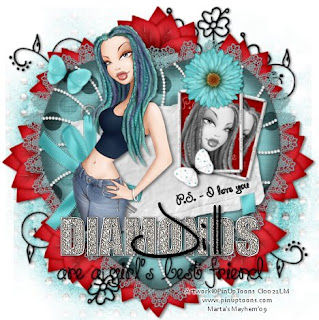
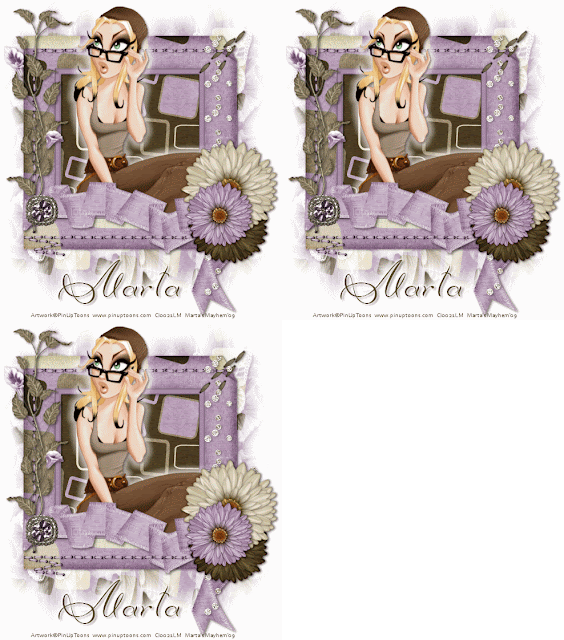
♥ Be Jeweled ♥


Click the tag to preview at full size. This tutorial was written by Marta on January 30, 2009. Any resemblance to any other tutorial is coincidental. Do not copy and paste this tutorial elsewhere on the net. Absolutely NO Scripting and/or translating of this tutorial.

For this tutorial you will need:

PSP
Tube of choice
Font of choice (I used DianaCTT)
Mask - Zuzzanna_mask 36 - You can download from her site HERE
EC4-Gradient Glow
DSB Flux/Bright Noise
Animation Shop
ScrapKit *Seeing Squares* by Impy of Impy Provisations
You can purchase it HERE

I am using the artwork of PinUpToons, you can find his licensed art at CILM.

Let's get started:

Open a new image 500x600 and background set to white. Copy & paste paper7 as a new layer. Open Zuzzanna_mask36, Layers/New Mask Layer/From Image and find the mask in the drop down list. Delete mask layer, and merge group.

Copy & paste frame2 as a new layer. Copy & paste paper6 as a new layer and move under frame layer. Copy & paste your tube of choice and move between the frame and paper layers. Using your Magic Wand, click inside the frame, Selections/Modify/Expand by 5/Selections/Invert and hit Delete on the tube and paper layers. Add drop shadow to your tube and frame layers.

Copy & paste stitch1 as a new layer. Add drop shadow. Duplicate 2 times. Position the stitch layers so it is on 3 sides of the frame by rotating left or right. Copy & paste the foliage, ribbon2, sequinsquare2, flower1, flower2, flower3 and any additional elements of your choice. Add drop shadow.

Crop or resize to your liking. Add your text, copyright info, and watermark.

Copy & paste sequinborder2 as a new layer. Move to the right of the frame. Using your Eraser tool, erase any that is on the outside of the frame. Rename this layer Sequin1. Duplicate 2 more times and rename Sequin2 and Sequin3. In your layer palette, they should be in order 1, 2, 3. On the Sequin1 layer, Effects/DSB Flux/Bright Noise/Set to Mix/Intensity 22. On the Sequin2 layer, Effects/DSB Flux/Bright Noise/Set to Mix/Intensity 32. On the Sequin3 layer, Effects/DSB Flux/Bright Noise/Set to Mix/Intensity 42. Now we're going to take our tag over to Animation Shop.

Make sure layers Sequin2 and Sequin3 layers are x'ed out. Right click on your tag, Copy Merged and paste as a new animation in animation shop. Go back to PSP, make sure Sequin1 and Sequin3 are x'ed out. Right click on your tag, Copy Merged and right click on your tag in AS, paste after current frame. Go back to PSP, make sure Sequin1 and Sequin2 are x'ed out. Right click on your tag, Copy Merged and right click on your tag in AS, paste after current frame. You should now have 3 frames in AS. Click on the View Animation in the toolbar to make sure the animation is working and that you are satisfied with your result. File/Save As and save your new tag.

That's it.. all done!

Thursday, January 29, 2009

♥ Bed of Daisies ♥


This tutorial was written by Marta on January 29, 2009. Any resemblance to any other tutorial is coincidental. Do not copy and paste this tutorial elsewhere on the net. Absolutely NO Scripting and/or translating of this tutorial.

For this tutorial you will need:

PSP
Tube of choice
Font of choice (I used Ingrid Darling)
Mask - Becky_Mask022
Penta/Color Dot
ScrapKit *Spring Dream* by Crystal of Scrappy Inspirations
You can purchase it HERE.

I am using the artwork of Jennifer Janesko, you can find her licensed art at CILM.

Let's get started:

Open a new image 550x550 and background set to white. Copy & paste paper20 as a new layer. Open Becky_Mask022, Layers/New Mask Layer/From Image and find the mask in the drop down list. Delete mask layer, and merge group. Effects/Penta/Color Dot/Set to default settings.

Copy & paste frame2 as a new layer. Adjust/Hue/Saturation/Colorize/Set to h - 201, s - 95. Copy & paste paper12 as a new layer and move under the frame layer. Copy & paste your tube and position to your liking. Using your Magic Wand, click inside the frame, Selections/Modify/Expand by 5/Selections/Invert and hit Delete on your paper and tube layer Add drop shadow to your frame and tube layers.

Add any additional bows, butterflies, hearts, doodles, or elements of your choice.

Crop or resize to your liking. Add your text, add drop shadow, Adjust/Add Noise/Set to 30. Add copyright info, and watermark, and save as a jpg, png, or gif file.

That's it.. all done!

♥ Beauty 'n the Blues ♥


This tutorial was written by Marta on January 29, 2009. Any resemblance to any other tutorial is coincidental. Do not copy and paste this tutorial elsewhere on the net. Absolutely NO Scripting and/or translating of this tutorial.

For this tutorial you will need:

PSP
Tube of choice
Font of choice (I used Ingrid Darling)
Mask - sg_scraps_edge by Essex Girl, you can download it HERE
VM Extravaganza/Plastic Surgery
ScrapKit *Feelin Stitchy* by Miss Foxy of Miss Foxy's Designs.
You can purchase it HERE.

I am using the artwork of Jamie Kidd, you can find his licensed art at CILM.

Let's get started:

Open a new image 550x550 and background set to white. Copy & paste paper1 as a new layer. Open sg_scraps_edge, Layers/New Mask Layer/From Image and find the mask in the drop down list. Delete mask layer, and merge group. Effects/VM Extravaganza/Plastic Surgery/Set to default settings.

Copy & paste frame5 as a new layer. Copy & paste paper10 as a new layer and move under the frame layer. Copy & paste your tube, add drop shadow, and move between the frame and paper layer. Using your Magic Wand, click inside the frame, Selections/Modify/Expand by 5/Selections/Invert and hit Delete on your tube and paper layers. Add drop shadow to the frame layer and merge these layers. Duplicate. On the original frame layer, Image/Rotate/Right 15 degrees and position to your liking.

Uning your Rectangle Tool, Foreground null, and Background to a paper or color of your choice, draw out several rectangles and add drop shadow. I added the brackets to each side of one of the rectangles, and also added buttons on each side. Add drop shadow.

Add any additional bows, butterflies, wordart, or elements of your choice.

Crop or resize to your liking. Add your text, copyright info, and watermark, and save as a jpg, png, or gif file.

That's it.. all done!
Wednesday, January 28, 2009

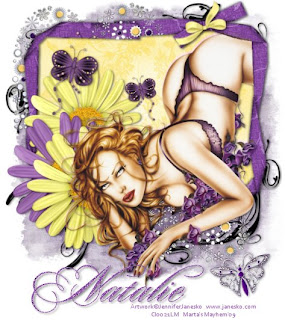
Showing off a tag....


I just finished making this tag and I was going to tut it, but I didn't think I could explain it good enough for anyone to follow lol, but I'm happy with it and wanted to show it off.

I'm using a template by ButterflyFlutterby "Record Template" and you can download it HERE.

The ScrapKit is called *My Passion* by Vassia and is sold at Paradise4Scrappers.

Tuesday, January 27, 2009

♥ Affair of the Heart ♥


This tutorial was written by Marta on January 27, 2009. Any resemblance to any other tutorial is coincidental. Do not copy and paste this tutorial elsewhere on the net. Absolutely NO Scripting and/or translating of this tutorial.

For this tutorial you will need:

PSP
Tube of choice
Font of choice (I'm using Jack Bisio)
Filters Unlimited/Render
JustDreaminTutorials_Template#3 - I can't find her blog, so I will supply until I can find out where her site is.
ScrapKit *A Love Affair* by Shelle of Shellez Creations
You can purchase it HERE.

I am using the artwork of Armando Huerta, you can find his licensed art MPT.

Supplies - HERE

Let's get started:

Open JustDreaminTutorials_Template#3, Shift D, and close out the original. Delete copyright layer. Click on the circle layer, Selections/Select All/Float/Defloat/Modify/Smooth/Set to 10. Copy & paste paper03 as a new layer, Selections/Invert/hit Delete on the paper layer.

Copy & paste the eyelet and place it in the middle of the circle layer, and add the pink bow at the bottom. Add drop shadow to both layers.

Copy & paste your tube of choice. Duplicate your tube. Set your background to #F8DBE6 and your foreground to #000000. Working on the original tube layer, Effects/Filters Unlimited 2/Render/Clouds(fore/background color)/Use default settings. Move this layer up and a little to the right of the tube. Adjust/Blur/Gaussian Blur/Set to 5.

Copy & paste doodles 04, 05, and 01 and position to your liking. Add drop shadow to all.

Add any additional flowers, wordart, or other elements of your choice.

Crop or resize to your liking. Add your text, copyright info, and watermark, and save as a jpg, png, or gif file.

That's it.. all done!
Monday, January 26, 2009

♥ Blue Jeans ♥


This tutorial was written by Marta on January 26, 2009. Any resemblance to any other tutorial is coincidental. Do not copy and paste this tutorial elsewhere on the net. Absolutely NO Scripting and/or translating of this tutorial.

For this tutorial you will need:

PSP
Tube/s of choice
Font of choice (I'm using Jean Splice, Bank Gothic, and Bilbo)
Mask - Becky_Mask023
ScrapKit *Blue Jean Baby* by Toni of Toni's Scraparoni
You can purchase it HERE.

I am using the artwork of Keith Garvey, you can find his licensed art at MPT.

Let's get started:

Open a new image 550x500 and background set to white. Copy & paste paper04 as a new layer. Open Becky_Mask023, Layers/New Mask Layer/From Image and find the mask in the drop down list. Delete mask layer, and merge group. Effects/Texture Effects/Weave/Set to Gap Size - 1, Width - 1, Opacity - 1, Weave and Gap Color - white, Fill Gaps checked.

Copy & paste frame02 as a new layer. Selections/Modify/Expand/Set to 3/Selections/Invert. Copy & paste paper02 as a new layer and move under frame layer. Add two tubes for each part of the frame and move under the frame layer. Add drop shadow to tubes. When satisfied with placement, hit Delete on the frame, tubes, and paper layers. Change the blend mode on your tubes to Overlay. Merge the frame, tube, and paper layers.

Copy & paste bow03 and place at top left of frame. Duplicate/Image/Mirror. I added the saying "Blue Jeans Baby". I used Bank Gothic for the Blue and Baby, and used Bilbo, a scripty font for Jeans. Copy & paste belt02 as a new layer, and add your choice of flowers, or the ones I used, flowers03 and 04. Add drop shadow to all.

Copy & paste doodle03 as a new layer. Duplicate/Image/Mirror/Flip. I think I used the doodle three times, but that is up to you. Add a slight drop shadow to all doodle layers.

Copy & paste your third tube as a new layer. Add drop shadow and place in the middle of the frame layer.

Add any additional bows, butterflies, wordart, or elements of your choice.

Crop or resize to your liking. Add your text, copyright info, and watermark, and save as a jpg, png, or gif file.

That's it.. all done!
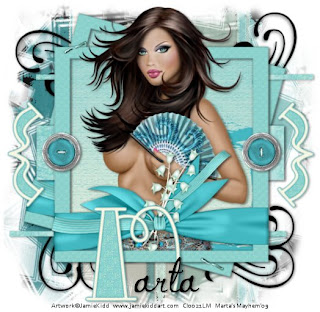
♥ Blossoms Galore ♥


This tutorial was written by Marta on January 26, 2009. Any resemblance to any other tutorial is coincidental. Do not copy and paste this tutorial elsewhere on the net. Absolutely NO Scripting and/or translating of this tutorial.

For this tutorial you will need:

PSP
Tube of choice
Font of choice (I'm using Dael Calligraphy)
Mask - WSL_Mask82 - You can download from Chelle's blog HERE
Mura's Meister/Copies
ScrapKit *Lotus Blossoms* by Denise a.k.a. Scrappy Redhead
You can purchase it HERE.

I am using the artwork of Jennifer Janesko, you can find her licensed art at CILM.

Let's get started:

Open a new image 550x550 and background set to white. Copy & paste paper15 as a new layer. Open your mask, Layers/New Mask Layer/From Image and find the mask in the drop down list. Delete mask layer, and merge group. Adjust/Add Noise/Random/Set to 30/Monochrome checked.

Copy & paste flower5 as a new layer. Effects/Mura's Meister/Copies with the following settings: Change to encircle/Number 6. Copy & paste flower6 as a new layer. Effects/Mura's Meister/Copies with the following settings: Change to encircle/Number 6. Image/Free Rotate/Rotate/Right 30 degrees. Add drop shadow to both layers.

Copy & paste frame1 as a new layer. Using your magic wand, click inside the frame, Selections/Modify/Expand by 5/Selections/Invert. Copy & paste paper15 as a new layer and hit Delete on the paper layer. Add drop shadow to frame. Copy & paste frame2 as a new layer, and resize as necessary so it covers just the outer part of frame1. See my tag for reference. Add drop shadow. Add your tube and place it between the two frame layers. Add drop shadow to tube. When happy with placement, merge the frames, paper, and tube layers.

Copy & paste fan2 as a new layer. Image/Free Rotate/Rotate/Left 15 degrees and add drop shadow. Copy & paste flower5, flower6, and flower8 as a new layer, resize by 50%, and arrange to the bottom left of the frame. When happy, add drop shadows to all flower layers.

Add any bows, butterflies, dragonflies, wordart, or elements of your choice.

Crop or resize to your liking. Add your text, copyright info, and watermark, and save as a jpg, png, or gif file.

That's it.. all done!

Saturday, January 24, 2009

♥ Beary Hot Chocolate ♥


This tutorial was written by Marta on January 25, 2009. Any resemblance to any other tutorial is coincidental. Do not copy and paste this tutorial elsewhere on the net. Absolutely NO Scripting and/or translating of this tutorial.

For this tutorial you will need:

PSP
Tube/s or Image/s of choice
Font of choice (Diana CTT)
Mask of choice (I used WynterMask1903082)
Xero/Fritillary
Filters Unlimited 2/Render
Filters Unlimited 2/Photo Aging Kit
Eye Candy 3.1/HSB Noise
ScrapKit *Hot Chocolate* by Ann of Angelic Scraps
You can purchase it HERE.

I am using the artwork of PinUpToons, you can find his licensed art at CILM.

Let's get started:

Open a new image 550x550 and background set to white. Copy & paste paper2 as a new layer. Open your mask, Layers/New Mask Layer/From Image and find the mask in the drop down list. Delete mask layer, and merge group. Effects/Xero/Fritillary/Set to G - 4, A - 30, T - 77, V - 86. Effects/Texture Effects/Weave/Set to Gap Size 1, Width - 7, Opacity - 3, Weave & Gap Colors - White, and Fill Gaps checked.

Copy & paste the Scalloped Frame as a new layer. Using your Magic Wand, click inside the frame. Selections/Modify/Expand by 5/Selections/Invert Copy & paste paper4 as a new layer, move under your frame layer, and hit Delete on the paper layer. Add drop shadow to the frame layer, and merge these layers. Copy & paste the Cardboard Hearts and place in the middle of the frame. Add drop shadow.

Copy & paste the diary and move to the left top of the frame, add your wordart of choice. Effects/Filters Unlimited 2/Photo Aging Kit/Coffee Ring/Set to Size - 100, H - 119, V - 128. Add drop shadow.

Copy & paste doodle. Duplicate. and position to your liking. Add drop shadow. Effects/Eye Candy 3.1/HSB Noise/Set to Hue - 5, Saturation - 30, Brightness - 40, Opacity - 0, Lump Width - 5, Lump Height - 5, Random Seed - 1.

Copy & paste your tube of choice and one of the bears from the kit. Duplicate your tube. Set your background to #4C3432 and your foreground to #FFFFFF. Working on the original tube layer, Effects/Filters Unlimited 2/Render/Clouds(fore/background color)/Set to Cloud - 65, Gamma - 97. Move this layer up and a little to the right of the tube. Do this for the teddy bear as well.

Add any flowers, bows, doodles, wordart, or other elements of your choice.

Crop or resize to your liking. Add your text, copyright info, and watermark, and save as a jpg, png, or gif file.

That's it.. all done!
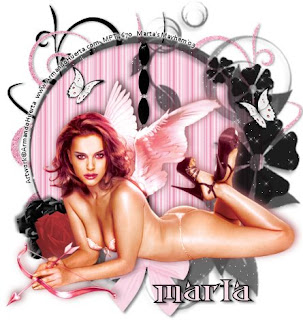
♥ Beautiful Day ♥


This tutorial was written by Marta on January 24, 2009. Any resemblance to any other tutorial is coincidental. Do not copy and paste this tutorial elsewhere on the net. Absolutely NO Scripting and/or translating of this tutorial.

For this tutorial you will need:

PSP
Tube/s or Image/s of choice
Font of choice (I'm using New Romantics)
Mask - WSL_Mask194 - You can download from Chelle's blog HERE
Penta/Color Dot
ScrapKit *A Beautiful Day* by Brooke of Butterfly Blush Designs.
You can purchase it HERE.

I am using the artwork of Mattt Poser, you can find his licensed art at AMI.

Let's get started:

Open a new image 500x500 and background set to white. Copy & paste paper11 as a new layer. Open WSL_Mask194, Layers/New Mask Layer/From Image and find the mask in the drop down list. Delete mask layer, and merge group.

Copy & paste frame1 as a new layer. Image/Rotate/Right 90. Duplicate, Image/Mirror. Move the 2 frame layers, so it looks like 3 frames, see my tag for reference. Copy & paste your tube, I used 3 different tubes, but you can use 1 tube or 1 image, etc., as a new layer and position to your liking. Copy & paste paper2 as a new layer and move under the tube and frame layers. Click inside each frame, which will actually be 2, Selections/Modify/Expand by 5, Selections/Invert and hit Delete on the tubes and paper layers. Add drop shadow to both frames.

Working on your tube layers, Effects/Penta/Color Dot/Set to default settings. Apply to all tube layers. Change your blend mode to overlay or a setting of your choice.

Don't forget to add those cute birdies (I love these) and add any flowers, bows, doodles, wordart, or other elements of your choice.

Crop or resize to your liking. Add your text, copyright info, and watermark, and save as a jpg, png, or gif file.

That's it.. all done!
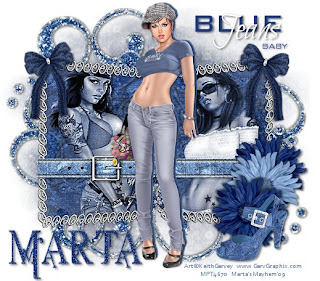
♥ Plum Beautiful ♥


This tutorial was written by Marta on January 24, 2009. Any resemblance to any other tutorial is coincidental. Do not copy and paste this tutorial elsewhere on the net. Absolutely NO Scripting and/or translating of this tutorial.

For this tutorial you will need:

PSP
Tube or Image of choice
Font of choice (I'm using Ambiance BT Swash)
Mask - WSL_Mask216 - You can download from Chelle's blog HERE
Vix_Mask_Valentine13 - You can download from Vix's site HERE
ScrapKit *Hello Beautiful* by Danielle of DMK Designs.
You can purchase it HERE.

I am using the artwork of Jennifer Janesko, you can find her licensed art at CILM.

Let's get started:

Open a new image 600x500 and background set to white. Copy & paste paper25 as a new layer. Open WSL_Mask216, Layers/New Mask Layer/From Image and find the mask in the drop down list. Delete mask layer, and merge group.

Copy & paste paper27 as a new layer. Open Vix_Mask_Valentine13, Layers/New Mask Layer/From Image and find the mask in the drop down list. Delete mask layer, and merge group. Adjust/Add Noise/Set to Random, 30%, and Monochrome checked.

Copy & paste frame01 as a new layer, I resized 50%. Duplicate. Image/Rotate/Right 15 and position. I used an image, but you can use tubes & papers of choice. Using your Magic Wand, click inside both frames, Selection/Modify/Expand by 5, Selections/Invert and hit Delete on your image, tube, or paper layers. Add drop shadow to both frames, and merge these layers.

Add any flowers, buttons, doodles, or other elements of your choice.

Crop or resize to your liking. Add your text, copyright info, and watermark, and save as a jpg, png, or gif file.

That's it.. all done!
Friday, January 23, 2009

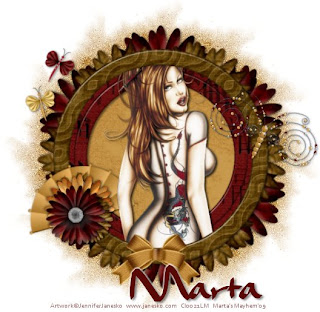
♥ Love In Bloom ♥


This tutorial was written by Marta on January 22, 2009. Any resemblance to any other tutorial is coincidental. Do not copy and paste this tutorial elsewhere on the net. Absolutely NO Scripting and/or translating of this tutorial.

For this tutorial you will need:

PSP
Tube of choice
Font of choice (I'm using Martina)
Mask - WSL_Mask86 - You can download from Chelle's blog HERE
ScrapKit *Mom I Love You* by Kimmie of Kimmie's Kreations.
You can purchase it HERE.

I am using the artwork of Jennifer Janesko, you can find her licensed art at CILM.

Let's get started:

Open a new image 550x550 and background set to white. Copy & paste paper17 as a new layer. Open WSL_Mask86, Layers/New Mask Layer/From Image and find the mask in the drop down list. Delete mask layer, and merge group. Duplicate/Image/Mirror/Flip. Position to your liking and merge the 2 mask layers. Effects/Textures/Blinds/Set to Width - 2, Opacity - 34, Color - White, and light from left/top checked.

Copy & paste frame4 as a new layer. Image/Rotate/Left 13 and move up and to the left. Copy & paste frame2 as a new layer. Copy & paste your tube and move under frame2. Copy & paste paper4 as a new layer, and move under your tube layer. Using your Magic Wand, click inside frame2, Selections/Modify/Expand by 5, Selections/Invert and hit Delete on your tube and paper layer. Add drop shadow to your tube, frame2, and frame4.

Copy & paste flower2 as a new layer and move to the left of the frame. Copy & paste flower3 as a new layer, and place above flower2, and resize so it is a littler smaller than flower3. Add drop shadow to both flower layers. See my tag for reference.

Copy & paste heartnflower1, Image/Flip. Copy & paste heartnflower3 as a new layer. Add drop shadow to both layers.

Add any additional flowers, doodles, or other elements of your choice.

Crop or resize to your liking. Add your text, copyright info, and watermark, and save as a jpg, png, or gif file.

That's it.. all done!
Thursday, January 22, 2009

♥ Be Mine ♥


This tutorial was written by Marta on January 21, 2009. Any resemblance to any other tutorial is coincidental. Do not copy and paste this tutorial elsewhere on the net. Absolutely NO Scripting and/or translating of this tutorial.

For this tutorial you will need:

PSP
Tube of choice
Font of choice (I'm using DianaCTT)
Tramages/Tow The Line - You can grab the filter HERE
Vix_Mask_Valentine13 - You can download from her site HERE
ScrapKit *Hearts Desire* by Yvette of Misfits Scrapz.
You can download it HERE.

I am using the artwork of Elias Chatzoudis, you can find his licensed art at MPT.

Let's get started:

Open a new image 550x550 and background set to white. Copy & paste paper12 as a new layer. Open Vix_Mask_Valentine13, Layers/New Mask Layer/From Image and find the mask in the drop down list. Delete mask layer, and merge group. Adjust/Add Noise/Set to 30.

Copy & paste frame 4 as a new layer. Using your Magic Wand, click inside the frame, Selections/Modify/Expand by 5. Copy & paste paper2 as a new layer, move under frame layer. Add your tube, Selections/Invert and hit Delete on the paper and tube layers. Add drop shadow to your tube and frame layers, and merge these 3 layers only. Duplicate. Working on the original layer, Adjust/Blur/Gaussian/Set to 10. Effects/Tramages/Tow the line/Default settings.

Add any flowers, doodles, or other elements of your choice.

Crop or resize to your liking. Add your text, copyright info, and watermark, and save as a jpg, png, or gif file.

That's it.. all done!
Saturday, January 17, 2009

♥ Pink Seduction ♥


This tutorial was written by Marta on January 18, 2009. Any resemblance to any other tutorial is coincidental. Do not copy and paste this tutorial elsewhere on the net. Absolutely NO Scripting and/or translating of this tutorial.

For this tutorial you will need:

PSP
Tube of choice
Font of choice (I'm using Zapfino Linotype Three)
Missy's Template#141 - You can download from her blog HERE
Mask - WSL_Mask105 - You can download from Chelle's blog HERE
Mura's Meister/Copies
ScrapKit *GIRLY PINK* by Brooke of Butterfly Blush Designs.
You can purchase it HERE.

I am using the artwork of Barbara Jensen, you can find her licensed art HERE.

Let's get started:

Open Missy's template #141, Shift D, and close out the original. Delete copyright layer. Image/Canvas Size/500x600., placement center. Click on the circle layer, Selections/Select All/Float/Defloat/Modify/Smooth/Set to 10. Copy & paste paper12 as a new layer, Selections/Invert/hit Delete. Click on the frame background layer, Selections/Select All/Float/Defloat/Modify/Smooth/Set to 10. Copy & paste paper8 as a new layer, Selections/Invert/hit Delete. I didn't change the frame color, but if you would like, do the same as above. Using your Magic Wand, click on each of the frames. Selections/Modify/Expand by 3, Add your tube/s behind the frame, when happy with placement, hit Delete on the tube layer. Add a drop shadow to the frame and tube layers. I didn't use the wordart, the small circles, and the hearts, but if you do, do the same as above.

Copy & paste flower8 as a new layer. Effects/Mura's Meister/Copies with the following settings: Change to encircle/Number 12/Shift X & Y to 70. Add drop shadow and move this layer just above the white background.

Copy & paste paper2 as a new layer. Open WSL_Mask105, Layers/New Mask Layer/From Image and find the mask in the drop down list. Delete mask layer, and merge group. Move this just above the white background.

Add any brushes, wordart, or elements of your choice.

Crop or resize to your liking. Add your text, copyright info, and watermark, and save as a jpg, png, or gif file.

That's it.. all done!
♥ Country Girl ♥


This tutorial was written by Marta on January 17, 2009. Any resemblance to any other tutorial is coincidental. Do not copy and paste this tutorial elsewhere on the net. Absolutely NO Scripting and/or translating of this tutorial.

For this tutorial you will need:

PSP
Tubes of choice
Font of choice (I'm using Children Play and International Palms)
Mask - WSL_Mask105 - You can download from Chelle's blog HERE
EC4 - Gradient Glow
ScrapKit *COUNTRY CORNER* by Krissy of Krissy's Scraps.
You can purchase it HERE.

I am using the artwork of Keith Garvey, you can find his licensed art at MPT.

Let's get started:

Open a new image 600x600, set background to white. Copy & paste paper8 as a new layer. Open WSL_Mask105, Layers/New Mask Layer/From Image and find the mask in the drop down list. Delete mask layer, and merge group.

Copy & paste frame4 as a new layer. Using your magic wand, click inside each frame. Selections/Select All/Float/Defloat/Selections/Modify/Expand by 5. Selections/Invert. Using paper 10, copy & paste as a new layer and move under the frame layer. Add your tubes and add a drop shadow. When your tubes are positioned, hit Delete on the paper layer and on all 3 tube layers. Add drop shadow to your frame. On your tube layers, Effects/Photo Effects/Film and Filters/Set to muted reds, custom, color black, and density set to 30. Add drop shadow to your tube layers. Merge your frame, paper layer, and tube layers.

Copy & paste the glitterdoodle2 as a new layer, move it to the bottom of your tag. Duplicate/Image/Mirror/Image/Flip and move to the top of your tag. Add any brushes, wordart, elements of your choice.

Crop or resize to your liking. Add your text, add drop shadow and EC4 Gradient Glow with width set to 5, color white. Add your copyright info, and watermark, and save as a jpg, png, or gif file.

That's it.. all done!
♥ Berry Beautiful ♥


This tutorial was written by Marta on January 17, 2009. Any resemblance to any other tutorial is coincidental. Do not copy and paste this tutorial elsewhere on the net. Absolutely NO Scripting and/or translating of this tutorial.

For this tutorial you will need:

PSP
Tube of choice
Font of choice (I'm using Chantilly Lace NF)
Mask - WSL_Mask117 - You can download from Chelle's blog HERE
EC4 - Gradient Glow
ScrapKit *BERRY DELIGHT* by Brandi of Grunge and Glitter Scraps.
You can purchase it HERE.

I am using the artwork of Joe Pekar, you can find his licensed art at CILM.

Let's get started:

Open a new image 500x500, set background to white. Copy & paste paper11 as a new layer. Open Becky_Mask022, Layers/New Mask Layer/From Image and find the mask in the drop down list. Delete mask layer, and merge group. Effects/Texture Effects/Weave/Set all to 1, weave & gap color to #ffffff, and Fill gaps checked.

Copy & paste frame1 as a new layer. Using your magic wand, click inside each frame. Selections/Select All/Float/Defloat/Selections/Modify/Expand by 4. Selections/Invert. Using paper 11, copy & paste as a new layer and move under the frame layer. Add your tubes or I used the same tube but colorized two of them. When your tubes are positioned, hit Delete on the paper layer and on all 3 tube layers. Merge your frame, paper layer, and tube layers.

Copy & paste the flower doodle and doodle2 as new layers and position. Copy & paste wordart2 and position above the frame. See my tag for reference. Add drop shadow to the wordart and apply EC4 Gradient Glow with the width set to 5, color white.

Crop or resize to your liking. Add your text, add drop shadow and EC4 Gradient Glow with same settings, copyright info, and watermark, and save as a jpg, png, or gif file.

That's it.. all done!
Friday, January 16, 2009

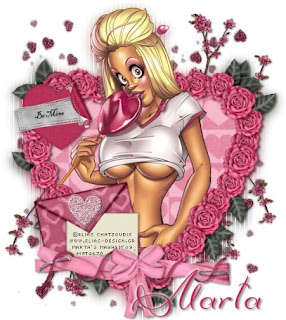
♥ Love Hurts ♥


This tutorial was written by Marta on January 16, 2009. Any resemblance to any other tutorial is coincidental. Do not copy and paste this tutorial elsewhere on the net. Absolutely NO Scripting and/or translating of this tutorial.

For this tutorial you will need:

PSP
Tube of choice
Template #57 by Yvette of Essence Of Creativity, you can download it HERE
Font of choice (I'm using WaterBrush)
Mask - Becky_Mask022
ScrapKit *BROKEN WING* by Tamara of Just A Girls Designs.
You can purchase it HERE.

I am using the artwork of Alayna Magnan, you can find her licensed art at CILM.

Let's get started:

Open Yvette's template #57, Shift D, and close out the original. Delete raster layer 1. Image/Canvas Size/650x500., placement center. Click on the rounded rectangle layer, Selections/Select All/Float/Defloat/Modify/Smooth/Set to 10. Copy & paste Background3 as a new layer, Selections/Invert/hit Delete. Click on the heart layer, Selections/Select All/Float/Defloat/Modify/Smooth/Set to 10. Copy & paste Background1 as a new layer, Selections/Invert/hit Delete. Add a drop shadow to both layers with the settings, V 0, H 0, Opacity 69, Blur 14. Click on the heart layer, Image/Free Rotate/Rotate Left 14.

Copy & paste roses2 and the pagewrap and position to your liking. Copy & paste the ropeheart, Adjust/Hue and Saturation/Colorize/H 239, S 53/Adjust/Brightness and Contrast/Brightness/Contrast/Set to B -33, C 9. Place at the knot of the pagewrap.

Copy & paste black and red splatters and the flowing hearts. Add any additional doodles, wordart, or elements of your choice. I typed the words LOVE HURTS and set to soft light.

For the wings, I used the angelwings and using the Selection tool, set to rectangle, I drew a rectangle around the right side and to the middle, basically separating them in half, and cut and paste as a new layer. Resize and position them on the back of the tube. Using this tube it worked very well, not sure how it would be using different tubes, just have to try it and see.

Click on your white background layer, and copy & paste background8 as a new layer. Open Becky_Mask022, Layers/New Mask Layer/From Image and find the mask in the drop down list. Delete mask layer, and merge group. Duplicate/Image/Mirror/Flip. Effects/Texture Effects/Weave/Set all to 1, weave & gap color to #ffffff, and Fill gaps checked to both layers and merge these 2 layers.

Crop or resize to your liking. Add your text, copyright info, and watermark, and save as a jpg, png, or gif file.

That's it.. all done!
Thursday, January 15, 2009

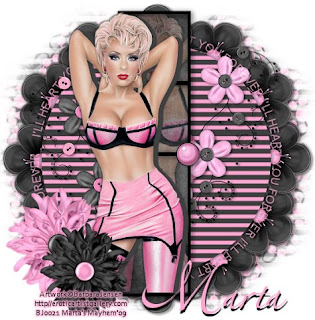
♥ Vintage ♥


This tutorial was written by Marta on January 15, 2009. Any resemblance to any other tutorial is coincidental. Do not copy and paste this tutorial elsewhere on the net. Absolutely NO Scripting and/or translating of this tutorial.

For this tutorial you will need:

PSP
Tube/s or image/s of choice
Font of choice (I'm using Anna Nicole NF)
Mask - LettersMaskByMarta (included in supplies)
Gradient - VintageByMarta (included in supplies)
ScrapKit *VINTAGE LOVE* by Krissy of Krissy's Scraps.
You can purchase it HERE.

Supplies - HERE

I am using the artwork of Jennifer Janesko, you can find her licensed art at CILM.

Let's get started:

Open a New Image at 550x550, set the background to white. New raster layer, Selections/Select All, Open the KSVLPaper2 Adjust/Hue and Saturation/Colorize/Set to H 31, S 46, Copy and paste into selection, Selections/Select None. Open the LettersMaskByMarta. Layers/New Mask Layer/From Image and find the mask in the drop down list. Delete mask layer, and merge group. Duplicate and merge these 2 layers. Effects/Texture Effects/Weave/Set all to 1, weave & gap color to #ffffff, and Fill gaps checked.

Copy & paste KSVLJournalingCluster1 as a new layer. Add drop shadow. Copy & paste KSVLEnvelope1 as a new layer. Image/Free Rotate/Rotate left 13. Move to the top left of the journaling cluster, add drop shadow. Copy & paste KSVLEnvelope2 as a new layer. Image/Free Rotate/Rotate right 13 and move the the bottom right of the journaling cluster. Move both envelope layers under the journaling cluster. When happy with position, add drop shadow to both envelope layers. Copy & paste KSVLwrap2, resize as needed, place to the left top of the journaling cluster, add drop shadow. Duplicate/Image/Mirror/Flip and move this to the right bottom.

KSVLEmbellished Double Frame1, resize by 50%, copy & paste as a new layer. Duplicate. X out the copy of the frame. Working on the original frame layer, using your Magic Wand, click inside the frames, Selections/Modify/Expand/Set to 5. Copy & paste KSVLpaper1 as a new layer, move under the frame layer, resize, Selections/Invert and hit Delete on your paper layer. Add drop shadow to frame layer. Merge these 2 layers. Image/Free Rotate/Rotate right 13.

Open your copy of the original frame layer, using your Magic Wand, click inside the frames, Selections/Modify/Expand/Set to 5. Copy & paste a paper of your choice and your images or tubes, resize, Selections/Invert and hit Delete on the tube/s, image/s, and paper layers. Add drop shadow to frame layer and merge.

I added KSVLOld Time Bloom 1 and 2 to the bottom left. See tag for reference.

Put the gradient into your gradient folder. Set to gradient as your background, and find VintageByMarta, and add your text. Add drop shadow.

Crop or resize to your liking. Add your copyright info, and watermark, and save as a jpg, png, or gif file.

That's it.. all done!
Wednesday, January 14, 2009

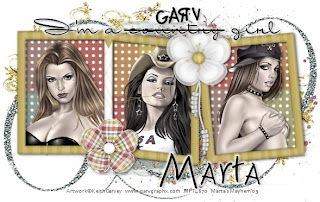
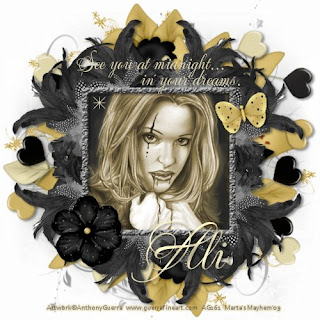
♥ Midnight Dreams ♥


This tutorial was written by Marta on January 14, 2009. Any resemblance to any other tutorial is coincidental. Do not copy and paste this tutorial elsewhere on the net. Absolutely NO Scripting and/or translating of this tutorial.

For this tutorial you will need:

PSP
Tube of choice
Font of choice (I'm using MeaCulpa)
Mask - SL-NewEonSabreMask
Mask - magicalcharms_splatter002
ScrapKit *MIDNIGHT DREAMS* by Ali of Designs by Ali.
You can purchase it HERE.

Supplies - HERE

I am using the artwork of Anthony Guerra, you can find his licensed art ot CILM.

Let's get started:

Copy & paste frame1 as a new layer. Open paper13 and paste as a new layer and move under the frame. Resize 50%. Add your tube, if you're using the same tube as I am or another black and white tube, Adjust/Hue and Saturation/Colorize/Set to h 30, s 66, add drop shadow and position under the frame layer. When satisfied, using your Magic Wand, click inside the frame, Selections/Modify/Expand by 5, Selections/Invert and hit Delete on your tube and paper layer. Add drop shadow to your frame, and merge all 3 layers.

Copy & paste decorated flower 2 as a new image. Duplicate/Image/Mirror/Flip. See my tag for reference. Copy & paste decorated flower 1 as a new layer. Position to your liking and add drop shadow to all 3 flower layers.

Click on your white layer, add new raster layer. Floodfill with black or you can use a paper from the kit. Open the SL-NewEonSabreMask, Layers/New Mask Layer/From Image and find the mask in the drop down list. Delete mask layer, and merge group.

Add new raster layer, and floodfill with #CEB367. Open the SL-NewEonSabreMask, Layers/New Mask Layer/From Image and find the mask in the drop down list. Delete mask layer, and merge group. Duplicate and position to your liking. Adjust/Add/Remove Noise/Add Noise/Set to Uniform 31 with monochrome on both of these mask layers.

I added butterfly2, and flower2 (which matches the paper I used under the frame. Add drop shadow. Add any additional doodles, wordart, or elements of your choice.

Crop or resize to your liking. Add your text, copyright info, and watermark, and save as a jpg, png, or gif file.

That's it.. all done!
Tuesday, January 13, 2009

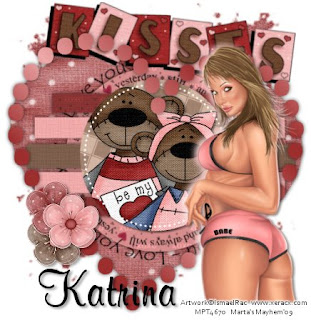
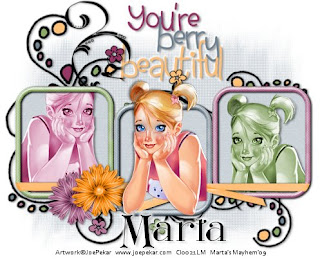
♥ Bear Kisses ♥


This tutorial was written by Marta on January 14, 2009. Any resemblance to any other tutorial is coincidental. Do not copy and paste this tutorial elsewhere on the net. Absolutely NO Scripting and/or translating of this tutorial.

For this tutorial you will need:

PSP
Tube/s of choice
Font of choice (I used MurphyScript)
Template 140 by Missy of Divine Intentions, you can download from her blog HERE
Template 125 by Ali of Designs by Ali, you can download from her blog HERE
MKMask1 by MandaK, you can download HERE under goodies
ScrapKit *BEE MINE* by Tracey of Soxsational Scraps.
You can purchase it HERE.

I am using the artwork of Ismael Rac, you can find his licensed art at MPT.

Let's get started:

Open up Template 140, Shift D, and close out the original. Image/Canvas Size/Set to 500x500/Center. Delete the by missy layer. Click on the thin rectangle1 layer, Selections/Float/Defloat, Selections/Modify/Smooth/Set both 10 with anti-alias and preserve corners checked. Open a paper of your choice, paste as new layer, Selections/Invert and hit Delete on this paper layer. Continue doing this on all layers of the template. On the circle layer, I added 2 bears from the kit. Add drop shadow to all layers, v - 0, h - 0, opacity 69, blur 14.

Open Ali's Template 125 and copy & paste raster layer 3, which is the dotted heart layer. Selections/Float/Defloat, Selections/Modify/Smooth/Set both 10 with anti-alias and preserve corners checked. Pick 2 colors from the kit, set to gradient, add new raster layer, and floodfill the dotted hearts. Add drop shadow.

Copy & paste paper 11 as a new image. Open the MKMask1 mask, Layers/New Mask Layer/From Image and find the mask in the drop down list. Delete mask layer, and merge group. Adjust/Add/Remove Noise/Add Noise/Set to Uniform 31 with monochrome.

Copy & paste your tube and add drop shadow. Add any doodles, wordart, or elements of your choice.

Crop or resize to your liking. Add your text, copyright info, and watermark, and save as a jpg, png, or gif file.

That's it.. all done!

Monday, January 12, 2009

♥ P.S. I Love You ♥


This tutorial was written by Marta on January 13, 2009. Any resemblance to any other tutorial is coincidental. Do not copy and paste this tutorial elsewhere on the net. Absolutely NO Scripting and/or translating of this tutorial.

For this tutorial you will need:

PSP
Tube/s of choice
Font of choice (I used Luna Bar)
Mask heartbycheri by Cheri
Mura's Meister/Copies
ScrapKit *P.S. I LOVE YOU* by Jill of createdbyjill.
You can purchase it HERE

Supplies - HERE

I am using the artwork of PinUpToons, you can find his licensed art at CILM.

Let's get started:
Open a New Image at 500x500, set the background to white. Copy & paste paper 6 as a new image. Open the heartbycheri mask, Layers/New Mask Layer/From Image and find the mask in the drop down list. Delete mask layer, and merge group. Duplicate Image/Flip Image/Mirror. Adjust/Add/Remove Noise/Add Noise/Set to Random 56 with monochrome checked to both mask layers.

Copy & paste flowerC from the kit. Effects/Mura's Meisters/Copies, set to encircle and change these settings only, Number 8, ShiftX 60, ShiftY 60. Copy & paste the laceheart as a new layer, and add a slight drop shadow. Copy & paste the journaltag3 as a new layer.

Open the frame 10, resize 30%, Adjust/Sharpness/Sharpen. Open you tube and place under the frame and open a paper of your choice, I used paper10. Using your Magic Wand, click inside the frame, Selections/Modify/Expand/Set to 2. Selections/Invert and press Delete on the tube and paper layers. Add drop shadow to tube and frame, and merge visible. Copy & paste this frame to your main image and place to your liking. Duplicate. On original frame layer, Image/Free Rotate/Rotate right 13 and move to the right of the top frame. See my tag for reference.

Copy & paste your tube and add drop shadow. Add any doodles, wordart, or elements of your choice.

Crop or resize to your liking. Add your text, copyright info, and watermark, and save as a jpg, png, or gif file.

That's it.. all done!
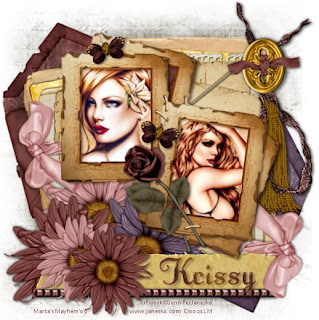
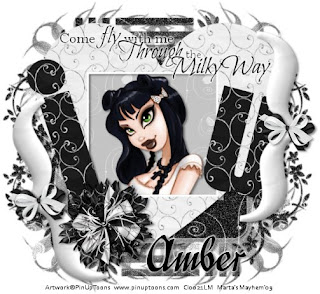
♥ Milky Way ♥


This tutorial was written by Marta on January 12, 2009. Any resemblance to any other tutorial is coincidental. Do not copy and paste this tutorial elsewhere on the net. Absolutely NO Scripting and/or translating of this tutorial.

For this tutorial you will need:

PSP
Tube/s of choice
Font of choice (I used Divina)
Mask sg_stencilled-flower-square-2 by Essex Girl HERE
Brackets by me
ScrapKit *MILKY WAY* by Amber of Bittersweet Designs.
You can purchase it HERE.

Supplies: HERE

I am using the artwork of PinUpToons, you can find his licensed art at CILM.

Let's get started:

Open a New Image at 600x600, set the background to white. Copy & paste the IHeartUFrame2 as a new image. Resize as needed. Copy & paste your tube and paper#5 from the kit. Place these under your frame layer. Using your Magic Wand, click inside the frame. Selections/Modify/Expand/Set to 5. Selections/Invert and press Delete on the tube and paper layers. Add drop shadow to tube and frame. X out your white background and merge visible.

Copy & paste flower1 and move to the left of your frame. Copy & paste bow9 and place above your flower layer. Copy & paste the brackets and place to your liking or see my tag for reference. I added bow to both brackets. Add any additional elements, wordart, doodles, etc. of your choice. Add drop shadow.

Click on your white bottom layer, copy and paste paper5 as a new raster layer. Open the sg_stencilled-flower-square-2 mask, Layers/New Mask Layer/From Image and find the mask in the drop down list. Delete mask layer, and merge group. Adjust/Add/Remove Noise/Add Noise/Set to Random 56 with monochrome checked.

Crop or resize to your liking. Add your text, copyright info, and watermark, and save as a jpg, png, or gif file.

That's it.. all done!
Sunday, January 11, 2009

♥ Cocoa Kissed ♥


Click the tag to preview at full size.

Tut is now hosted at Double Vision PSP


Click the banner above to get to the tut.

Hugs, Marta

Saturday, January 10, 2009

♥ Love Bug ♥


Click the tag to preview at full size.

Tut is now hosted at Double Vision PSP


Click the banner above to get to the tut.

Hugs, Marta

Thursday, January 8, 2009

Hi everyone! I just got my blog up but still having trouble making my own layouts, so this will continue to be a "work in progress"! hehe I'm also going to start writing tutorials again, and will be adding them here. Hopefully there will be something here soon.

Hugs, Marta