Sunday, June 28, 2009
Wednesday, June 24, 2009
♥ Pinked Love ♥
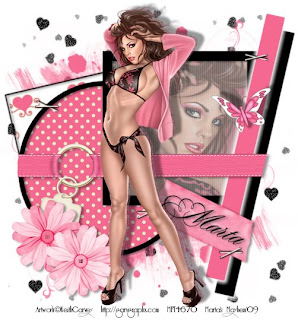
Click the tag to preview at full size.
If you would like this tag, please email me HERE. Please put "Pinked Love" in the subject line when requesting. Thank you!
ScrapKit used *Floral Love* by Brooke of Butterfly Blush.
You can purchase it HERE.
I am using the artwork of Keith Garvey, you can find his licensed art at MPT.
Labels:
Tag Offers
Wednesday, June 17, 2009
♥ Smiling Eyez ♥
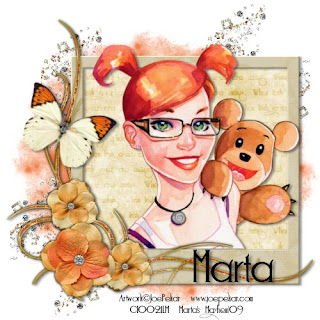
Click the tag to preview at full size. This tutorial was written byMarta on June 17, 2009. Any resemblance to any other tutorial is coincidental. Do not copy and paste this tutorial elsewhere on the net. Absolutely NO Scripting and/or translating of this tutorial.
For this tutorial you will need:
PSP
Tube of choice
Font of choice (I used Suciellid)
Mask - WSL_Mask75 - You can download HERE.
ScrapKit *Tangerine Dream* by Lynne of Baby Cakes Scraps.
Let's get started:
Open a new image 500x500 and background set to white. Copy & paste paper2 as a new layer. Open WSL_Mask75, Layers/New Mask Layer/From Image and find the mask in the drop down list. Delete mask layer, and merge group.
Copy & paste ScatterDust as a new layer and move to the right side of canvas. Image/Mirror Image/Flip and position as desired.
Copy & paste SquareFrame as a new layer. Copy & paste paper20 as a new layer and move under the frame layer. Open new raster layer. Using your text tool, background set to #000000, type out a saying that covers the size of the frame. When finished, set blend mode to overlay. Copy & paste your tube of choice and position. Add drop shadow. Using your Magic Wand, click inside the frame layer, and hit delete on the paper, tube, and text layers.
Add any additional flowers, bows, butterflies, or elements of your choice.
Crop or resize to your liking. Add your text, copyright info, and watermark, and save as a jpg, png, or gif file.
That's it.. all done!
Tuesday, June 16, 2009
♥ TAG OFFER ♥ - Tantalizing Tangerine

Click the tag to preview at full size.
If you would like this tag, please email me HERE. Please put "Tantalizing Tangerine" in the subject line when requesting. Thank you!
ScrapKit used *Tangerine Dream* by Lynne of Baby Cakes Scraps. You can purchase it HERE.
I am using the artwork of Jennifer Janesko, you can find her licensed art at CILM.
Labels:
Tag Offers
Monday, June 15, 2009
♥ Laugh Often ♥
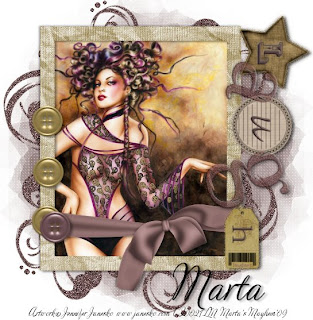
Click the tag to preview at full size. This tutorial was written byMarta on June 15, 2009. Any resemblance to any other tutorial is coincidental. Do not copy and paste this tutorial elsewhere on the net. Absolutely NO Scripting and/or translating of this tutorial.
For this tutorial you will need:
PSP
Image or Tube of choice
Font of choice (I used Adios Script Pro)
Mask - Vix_Mask109 - You can download HERE.
ScrapKit *Laugh Often* by Jillann of Jillann's Scraps.
You can purchase it HERE.
I am using the artwork of Jennifer Janesko, you can find her licensed art at CILM.
Let's get started:
Open a new image 600x600 and background set to white. Copy & paste paper1 as a new layer. Open Vix_Mask109, Layers/New Mask Layer/From Image and find the mask in the drop down list. Delete mask layer, and merge group.
Copy & paste doodle1 as a new layer and move to the left side of your canvas. Duplicate. Image/Mirror, Image/Flip, move as needed.
Copy & paste frame1 as a new layer. Copy & paste your image/tube of choice as a new layer and move under the frame layer. Using your Magic Wand, click inside the frame, and hit Delete on your image/tube layer. Add drop shadow to your frame and tube layers. If using a tube, you will need to use a paper behind your tube.
Copy & paste your Laugh WordArt as a new layer. Image/Rotate/Left 90 degrees.
Add any additional flowers, bows, buttons, stars, or elements of your choice.
Crop or resize to your liking. Add your text, copyright info, and watermark, and save as a jpg, png, or gif file.
That's it.. all done!
Sunday, June 14, 2009
Friday, June 12, 2009
Wednesday, June 10, 2009
♥ Indian Summer ♥
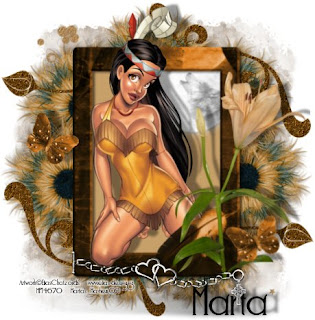
Click the tag to preview at full size. This tutorial was written byMarta on June 10, 2009. Any resemblance to any other tutorial is coincidental. Do not copy and paste this tutorial elsewhere on the net. Absolutely NO Scripting and/or translating of this tutorial.
For this tutorial you will need:
PSP
Tube of choice
Font of choice (I used Suciellid)
Mask - Becky_Mask022
Mura's Meister -Copies
ScrapKit *Jacob* by Jo of Creationz by Jo
You can purchase it HERE.
I am using the artwork of Elias Chatzoudis, you can find her licensed art at MPT.
Let's get started:
Open a new image 500x500 and background set to white. Copy & paste paper5 as a new layer. Open Becky_Mask022, Layers/New Mask Layer/From Image and find the mask in the drop down list. Delete mask layer, and merge group.
Copy & paste CupidsFlower2 as a new layer. Resize by 75%. Add drop shadow. Set to Encircle and change number to 7, and leave all other settings.
Copy & paste frame2 as a new layer and resize by 45%. Pick a color from you tube, I used #E6A35D. Adjust/Hue and Saturation/Colorize/Set to H/23 S/194. Using your Magic Wand, click inside your frame, Selections/Modify/Expand by 7. Open a new raster layer and move under the frame layer, and floodfill with #C69F69 or a color to match your tube. Add drop shadow to your frame layer.
Add any additional flowers, butterflies, ribbons, glitters, feathers, or elements of your choice.
Crop or resize to your liking. Add your text, copyright info, and watermark, and save as a jpg, png, or gif file.
That's it.. all done!
Sunday, June 7, 2009
♥ Moments Joyeux ♥

Click the tag to preview at full size. This tutorial was written byMarta on June 6, 2009. Any resemblance to any other tutorial is coincidental. Do not copy and paste this tutorial elsewhere on the net. Absolutely NO Scripting and/or translating of this tutorial.
For this tutorial you will need:
PSP
Tube(s) or Image(s) of choice
Font of choice (I used CalifornianDisplay)
Xenofex2 - Constellation
Mask - zuzzanna_mask5 - You can download HERE.
ScrapKit *Joyful Moments* by Kat of KatNKDA.
You can purchase it HERE.
I am using the artwork of Jennifer Janesko, you can find her licensed art at CILM.
Let's get started:
Open a new image 600x450 and background set to white. Copy & paste paper03 as a new layer. Open zuzzanna_mask5, Layers/New Mask Layer/From Image and find the mask in the drop down list. Delete mask layer, and merge group. Effects/Xenofex2/Constellation/Settings/Star Field/Keep Original Image.
Copy & paste frame02 as a new layer. Copy & paste your images/tubes of choice as new layers, and move both under the frame layer. Using your Magic Wand, click inside each frame, Selections/Modify/Expand by 5/Selections/Invert and hit Delete on both image/tube layers.
Copy & paste flower02 as a new layer and move to the center of the frame, add drop shadow. Copy & paste flower01 as a new layer and move the the right bottom of the frame, add drop shadow. Apply the Xenofex2 Constellation settings as above to both flowers.
Add any additional flowers, butterflies, ribbons, heart, tag, or elements of your choice.
Crop or resize to your liking. Add your text, copyright info, and watermark, and save as a jpg, png, or gif file.
That's it.. all done!
Friday, June 5, 2009
♥ Beauté dans le Bleu ♥
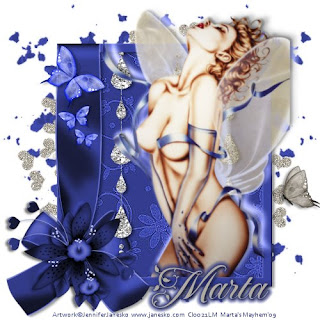
Click the tag to preview at full size. This tutorial was written by Marta on June 6, 2009. Any resemblance to any other tutorial is coincidental. Do not copy and paste this tutorial elsewhere on the net. Absolutely NO Scripting and/or translating of this tutorial.
For this tutorial you will need:
PSP
Tube of choice
Font of choice (I used FleurDeLeah)
Mask - Vix_Mask101 - You can download HERE.
Mask - Vix_Mask176 - You can download HERE.
ScrapKit *Moments in Time* by Annie of Annie's Design.
You can purchase it HERE.
I am using the artwork of Jennifer Janesko, you can find her licensed art at CILM.
Let's get started:
Open a new image 500x500 and background set to white. Copy & paste paper04 as a new layer. Open Vix_Mask176, Layers/New Mask Layer/From Image and find the mask in the drop down list. Delete mask layer, and merge group.
Open a new raster layer, and floodfill this layer with #B0A99E. Open Vix_Mask101, Layers/New Mask Layer/From Image and find the mask in the drop down list. Delete mask layer, and merge group. Adjust/Noise/Set to 30%.
Copy & paste frame6 as a new layer. Using your Magic Wand, click inside the frame. Copy & paste paper7 as a new layer and move under the frame layer. Selections/Modify/Expand by 7 and hit Delete on your paper layer. Add drop shadow to frame layer. Copy & paste your tube of choice as a new layer, add drop shadow.
Add any flowers, butterflies, bows, or elements of your choice.
Crop or resize to your liking. Add your text, copyright info, and watermark, and save as a jpg, png, or gif file.
That's it.. all done!
Don't forget to mail me your results, I would love to see them, and add to the slide for everyone to see :D
♥ Clockwork Valentine ♥
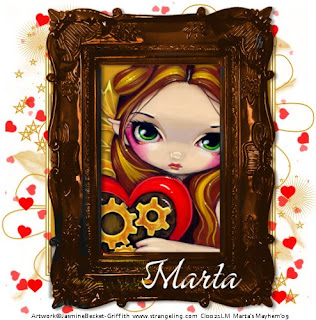
Click the tag to preview at full size. This tutorial was written by Marta on June 5, 2009. Any resemblance to any other tutorial is coincidental. Do not copy and paste this tutorial elsewhere on the net. Absolutely NO Scripting and/or translating of this tutorial.
For this tutorial you will need:
PSP
Image or Tube of choice
Font of choice (I used GreyQo)
Mask - zuzzanna_mask34 - You can download HERE.
Mask - Vix_Mask_Valentine13 - You can download HERE.
Frame of choice
I am using the artwork of Jasmine Beckett-Griffith, you can find her licensed art at CILM.
Let's get started:
Open a new image 500x500 and background set to white. Open new raster layer and floodfill with #D5971B or a color to match your tube. Open zuzzanna_mask4, Layers/New Mask Layer/From Image and find the mask in the drop down list. Delete mask layer, and merge group.
Open a new raster layer and floodfill with #f72424 or another color to match your tube. Open Vix_Mask_Valentine13, Layers/New Mask Layer/From Image and find the mask in the drop down list. Delete mask layer, and merge group.
Copy & paste a frame of your choice as a new layer. Pick a color from your tube, and using your Target Brush, color your frame. Add drop shadow.
Copy & paste your tube as a new layer, and move under the frame layer. Add drop shadow.
Add any flowers, butterflies, bows, or elements of your choice.
Crop or resize to your liking. Add your text, copyright info, and watermark, and save as a jpg, png, or gif file.
That's it.. all done!
Thursday, June 4, 2009
♥ Bad Influence ♥
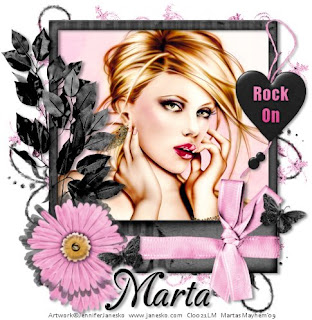
Click the tag to preview at full size. This tutorial was written by Marta on June 4, 2009. Any resemblance to any other tutorial is coincidental. Do not copy and paste this tutorial elsewhere on the net. Absolutely NO Scripting and/or translating of this tutorial.
For this tutorial you will need:
PSP
Image or Tube of choice
Font of choice (I used CarattereROB)
Mask - Vix_Mask_Valentine9 - You can download HERE.
ScrapKit *Tough Girlz* by Chaos Priestess of Creations By Chaos Priestess.
You can purchase it HERE.
I am using the artwork of Jennifer Janesko, you can find her licensed art at CILM.
Let's get started:
Open a new image 500x500 and background set to white. Copy & paste paper04 as a new layer. Open Vix_Mask_Valentine9, Layers/New Mask Layer/From Image and find the mask in the drop down list. Delete mask layer, and merge group.
Copy & paste frame04 as a new layer. Using your Magic Wand, click inside your frame. Selections/Modify/Expand by 7. Copy & paste your image or tube as a new layer (I used an image) and move under the frame layer, and hit Delete on the image layer. Add drop shadow to the frame and the tube layer, if you used a tube. If you used a tube, you will want to copy & paste a paper of choice.
Add any additional flowers, butterflies, bows, or elements of your choice.
Crop or resize to your liking. Add your text, copyright info, and watermark, and save as a jpg, png, or gif file.
That's it.. all done!
Wednesday, June 3, 2009
♥ Simply Circles ♥
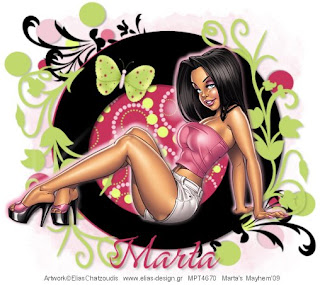
Click the tag to preview at full size. This tutorial was written by Marta on June 3, 2009. Any resemblance to any other tutorial is coincidental. Do not copy and paste this tutorial elsewhere on the net. Absolutely NO Scripting and/or translating of this tutorial.
For this tutorial you will need:
PSP
Tube of choice
Font of choice (I used GreyQoROB)
Template - Ali's Template 135 - You can download HERE.
Mask of choice
ScrapKit *Simply Circles* by Ali of Designs by Ali.
You can purchase it HERE.
I am using the artwork of Elias Chatzoudis, you can find his licensed art at MPT.
Let's get started:
Open Ali's Template135, Shift + D, and close out the original. Open new raster layer and floodfill with white and move to the bottom. Open new raster layer and floodfill with #F2CCD7. Open mask of choice, Layers/New Mask Layer/From Image and find the mask in the drop down list. Delete mask layer, and merge group. Adjust/Add Noise/Set to Random 30%. Move above the white background.
Copy & paste CIRCLESHAPE17 as a new layer, and move above the mask layer. Add drop shadow.
Click on the layer1 layer, Selections/Float/Defloat/Modify/Smooth by 10 and floodfill with a color to match your tube. I used the layer as is. Add drop shadow. Using your Magic Wand, click inside the layer1 layer, Selections/Modify/Expand by 7. Copy & paste paper38 as a new layer and move under the layer1 layer. Selections/Invert and hit Delete on the paper38 layer.
Click on the shape1 layer, Selections/Float/Defloat/Modify/Smooth by 10 and floodfill with a color to match your tube. I used the layer as is. Add drop shadow.
Click on the shape2 layer. Selections/Float/Defloat/Modify/Expand by 1 and floodfill with #C0D76B. Repeat above on shape2 copy layer. Add drop shadow to both layers. Move to each side of the layer1 layer.
Add any additional flowers, butterflies, bows, or elements of your choice.
Crop or resize to your liking. Add your text, copyright info, and watermark, and save as a jpg, png, or gif file.
That's it.. all done!
♥ Strawberry Fields Forever ♥

Click the tag to preview at full size. This tutorial was written by Marta on June 3, 2009. Any resemblance to any other tutorial is coincidental. Do not copy and paste this tutorial elsewhere on the net. Absolutely NO Scripting and/or translating of this tutorial.
For this tutorial you will need:
PSP
Tube of choice
Font of choice (I used DianaCTT)
Mask of choice
EC4 - Gradient Glow
ScrapKit *Strawberry Fields* by Patty of Honored Scraps.
You can purchase it HERE.
I am using the artwork of Keith Garvey, you can find his licensed art at MPT.
Let's get started:
Open a new image 550x550 and background set to white. Copy & paste paper3 as a new layer. Open your mask of choice, Layers/New Mask Layer/From Image and find the mask in the drop down list. Delete mask layer, and merge group.
Copy & paste frame3 as a new layer. Using your Magic Wand, click inside frame, Selections/Modify/Expand by 5. Open a new raster layer, move under the frame layer, and floodfill with #659115 or a color to match your tube. Open a new raster layer, move under the frame layer, add any text you want. Change the blend mode to soft light. Add drop shadow to frame and merge these layers.
Copy & paste flowervine1 as a new layer and move to the right of the frame layer. Add drop shadow. Duplicate. Image/Mirror and position to your liking.
Copy & paste bow5 as a new layer. Move to the bottom right of the frame layer. Add drop shadow.
Copy & paste your tube of choice as a new layer. Move to desired position. Duplicate. Working on the original layer, change Blend Mode to Luminance(L) and opacity to 81%.
Add any additional flowers, ribbons, butterflies, or elements of your choice.
Crop or resize to your liking. Add your text, copyright info, and watermark, and save as a jpg, png, or gif file.
That's it.. all done!
TAG OFFER ♥ Choo Choo ♥

Click the tag to preview at full size.
ScrapKit used: *Right On Track* by Kay Miller of Kay Miller Designs. You can purchase it HERE.
To request the tag above, please send an email to me HERE, and you will get your tag in a timely manner. Put Choo Choo in the subject line so it doesn't get lost in all my emails. Remember....manners please when requesting.
To request the tag above, please send an email to me HERE, and you will get your tag in a timely manner. Put Choo Choo in the subject line so it doesn't get lost in all my emails. Remember....manners please when requesting.
Labels:
Tag Offers
Subscribe to:
Posts (Atom)
