Saturday, January 31, 2009

♥ Twilight ♥


Click the tag to preview at full size. This tutorial was written by Marta on January 31, 2009. Any resemblance to any other tutorial is coincidental. Do not copy and paste this tutorial elsewhere on the net. Absolutely NO Scripting and/or translating of this tutorial.

For this tutorial you will need:

PSP
Tube/s or Image/s of choice
Font of choice (I used Zephyr/Twilight)
Mask - Becky_Mask022
ScrapKit *Twilight* by Jill of created-by-jill.
You can purchase it HERE.

I am using the artwork of Camilla Drakenborg, you can find her licensed art AMI.

Let's get started:

Open a new image 550x400 and background set to white. Copy & paste paper6 as a new layer. Open Becky_Mask022, Layers/New Mask Layer/From Image and find the mask in the drop down list. Delete mask layer, and merge group.

Copy & paste book1 as a new layer, add drop shadow. Copy & paste frame6 as a new layer. Copy & paste paper10 as a new layer and move under the frame layer. Copy & paste your tubes or images as new layers, and move under the frame layer. Using your Magic Wand, click inside each frame, Selections/Modify/Expand by 3/Selections/Invert and hit Delete on the tube/images and paper layers. Add drop shadow to frame and tubes. Merge these layers.

Add any additional bows, butterflies, hearts, handprints, blood splatter, or elements of your choice.

Crop or resize to your liking. Add your text, copyright info, and watermark, and save as a jpg, png, or gif file.

That's it.. all done!

Friday, January 30, 2009

♥ I Heart You ♥


Click the tag to preview at full size. This tutorial was written by Marta on January 30, 2009. Any resemblance to any other tutorial is coincidental. Do not copy and paste this tutorial elsewhere on the net. Absolutely NO Scripting and/or translating of this tutorial.

For this tutorial you will need:

PSP
Tube of choice
Font of choice (I used Twilight)
Mask - Vix_Mask_Valentine13 - You can download HERE
Mega Colab Kit *I Heart You* by Rachel of Captivated Visions and Deanna's Dreams.
You can purchase it HERE

I am using the artwork of Barbara Jensen, you can find her licensed art at Erotic Artist Gallery.

Let's get started:

Open a new image 600x500 and background set to white. Copy & paste paper10 as a new layer. Open Vix_Mask_Valentine13, Layers/New Mask Layer/From Image and find the mask in the drop down list. Delete mask layer, and merge group. Adjust/Add Noise/Set to 30.

Copy & paste frame11 as a new layer. Copy & paste paper14 as a new layer and move under the frame layer. Copy & paste your tube as a new layer and move under the frame layer. If you want your tube outside the frame, like my tag, click on your tube layer, Selections/Select All/Float/Defloat. Using your Eraser Tool, click on your frame layer, and erase any parts that are on top of your tube. When you have all parts erased, add drop shadow to your frame and tube layers. Merge these three layers.

Copy & paste the brackets, resize, add drop shadow. Move to each side of the frame layer. Using your Selection Tool, draw out a rectangle that fits between the 2 brackets, keep selected, and add new raster layer, copy paper16 and paste into selection, select none. Add drop shadow. Image/Rotate/Left 15 degrees on both brackets and paper layer. Position to your liking.

Copy & paste the flowers, duplicate. Image/Flip/Image/Mirror and move to desired position.

Add any additional bows, butterflies, hearts, doodles, or elements of your choice.

Crop or resize to your liking. Add your text, copyright info, and watermark, and save as a jpg, png, or gif file.

That's it.. all done!

♥ Be Jeweled ♥


Click the tag to preview at full size. This tutorial was written by Marta on January 30, 2009. Any resemblance to any other tutorial is coincidental. Do not copy and paste this tutorial elsewhere on the net. Absolutely NO Scripting and/or translating of this tutorial.

For this tutorial you will need:

PSP
Tube of choice
Font of choice (I used DianaCTT)
Mask - Zuzzanna_mask 36 - You can download from her site HERE
EC4-Gradient Glow
DSB Flux/Bright Noise
Animation Shop
ScrapKit *Seeing Squares* by Impy of Impy Provisations
You can purchase it HERE

I am using the artwork of PinUpToons, you can find his licensed art at CILM.

Let's get started:

Open a new image 500x600 and background set to white. Copy & paste paper7 as a new layer. Open Zuzzanna_mask36, Layers/New Mask Layer/From Image and find the mask in the drop down list. Delete mask layer, and merge group.

Copy & paste frame2 as a new layer. Copy & paste paper6 as a new layer and move under frame layer. Copy & paste your tube of choice and move between the frame and paper layers. Using your Magic Wand, click inside the frame, Selections/Modify/Expand by 5/Selections/Invert and hit Delete on the tube and paper layers. Add drop shadow to your tube and frame layers.

Copy & paste stitch1 as a new layer. Add drop shadow. Duplicate 2 times. Position the stitch layers so it is on 3 sides of the frame by rotating left or right. Copy & paste the foliage, ribbon2, sequinsquare2, flower1, flower2, flower3 and any additional elements of your choice. Add drop shadow.

Crop or resize to your liking. Add your text, copyright info, and watermark.

Copy & paste sequinborder2 as a new layer. Move to the right of the frame. Using your Eraser tool, erase any that is on the outside of the frame. Rename this layer Sequin1. Duplicate 2 more times and rename Sequin2 and Sequin3. In your layer palette, they should be in order 1, 2, 3. On the Sequin1 layer, Effects/DSB Flux/Bright Noise/Set to Mix/Intensity 22. On the Sequin2 layer, Effects/DSB Flux/Bright Noise/Set to Mix/Intensity 32. On the Sequin3 layer, Effects/DSB Flux/Bright Noise/Set to Mix/Intensity 42. Now we're going to take our tag over to Animation Shop.

Make sure layers Sequin2 and Sequin3 layers are x'ed out. Right click on your tag, Copy Merged and paste as a new animation in animation shop. Go back to PSP, make sure Sequin1 and Sequin3 are x'ed out. Right click on your tag, Copy Merged and right click on your tag in AS, paste after current frame. Go back to PSP, make sure Sequin1 and Sequin2 are x'ed out. Right click on your tag, Copy Merged and right click on your tag in AS, paste after current frame. You should now have 3 frames in AS. Click on the View Animation in the toolbar to make sure the animation is working and that you are satisfied with your result. File/Save As and save your new tag.

That's it.. all done!

Thursday, January 29, 2009

♥ Bed of Daisies ♥


This tutorial was written by Marta on January 29, 2009. Any resemblance to any other tutorial is coincidental. Do not copy and paste this tutorial elsewhere on the net. Absolutely NO Scripting and/or translating of this tutorial.

For this tutorial you will need:

PSP
Tube of choice
Font of choice (I used Ingrid Darling)
Mask - Becky_Mask022
Penta/Color Dot
ScrapKit *Spring Dream* by Crystal of Scrappy Inspirations
You can purchase it HERE.

I am using the artwork of Jennifer Janesko, you can find her licensed art at CILM.

Let's get started:

Open a new image 550x550 and background set to white. Copy & paste paper20 as a new layer. Open Becky_Mask022, Layers/New Mask Layer/From Image and find the mask in the drop down list. Delete mask layer, and merge group. Effects/Penta/Color Dot/Set to default settings.

Copy & paste frame2 as a new layer. Adjust/Hue/Saturation/Colorize/Set to h - 201, s - 95. Copy & paste paper12 as a new layer and move under the frame layer. Copy & paste your tube and position to your liking. Using your Magic Wand, click inside the frame, Selections/Modify/Expand by 5/Selections/Invert and hit Delete on your paper and tube layer Add drop shadow to your frame and tube layers.

Add any additional bows, butterflies, hearts, doodles, or elements of your choice.

Crop or resize to your liking. Add your text, add drop shadow, Adjust/Add Noise/Set to 30. Add copyright info, and watermark, and save as a jpg, png, or gif file.

That's it.. all done!

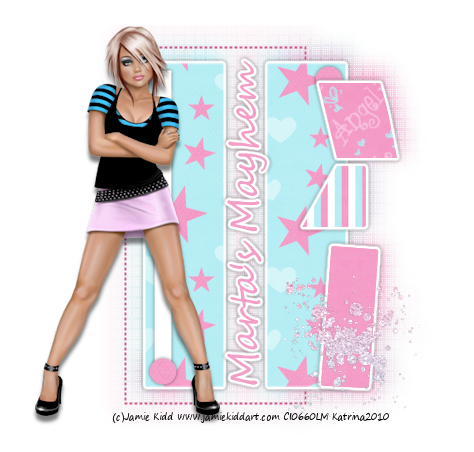
♥ Beauty 'n the Blues ♥


This tutorial was written by Marta on January 29, 2009. Any resemblance to any other tutorial is coincidental. Do not copy and paste this tutorial elsewhere on the net. Absolutely NO Scripting and/or translating of this tutorial.

For this tutorial you will need:

PSP
Tube of choice
Font of choice (I used Ingrid Darling)
Mask - sg_scraps_edge by Essex Girl, you can download it HERE
VM Extravaganza/Plastic Surgery
ScrapKit *Feelin Stitchy* by Miss Foxy of Miss Foxy's Designs.
You can purchase it HERE.

I am using the artwork of Jamie Kidd, you can find his licensed art at CILM.

Let's get started:

Open a new image 550x550 and background set to white. Copy & paste paper1 as a new layer. Open sg_scraps_edge, Layers/New Mask Layer/From Image and find the mask in the drop down list. Delete mask layer, and merge group. Effects/VM Extravaganza/Plastic Surgery/Set to default settings.

Copy & paste frame5 as a new layer. Copy & paste paper10 as a new layer and move under the frame layer. Copy & paste your tube, add drop shadow, and move between the frame and paper layer. Using your Magic Wand, click inside the frame, Selections/Modify/Expand by 5/Selections/Invert and hit Delete on your tube and paper layers. Add drop shadow to the frame layer and merge these layers. Duplicate. On the original frame layer, Image/Rotate/Right 15 degrees and position to your liking.

Uning your Rectangle Tool, Foreground null, and Background to a paper or color of your choice, draw out several rectangles and add drop shadow. I added the brackets to each side of one of the rectangles, and also added buttons on each side. Add drop shadow.

Add any additional bows, butterflies, wordart, or elements of your choice.

Crop or resize to your liking. Add your text, copyright info, and watermark, and save as a jpg, png, or gif file.

That's it.. all done!

Wednesday, January 28, 2009

Showing off a tag....


I just finished making this tag and I was going to tut it, but I didn't think I could explain it good enough for anyone to follow lol, but I'm happy with it and wanted to show it off.

I'm using a template by ButterflyFlutterby "Record Template" and you can download it HERE.

The ScrapKit is called *My Passion* by Vassia and is sold at Paradise4Scrappers.

Tuesday, January 27, 2009

♥ Affair of the Heart ♥


This tutorial was written by Marta on January 27, 2009. Any resemblance to any other tutorial is coincidental. Do not copy and paste this tutorial elsewhere on the net. Absolutely NO Scripting and/or translating of this tutorial.

For this tutorial you will need:

PSP
Tube of choice
Font of choice (I'm using Jack Bisio)
Filters Unlimited/Render
JustDreaminTutorials_Template#3 - I can't find her blog, so I will supply until I can find out where her site is.
ScrapKit *A Love Affair* by Shelle of Shellez Creations
You can purchase it HERE.

I am using the artwork of Armando Huerta, you can find his licensed art MPT.

Supplies - HERE

Let's get started:

Open JustDreaminTutorials_Template#3, Shift D, and close out the original. Delete copyright layer. Click on the circle layer, Selections/Select All/Float/Defloat/Modify/Smooth/Set to 10. Copy & paste paper03 as a new layer, Selections/Invert/hit Delete on the paper layer.

Copy & paste the eyelet and place it in the middle of the circle layer, and add the pink bow at the bottom. Add drop shadow to both layers.

Copy & paste your tube of choice. Duplicate your tube. Set your background to #F8DBE6 and your foreground to #000000. Working on the original tube layer, Effects/Filters Unlimited 2/Render/Clouds(fore/background color)/Use default settings. Move this layer up and a little to the right of the tube. Adjust/Blur/Gaussian Blur/Set to 5.

Copy & paste doodles 04, 05, and 01 and position to your liking. Add drop shadow to all.

Add any additional flowers, wordart, or other elements of your choice.

Crop or resize to your liking. Add your text, copyright info, and watermark, and save as a jpg, png, or gif file.

That's it.. all done!